In this section, you'll configure an app shortcut in the Zoom App Marketplace and enable a secure webview experience inside Chat. Shortcuts allow users to trigger actions like launching modals or composing messages, while the webview surface enables an in-app UI hosted directly from your server.
By the end of this section, you’ll have:
- A Zoom Team Chat shortcut with a custom command and modal launch
- Secure headers configured to enable embedded webviews
- A working webview rendered inside the Zoom client
Configure an app shortcut
Create a new app shortcut that lets users trigger a modal or message action directly from Chat.
- Go to the Zoom App Marketplace.
- Select your app.
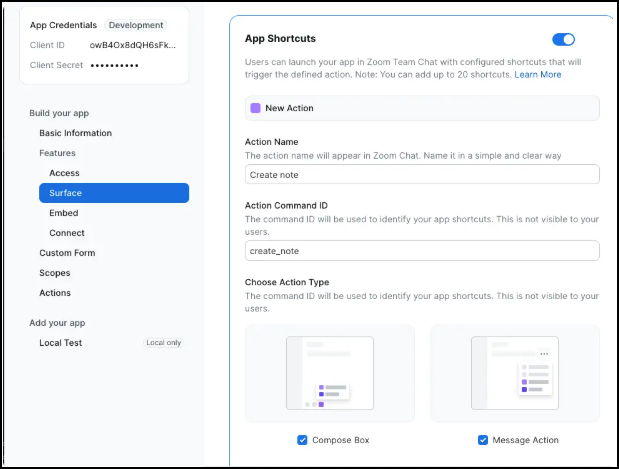
- Navigate to Surface → App Shortcuts.
- Toggle New Action to enabled.
- Fill in the fields:
- Action Name:
Create note - Action Command ID:
Notes
- Action Name:
- Choose both action types:
- Compose Box
- Message Action
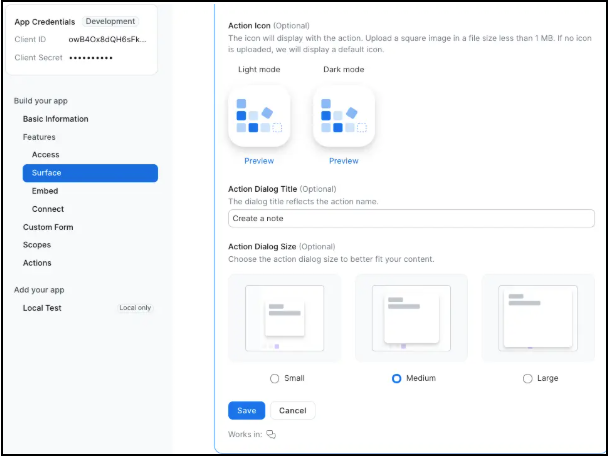
- (Optional) Set:
- Action Dialog Title:
Create a note - Action Dialog Size:
Medium - Upload an icon if desired.
- Action Dialog Title:
Example UI:
Enable secure webview
To render a custom web experience inside the Zoom client, configure the Home URL and allowed domains within the Marketplace.
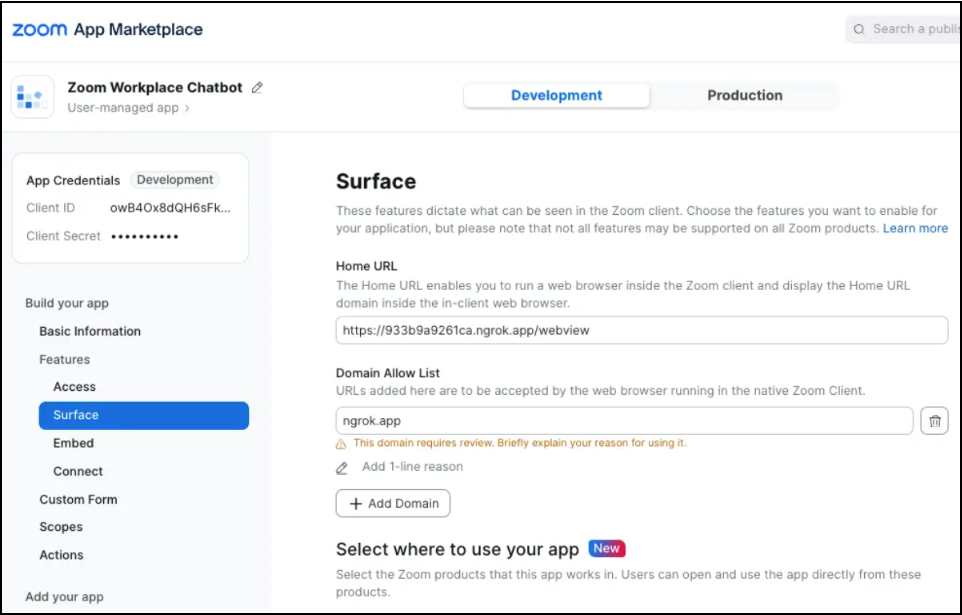
- In the Surface tab, scroll to Home URL.
- Enter the webview URL served by your backend (e.g.,
https://example.ngrok.app/webview). - Under Domain Allow List, add your root domain (e.g.,
ngrok.app). - Provide a one-line justification (e.g., "Development testing using ngrok").
Example UI:
Add security headers to support webview
Install Helmet to enforce content security policies that allow Zoom to safely embed your app in the Zoom client interface.
Install Helmet
npm install helmet