JWT for Zoom Video SDK
The Zoom Video SDK provides video, audio, screen sharing, chat, and more with an easy to use SDK. In this blog we'll showcase adding video chat to a Ruby on Rails web application.
Prerequisites:
- Rails 8.0+
- A Zoom Video SDK Account
You can find the completed project on GitHub.
Step 1: Scaffold the application
If you already have a Ruby on Rails project, you can skip this step.
Open a terminal and execute:
rails new videosdk-rails-app --css=tailwind
cd videosdk-rails-app
After running these commands, you'll have a new Rails project set up with Tailwind CSS for styling.
Step 2: Configuring the project
Install the dependencies
We will install the JWT gem for token generation and dotenv-rails for environment variable management. Add these to your Gemfile:
# JWT for Zoom Video SDK
gem "jwt"
# Environment variables
gem "dotenv-rails"
Then run bundle install to install the gems. These gems allow your Rails app to generate JWT tokens (required for Zoom authentication) and securely manage your environment variables.
Enable shared array buffer support
To leverage the full power of the Zoom Video SDK including features like rendering multiple videos, virtual background, & background noise suppression, we need to enable support for Shared Array Buffers (SAB) in the browser.
Simply, download this file and place it in the public folder of your project as public/coi-serviceworker.js.
By adding this file, you enable Shared Array Buffer support in browsers that require a cross-origin isolated context. This is necessary for advanced video features in the Zoom SDK.
Add environment variables
To complete the setup, create a .env file in the root of our project and add the Zoom Video SDK Key and Secret to it. You can find your SDK Key and Secret in the Video SDK Dashboard, by clicking on the Develop button and selecting Build Video SDK. Make sure you're logged in to your Video SDK account.
ZOOM_SDK_KEY="Your Zoom SDK Key"
ZOOM_SDK_SECRET="Your Zoom SDK Secret"
This file keeps your sensitive credentials out of your codebase. The dotenv-rails gem will load these values into your app's environment.
You can start the Rails development server with rails server. The app will be available at http://localhost:3000/.
Step 3: Set up the controller and routes
Create the Zoom controller
We'll create a controller to handle JWT generation and video session management:
rails generate controller Zoom index generate_jwt video_session
This command generates a new controller called ZoomController with three actions: index, generate_jwt, and video_session. It also creates the corresponding view files.
Configure routes
Update your config/routes.rb file to define the routes for our video conferencing app:
Rails.application.routes.draw do
  # Zoom Video SDK routes
  root "zoom#index"
  post "zoom/generate_jwt", to: "zoom#generate_jwt"
  get "zoom/video_session", to: "zoom#video_session"
end
These routes set the home page to the session form, provide an endpoint for generating JWTs, and a page for joining the video session.
Implement JWT generation
The Zoom Video SDK uses JWTs to authenticate a session. We'll implement the JWT generation in our controller. Update app/controllers/zoom_controller.rb:
class ZoomController < ApplicationController
  def index
  end
  def generate_jwt
    session_name = params[:session_name]
    role = params[:role] || 0 # Default to attendee role
    begin
      jwt_token = generate_signature(session_name, role.to_i)
      render json: { jwt: jwt_token, session_name: session_name }
    rescue => e
      render json: { error: e.message }, status: :unprocessable_entity
    end
  end
  def video_session
    @session_name = params[:session_name]
    @jwt_token = params[:jwt]
  end
  private
  def generate_signature(session_name, role)
    sdk_key = ENV['ZOOM_SDK_KEY']
    sdk_secret = ENV['ZOOM_SDK_SECRET']
    if sdk_key.blank? || sdk_secret.blank?
      raise "Missing ZOOM_SDK_KEY or ZOOM_SDK_SECRET environment variables, please add them in .env file."
    end
    iat = (Time.current.to_i) - 30
    exp = iat + (60 * 60 * 1) # 1 hour
    header = { alg: 'HS256', typ: 'JWT' }
    payload = {
      app_key: sdk_key,
      tpc: session_name,
      role_type: role,
      version: 1,
      iat: iat,
      exp: exp
    }
    JWT.encode(payload, sdk_secret, 'HS256', header)
  end
end
This controller handles three things:
- The
indexaction renders the main form. - The
generate_jwtaction receives a session name and role, generates a JWT using your credentials, and returns it as JSON. - The
video_sessionaction passes the session name and JWT to the view for use in the video call.
The generate_signature method creates a JWT token using the session name and role. We're using the jwt gem to encode the payload with the SDK secret. The token is valid for 1 hour and includes the necessary claims for Zoom Video SDK authentication.
Step 4: Build the main form
We'll create a simple form to collect session information.
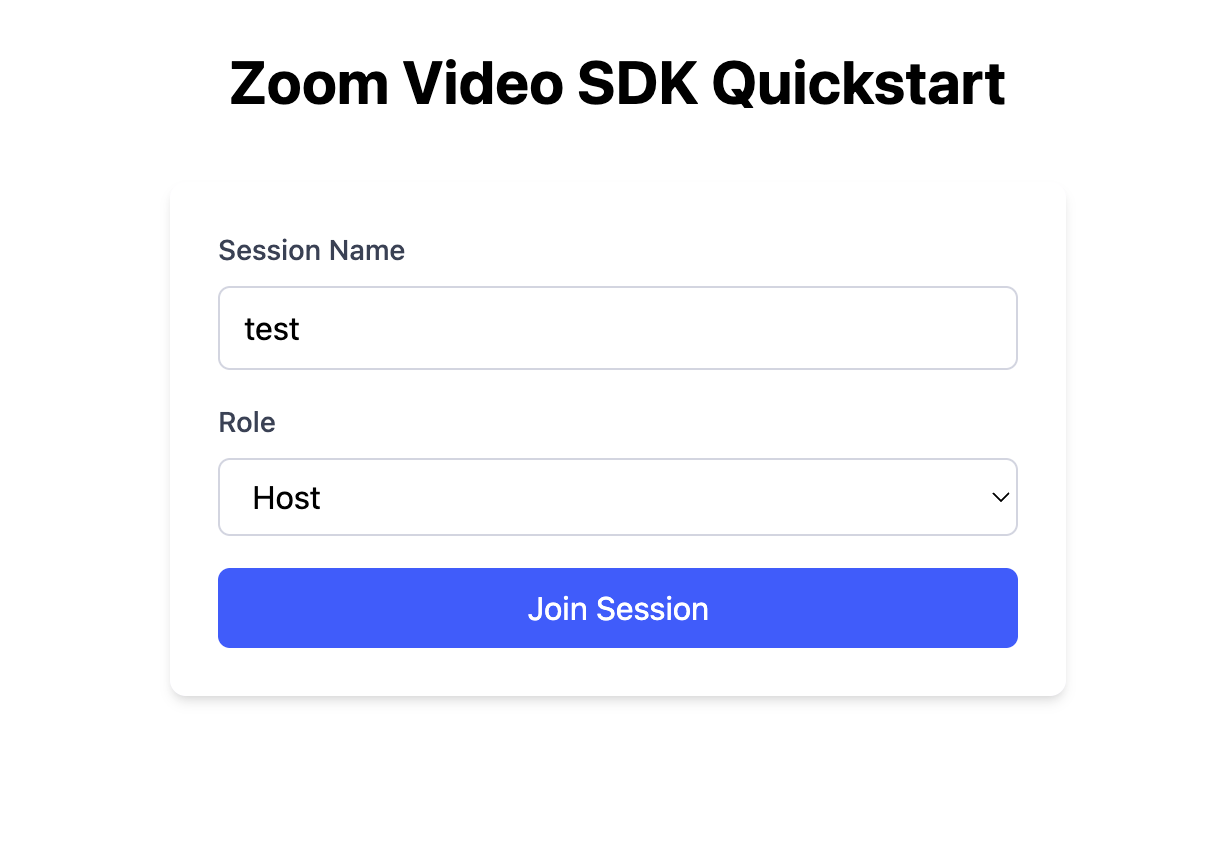
Update app/views/zoom/index.html.erb:
  <h1>Zoom Video SDK Quickstart</h1>
  <div>
    <form id="sessionForm">
      <div>
        <label for="sessionName">Session Name</label>
        <input type="text" id="sessionName" name="sessionName" required placeholder="Enter session name">
        <label for="role">Role</label>
        <select id="role" name="role">
          <option value="1">Host</option>
          <option value="0">Attendee</option>
        </select>
    </form>
  </div>
</div>
This form collects the session name and role from the user.
Note: To make the code blocks easy to read, I've omitted the tailwind styles from the code blocks. You can find them in the GitHub repo.
<script>
    document
        .getElementById("sessionForm")
        .addEventListener("submit", async function (e) {
            e.preventDefault();
            const sessionName = document.getElementById("sessionName").value;
            const role = document.getElementById("role").value;
            try {
                const response = await fetch("/zoom/generate_jwt", {
                    method: "POST",
                    headers: {
                        "Content-Type": "application/json",
                        "X-CSRF-Token": document
                            .querySelector('meta[name="csrf-token"]')
                            .getAttribute("content"),
                    },
                    body: JSON.stringify({
                        session_name: sessionName,
                        role: role,
                    }),
                });
                const data = await response.json();
                if (data.error) {
                    alert("Error: " + data.error);
                    return;
                }
                window.location.href = `/zoom/video_session?session_name=${encodeURIComponent(sessionName)}&jwt=${encodeURIComponent(data.jwt)}`;
            } catch (error) {
                alert("Error generating JWT: " + error.message);
            }
        });
</script>
When the form is submitted, it sends a POST request to your Rails backend to generate a JWT. If successful, it redirects the user to the video session page with the JWT and session name as parameters.
Step 5: Build the video session component
Now for the fun part of building the video call component. We'll create the video session view at app/views/zoom/video_session.html.erb:
<% content_for :title, "Zoom Video Session" %>
<h1>Zoom VideoSDK Quickstart</h1>
<video-player-container></video-player-container>
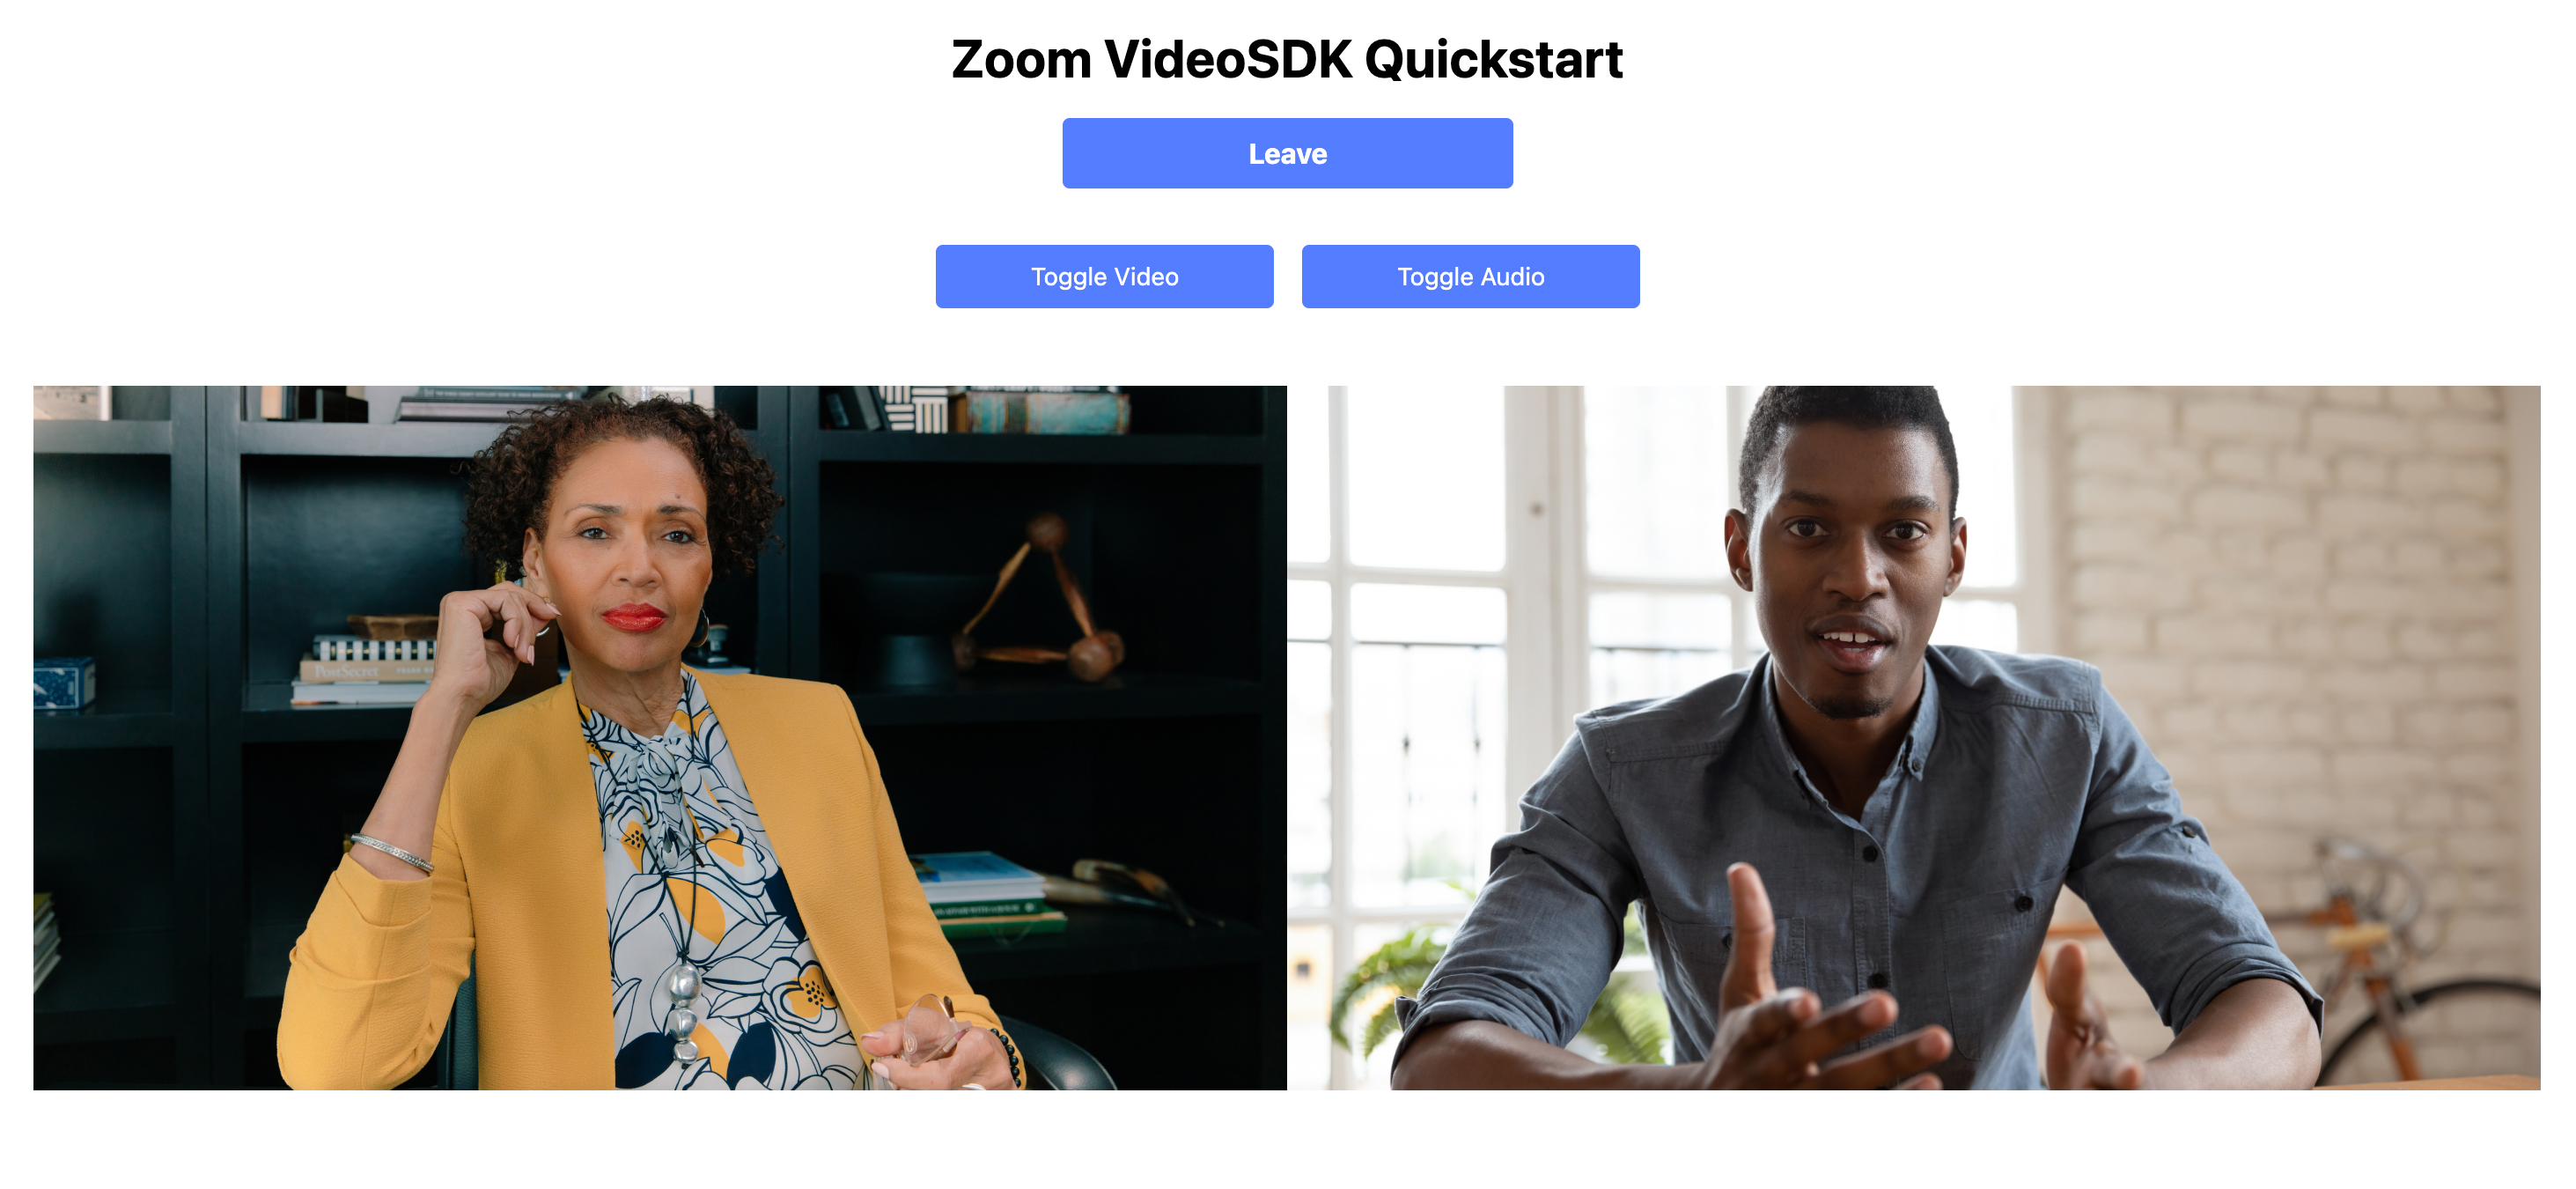
The HTML template provides join/leave buttons, video/audio toggle controls, and a video player container custom element that will hold both the local user's and remote participants' video streams.
<script src="https://source.zoom.us/videosdk/zoom-video-2.2.0.min.js"></script>
<script src="/coi-serviceworker.js"></script>
<script type="module">
const ZoomVideo = window.WebVideoSDK.default;
We can load the Zoom Video SDK from the CDN using a script tag.
At the time of writing, v2.2.0 is the latest release. You can find the latest release here.
const jwt = "<%= @jwt_token %>";
const sessionName = "<%= @session_name %>";
We pass the JWT token and session name from the Rails controller to the JavaScript. This makes your server-generated JWT and session name available to the client-side code, so you can securely join the video session.
const videoContainer = document.querySelector("video-player-container");
const role = 1;
const username = `User-${String(new Date().getTime()).slice(6)}`;
const client = ZoomVideo.createClient();
await client.init("en-US", "Global", { patchJsMedia: true });
We create a reference to the video container element, set the default role to host, generate a unique username, and initialize the Zoom Video SDK.
Joining a session
Let's create a function startCall that will join a session and start the audio and video. We'll add an event listener to the peer-video-state-change event. This event is fired when a user joins or leaves the session. We'll call the renderVideo function when this event is fired to keep our video layout up to date.
const startCall = async () => {
    client.on("peer-video-state-change", renderVideo);
};
Next, we can join the session using the join function and pass in our sessionName, JWT token and username from before.
const startCall = async () => {
    client.on("peer-video-state-change", renderVideo);
    await client.join(sessionName, token, username);
};
Now we can access the mediaStream using the getMediaStream function and start the audio and video.
const startCall = async () => {
  ...
  const mediaStream = client.getMediaStream();
  await mediaStream.startAudio();
  await mediaStream.startVideo();
};
Once all the media streams have started, we can render the videos to a canvas element using the renderVideo function:
const startCall = async () => {
  ...
  await renderVideo({ action: 'Start', userId: client.getCurrentUserInfo().userId });
};
Render the videos
With the Zoom Video SDK, you can render video either using stream.attachVideo and stream.detachVideo methods which give you access to VideoPlayer elements that you can nest in your DOM and style with CSS. Or you can use stream.renderVideo method that takes in a single canvas element and the coordinates of each tile to render them on the canvas. We'll use the attachVideo and detachVideo methods as they're easier to style by writing simple CSS.
The renderVideo function will accept an event object of type event: { action: "Start" | "Stop"; userId: number; }. We're keeping the function signature the same as the peer-video-state-change event so that we can reuse the function.
const renderVideo = async (event) => {
  ...
};
We can access the media stream using the getMediaStream function on the client. If the action is Start, we'll call the attachVideo function with the userId and the desired video quality (360p: 2). This method attaches the video stream to a VideoPlayer element, we'll add this element to the DOM as a child of the videoContainer.
const renderVideo = async (event) => {
  const mediaStream = client.getMediaStream();
  if (event.action === 'Start') {
    const userVideo = await mediaStream.attachVideo(event.userId, 2);
    videoContainer.appendChild(userVideo);
  }
  ...
};
If the event action is Stop we can call the detachVideo function to stop rendering the video for the user. This method returns an element (or array of elements) that we'll remove from the DOM.
const renderVideo = async (event) => {
  ...
  else {
    const element = await mediaStream.detachVideo(event.userId);
    Array.isArray(element) ? element.forEach((el) => el.remove()) : element.remove();
  }
};
Toggle the user video & audio
We can define a toggleVideo function that will toggle the user's video on and off. We'll call the startVideo and stopVideo functions on the mediaStream object to start and stop the video respectively. We'll also call the renderVideo function to update the video layout for the local user.
const toggleVideo = async () => {
    const mediaStream = client.getMediaStream();
    if (mediaStream.isCapturingVideo()) {
        await mediaStream.stopVideo();
        await renderVideo({
            action: "Stop",
            userId: client.getCurrentUserInfo().userId,
        });
    } else {
        await mediaStream.startVideo();
        await renderVideo({
            action: "Start",
            userId: client.getCurrentUserInfo().userId,
        });
    }
};
We can define a toggleAudio function that will toggle the user's audio on and off. We'll call the startAudio and stopAudio functions on the mediaStream object to start and stop the audio respectively. We'll also call the renderVideo function to update the video layout for the local user.
const toggleAudio = async () => {
    const mediaStream = client.getMediaStream();
    if (client.getCurrentUserInfo().muted) {
        await mediaStream.unmuteAudio();
    } else {
        await mediaStream.muteAudio();
    }
};
End the session
We can define an endCall function that will end the session. First, we remove the peer-video-state-change event listener. Then we can clean up the displayed videos by calling the detachVideo function for each user and removing the elements from the DOM. Finally, we'll call the leave function on the client to leave the session and stop the audio and video.
const leaveCall = async () => {
    client.off("peer-video-state-change", renderVideo);
    const mediaStream = client.getMediaStream();
    for (const user of client.getAllUser()) {
        const element = await mediaStream.detachVideo(user.userId);
        Array.isArray(element)
            ? element.forEach((el) => el.remove())
            : element.remove();
    }
    await client.leave();
};
Step 6: Wire it all up
We can now wire up all the functions we defined earlier to the buttons in our markup. We'll get references for the various buttons like so:
const startBtn = document.querySelector("#start-btn");
const stopBtn = document.querySelector("#stop-btn");
const toggleVideoBtn = document.querySelector("#toggle-video-btn");
const toggleAudioBtn = document.querySelector("#toggle-audio-btn");
When the start / stop button is clicked, we'll call the startCall / leaveCall function and update the button text and buttons visibility.
We also cleanup the DOM when the session is left.
startBtn.addEventListener("click", async () => {
    startBtn.innerHTML = "Connecting...";
    startBtn.disabled = true;
    await startCall();
    startBtn.innerHTML = "Connected";
    startBtn.style.display = "none";
    stopBtn.style.display = "block";
    toggleVideoBtn.style.display = "block";
    toggleAudioBtn.style.display = "block";
});
stopBtn.addEventListener("click", async () => {
    toggleVideoBtn.style.display = "none";
    toggleAudioBtn.style.display = "none";
    await leaveCall();
    stopBtn.style.display = "none";
    startBtn.style.display = "block";
    startBtn.innerHTML = "Join";
    startBtn.disabled = false;
});
When the toggle audio & video button is clicked, we'll call the toggleAudio / toggleVideo function.
toggleVideoBtn.addEventListener("click", async () => {
    await toggleVideo();
});
toggleAudioBtn.addEventListener("click", async () => {
    await toggleAudio();
});
Step 7: Add styles
For rendering the videos in a grid we'll add the following styles added to the app/assets/tailwind/application.css file:
@import "tailwindcss";
video-player-container {
    width: 100%;
    height: 100%;
    display: grid !important;
    grid-template-columns: repeat(1, minmax(0, 1fr));
}
video-player-container:has(> :nth-child(2)) {
    grid-template-columns: repeat(2, minmax(0, 1fr));
}
video-player-container:has(> :nth-child(5)) {
    grid-template-columns: repeat(3, minmax(0, 1fr));
}
video-player-container:has(> :nth-child(17)) {
    grid-template-columns: repeat(4, minmax(0, 1fr));
}
video-player {
    width: 100%;
    height: auto;
    aspect-ratio: 16/9;
}
That's all the code we need to build a video conferencing app using the Zoom Video SDK & Ruby on Rails. You can launch the app by running rails server. Navigate to http://localhost:3000 to access the main form, enter a session name, and join the video session.
Conclusion
We hope this quick guide has given you a good starting point to build your own video conferencing app using the Zoom Video SDK & Ruby on Rails. We've covered the basics of setting up the project, configuring the app, and building the video chat features. You can visit our documentation for adding more features like screen sharing, chat, and recording.
You can also read our blogs for the same project built with React/Next.js, Vue/Nuxt, SvelteKit and Solidstart. We'll be posting more guides for creating video chat apps with the Zoom Video SDK for different web technologies in the future. Stay tuned for more updates on our blog!