How to live stream with the Zoom Video SDK
The Zoom Video SDK makes live streaming to an unlimited audience simple over Real-Time Messaging Protocol (RTMP). This can enable users to scale Video SDK attendees beyond the 1,000 real-time session user limit by integrating with third-party streaming platforms such as YouTube Live, Facebook Live, Twitch, AWS IVS in under a few lines of code.
Follow along as we create a simple video web app that leverages the Video SDK to live stream to these platforms:
Prerequisites
- A Zoom Video SDK Account
- A third-party streaming account
Retrieving your streaming credentials
Live streaming requires the following information from third-party streaming platforms:
- Stream URL
- Stream Key
- Broadcast URL
Each platform is different in how it provides these values. In the following steps, we'll retrieve these from the streaming platform of your choice:
Stream to YouTube Live
Step 1 - Log in to YouTube.
Step 2 - Locate the video icon and press "Go Live".

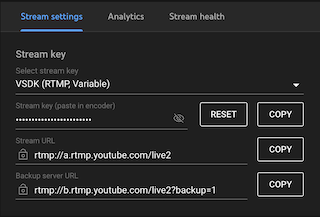
Step 3 - Access your Stream Key and URL from the YouTube Live streaming interface.
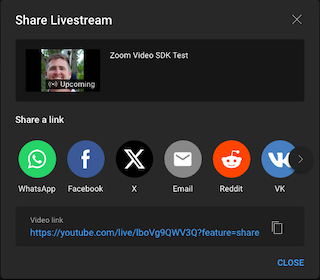
Step 4 - Access the Broadcast URL by pressing the share icon.
Stream to Facebook Live
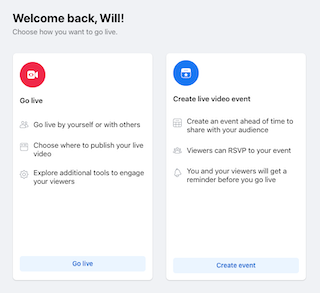
Step 1 - Log in to Facebook and navigate to Live Producer.
Step 2 - From the Live Producer, you can go live now or schedule a live video event for later. Click "Go Live".
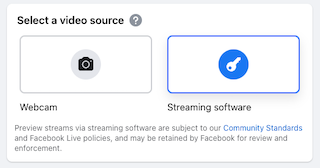
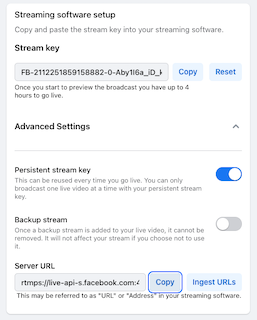
Step 3 - Select "Streaming Software" from the available video source options.
Step 4 - Under the "Streaming Software Setup" section, access your Stream Key. Under "Advanced Settings", access the Server URL. The Server URL is what we call the Stream URL.
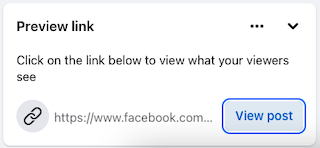
Step 5 - Once you go live, you may access the Broadcast URL in the "Preview Link" section.
Stream to Twitch
Step 1 - Go to Twitch and log in.
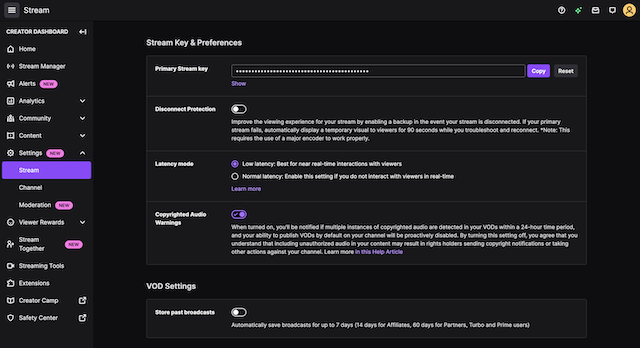
Step 2 - Hover on your profile in the top right corner and press Creator Dashboard.
Step 3 - Find the Settings tab and click Stream. Collect your Stream Key.
Step 4 - Get the optimal ingest endpoint from the Get Ingest Servers API
Step 5 - Your Stream Key is: rtmp://<ingest-server>/app/<stream-key>
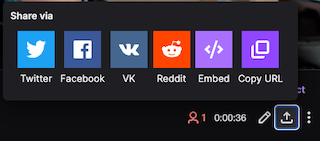
Step 6 - Access your Broadcast URL by pressing the share button and copying the URL.
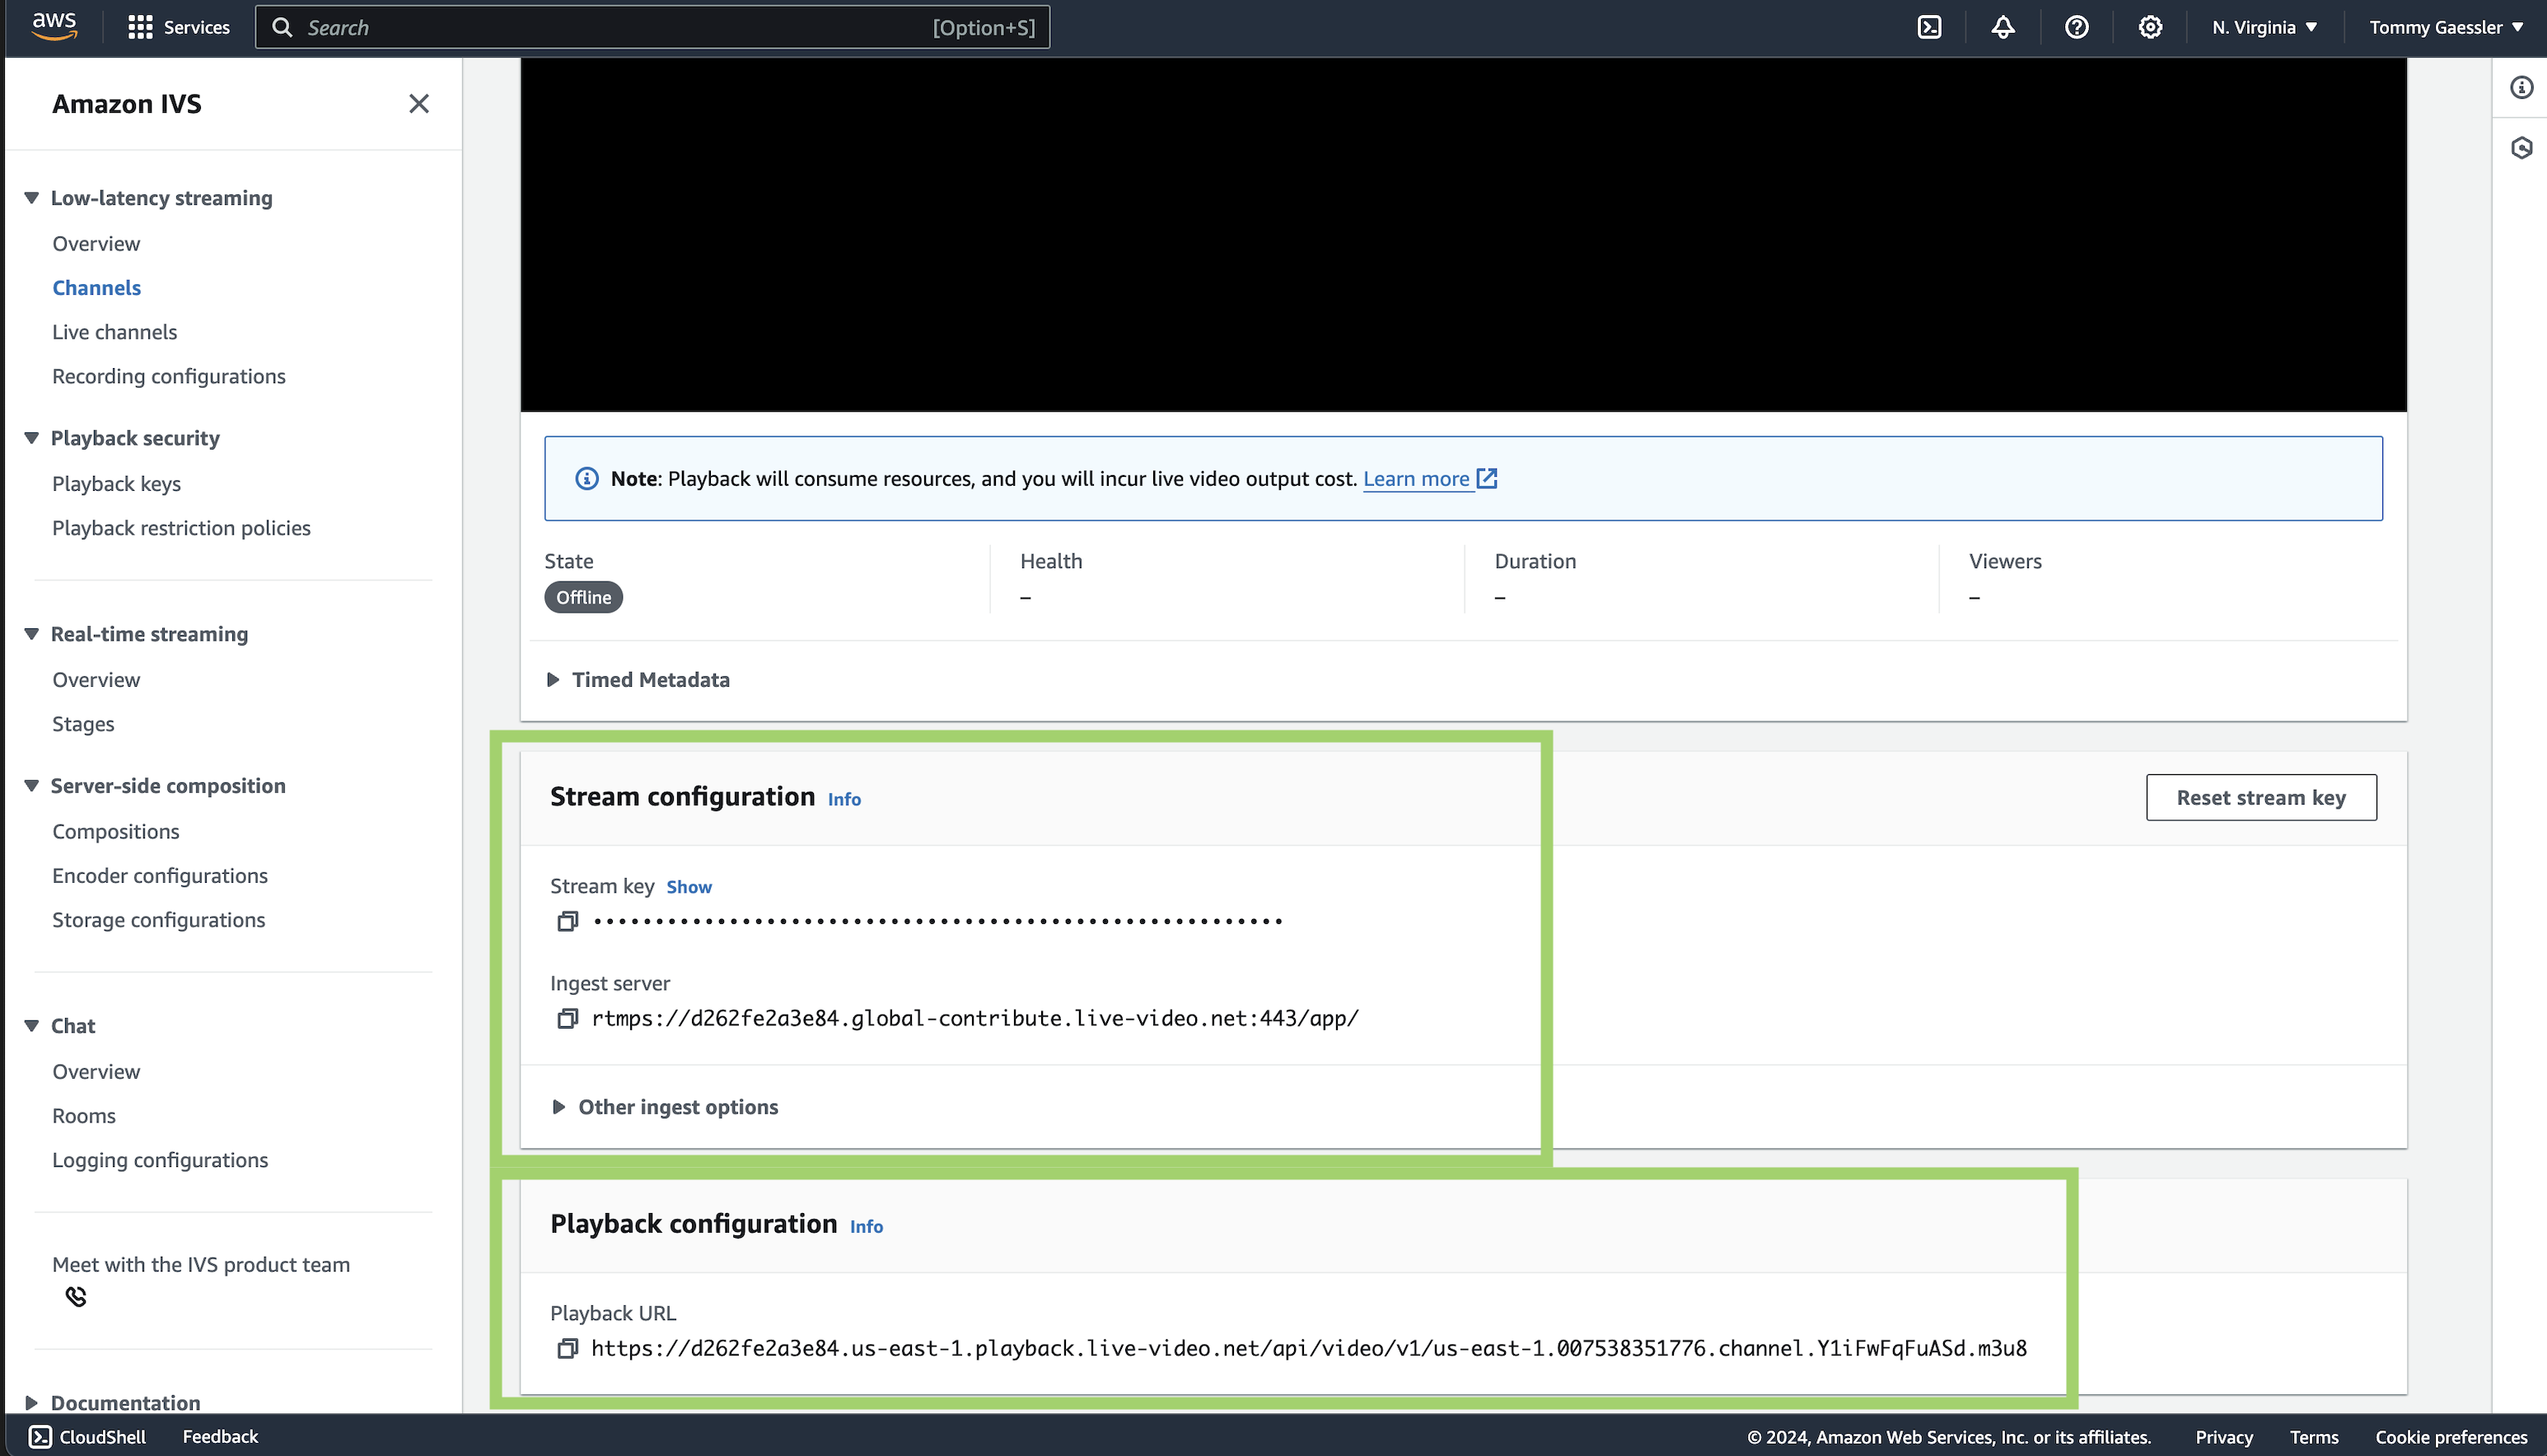
Stream to AWS IVS
Step 1 - Log in to AWS.
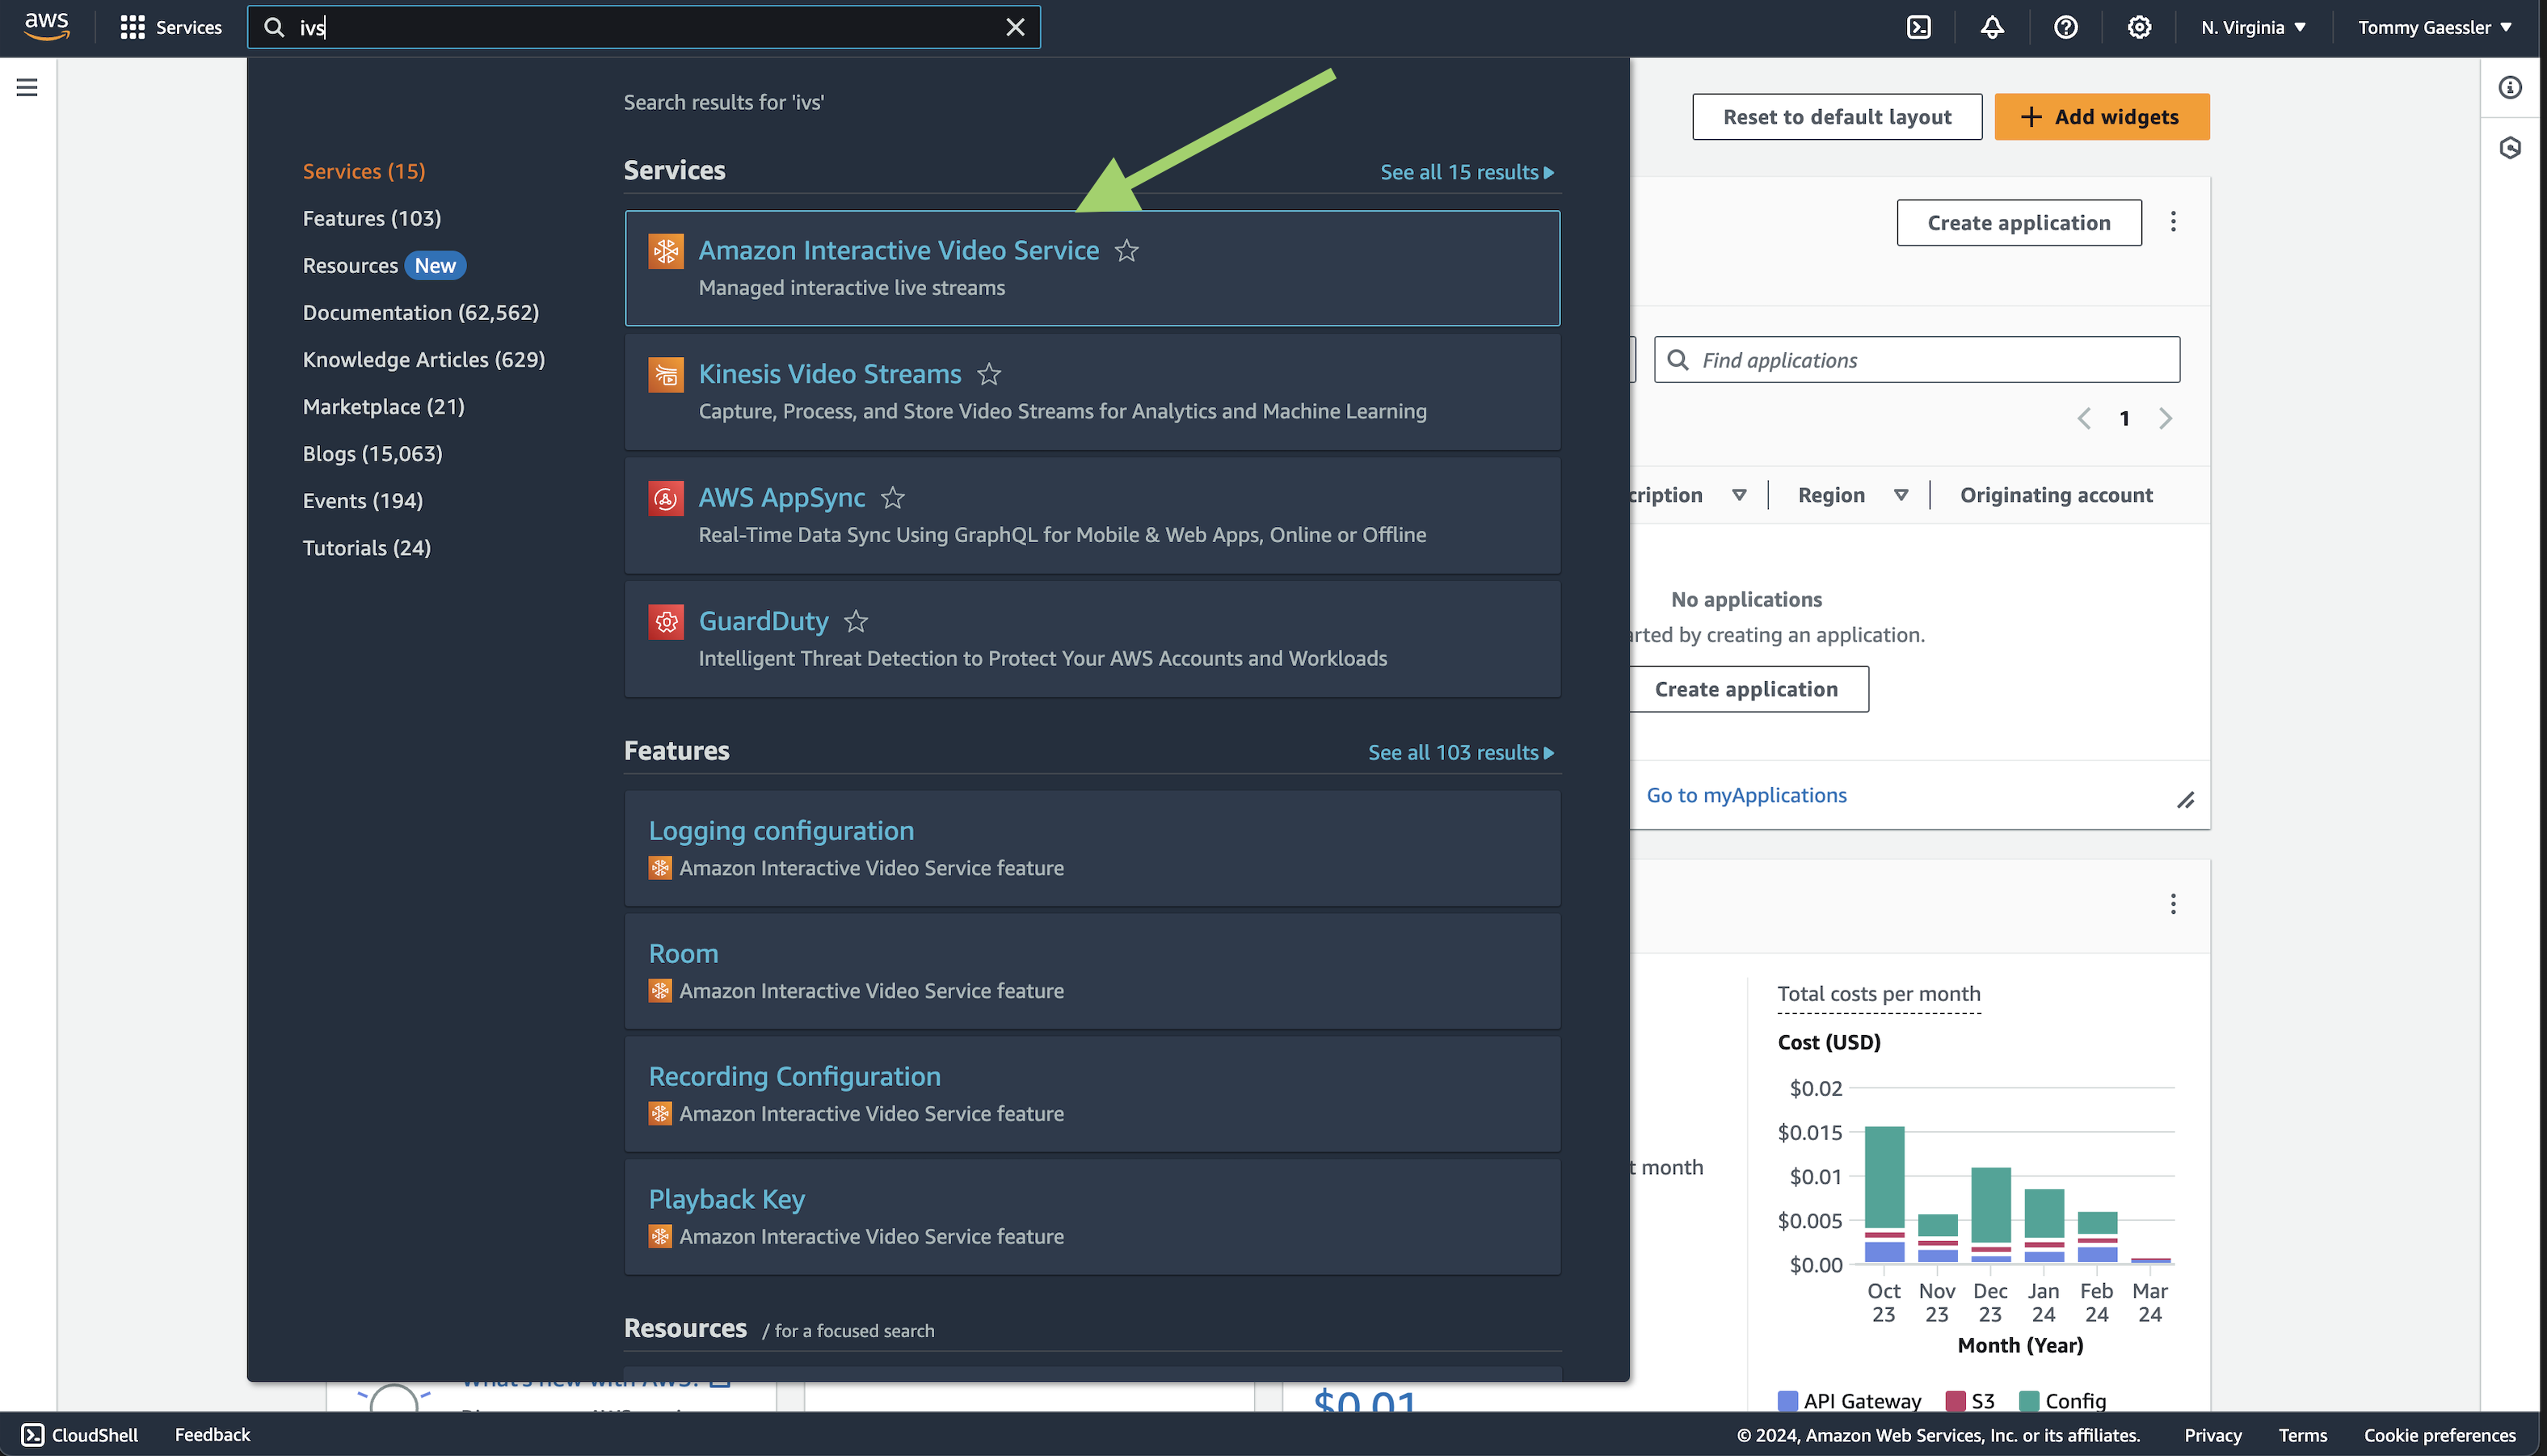
Step 2 - Navigate to the IVS service. You can also search it in the search bar.
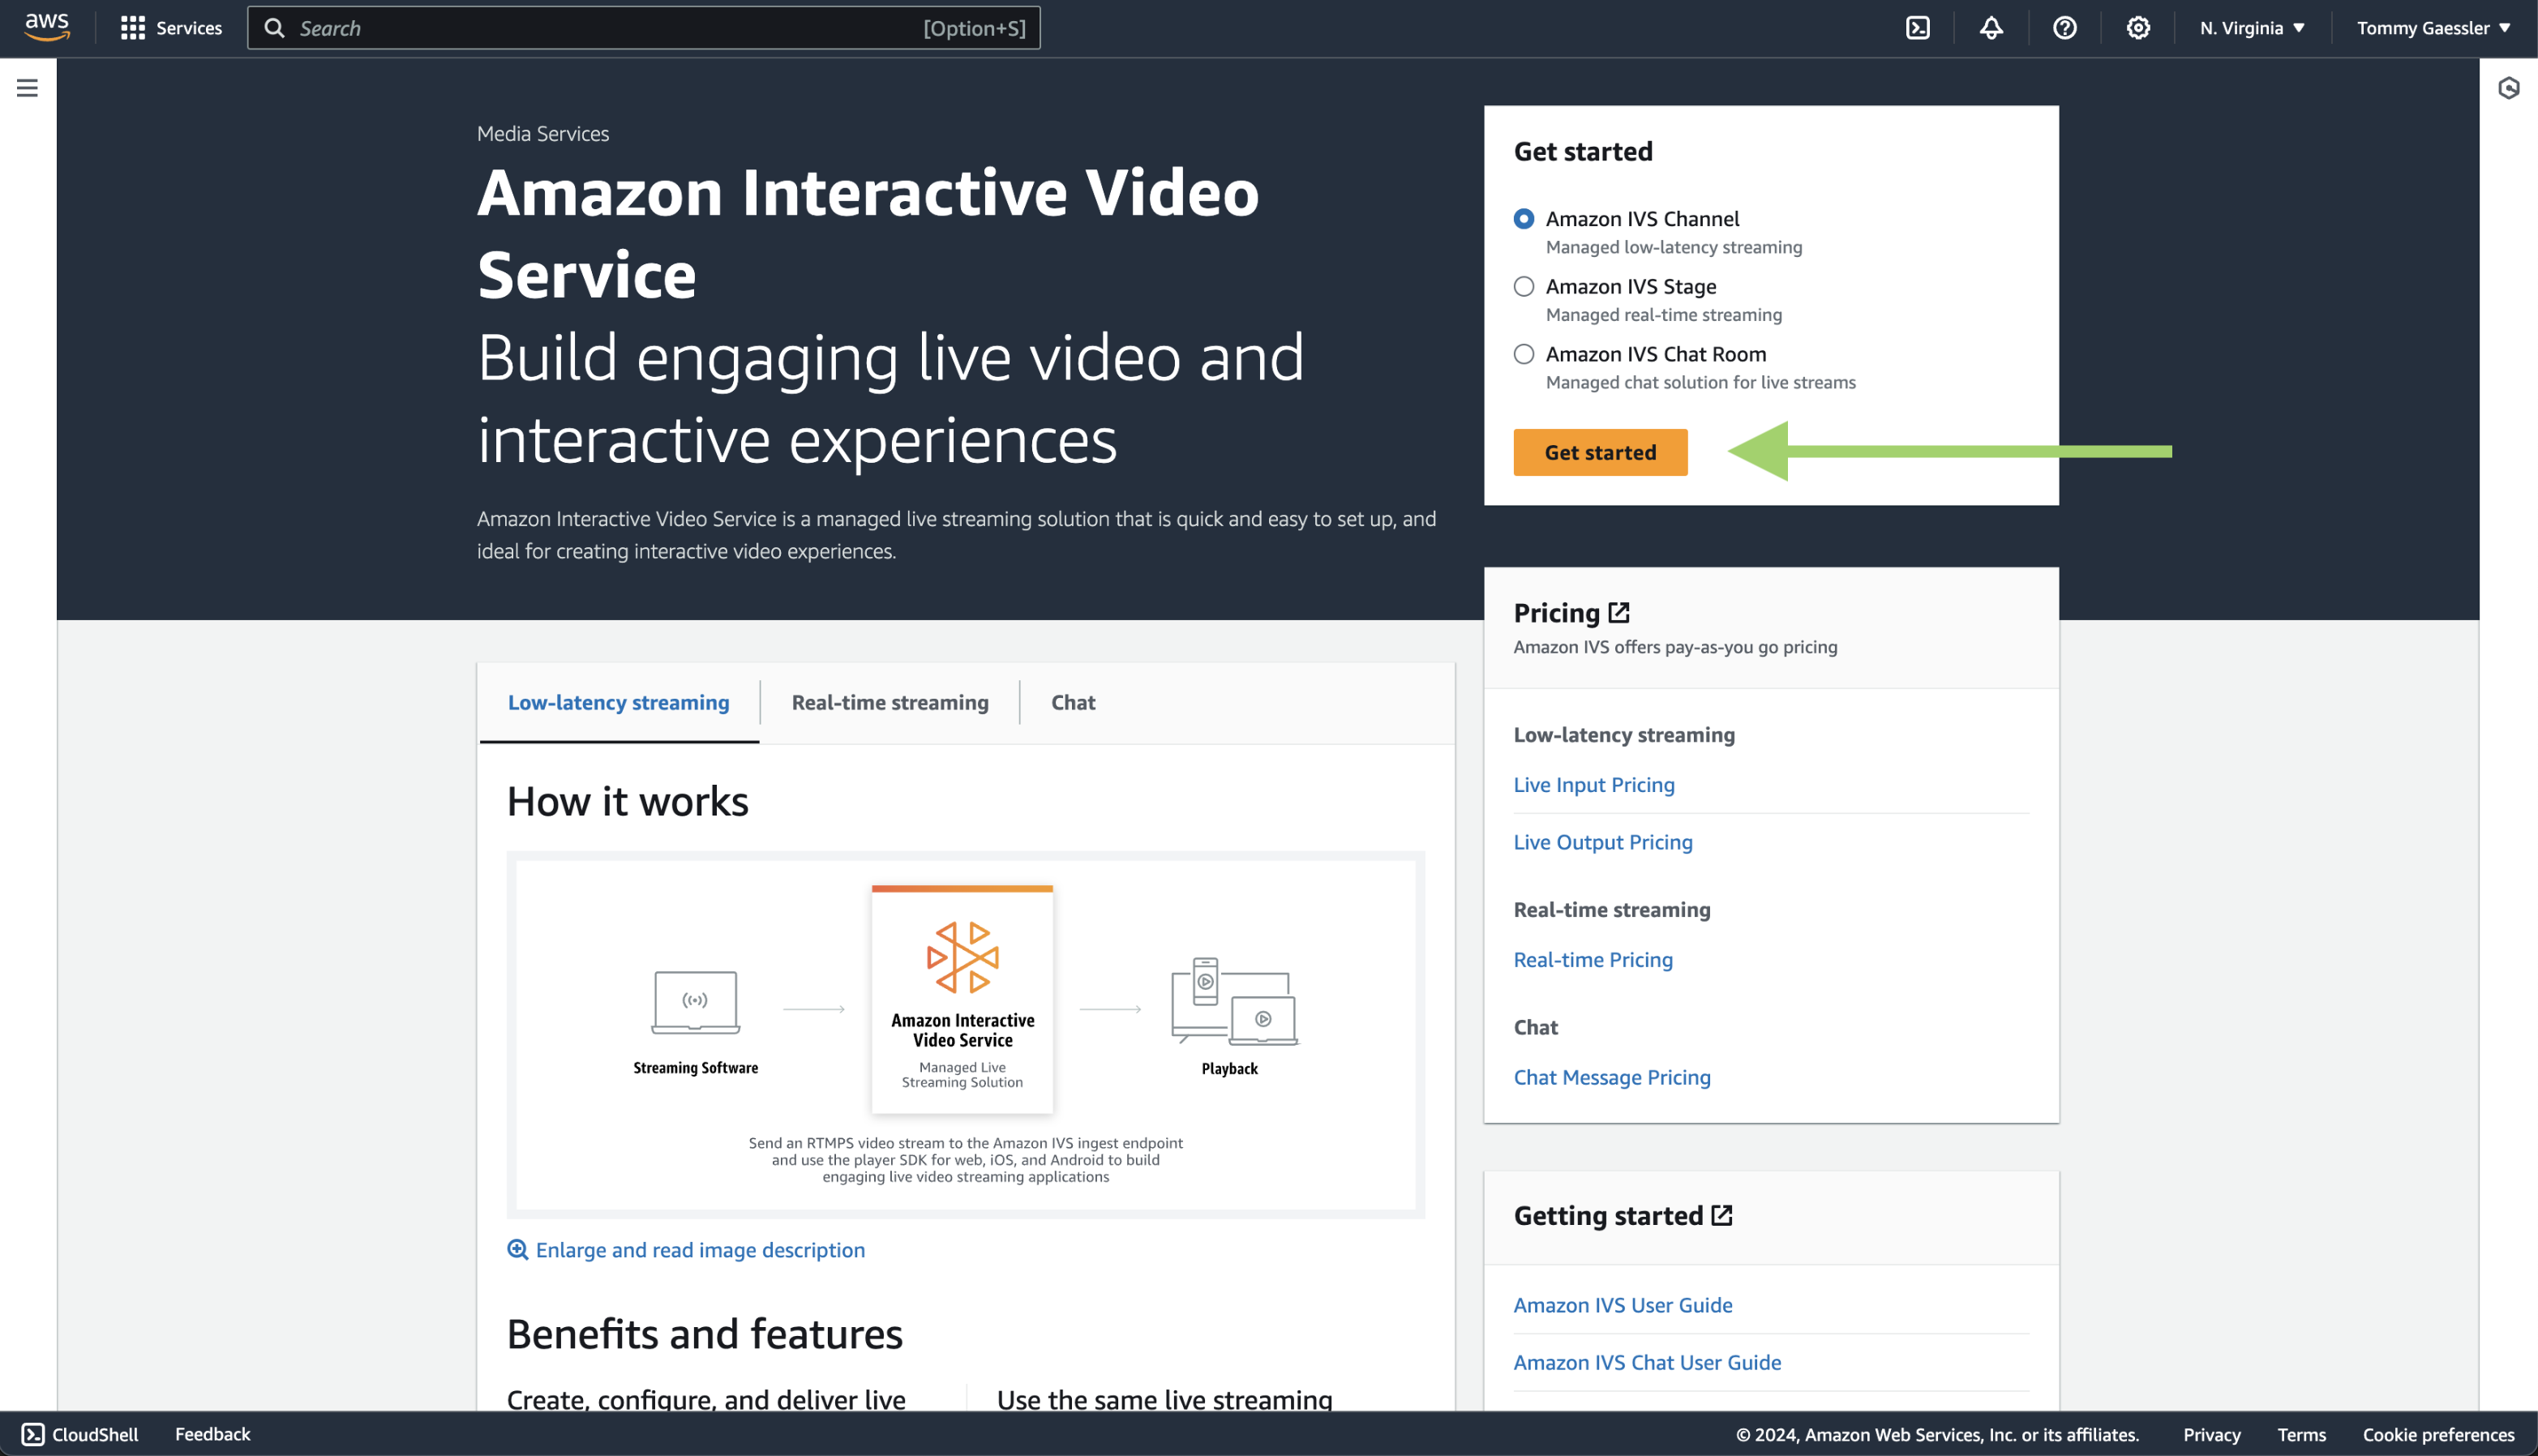
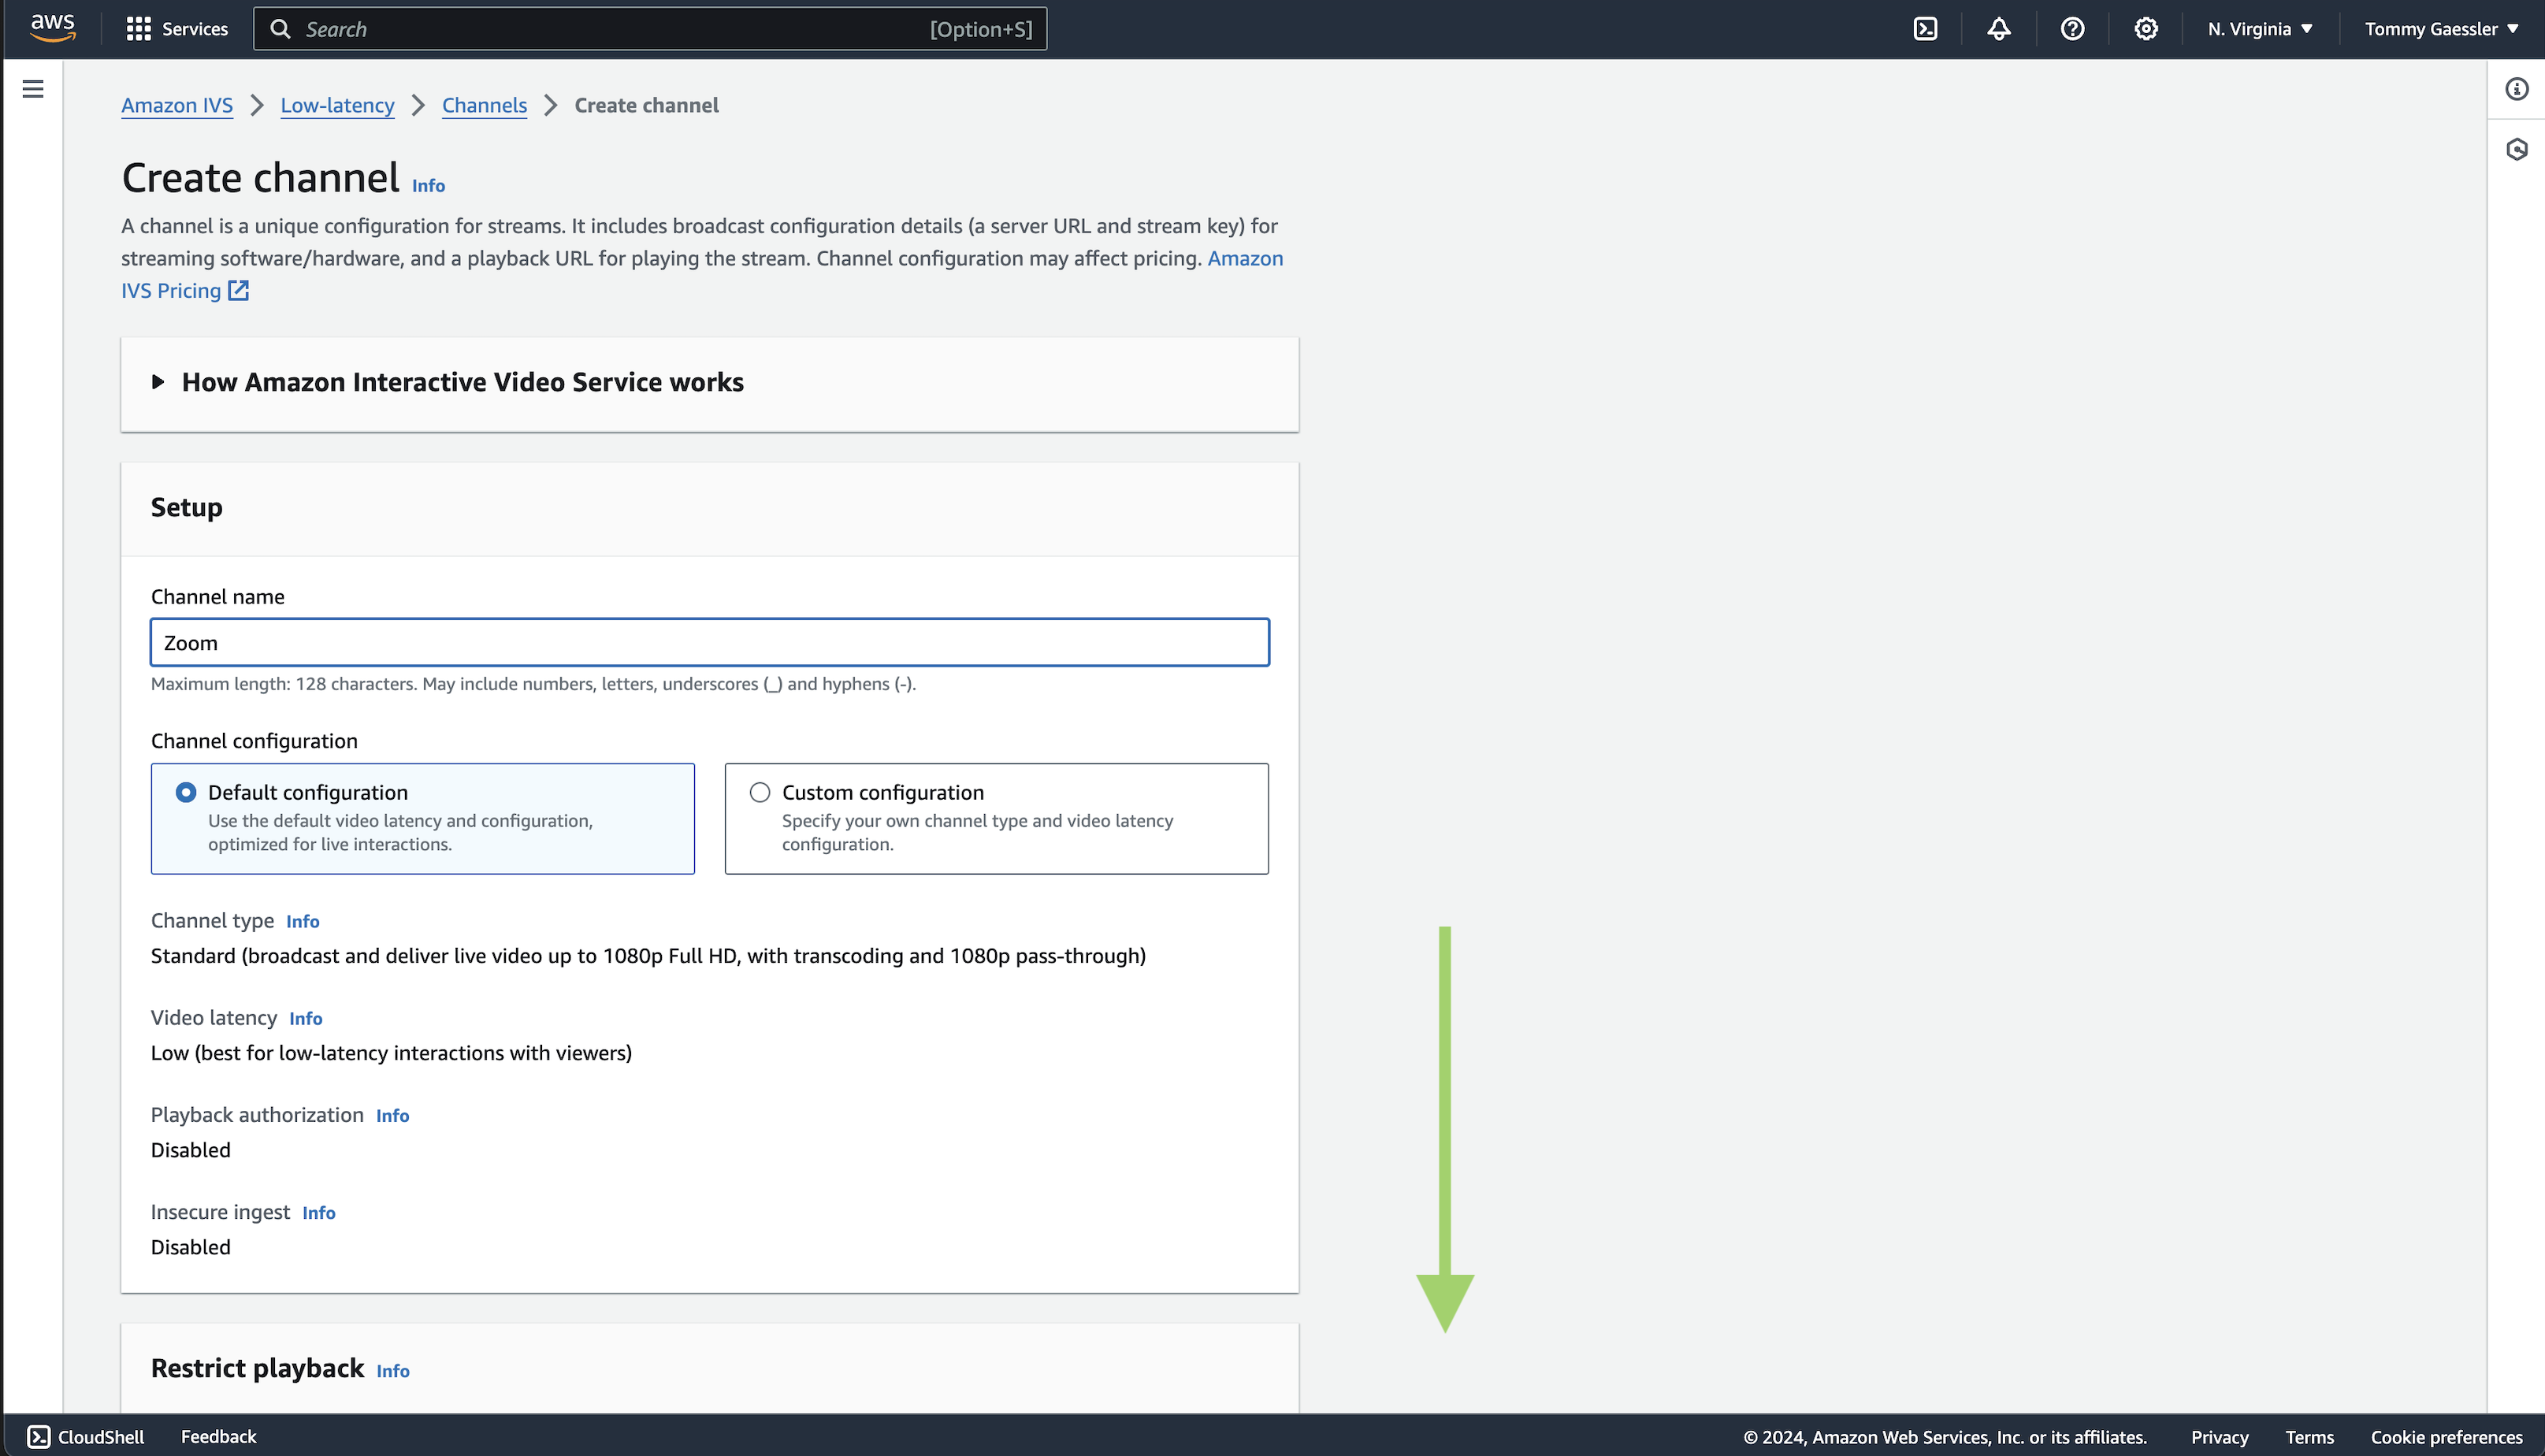
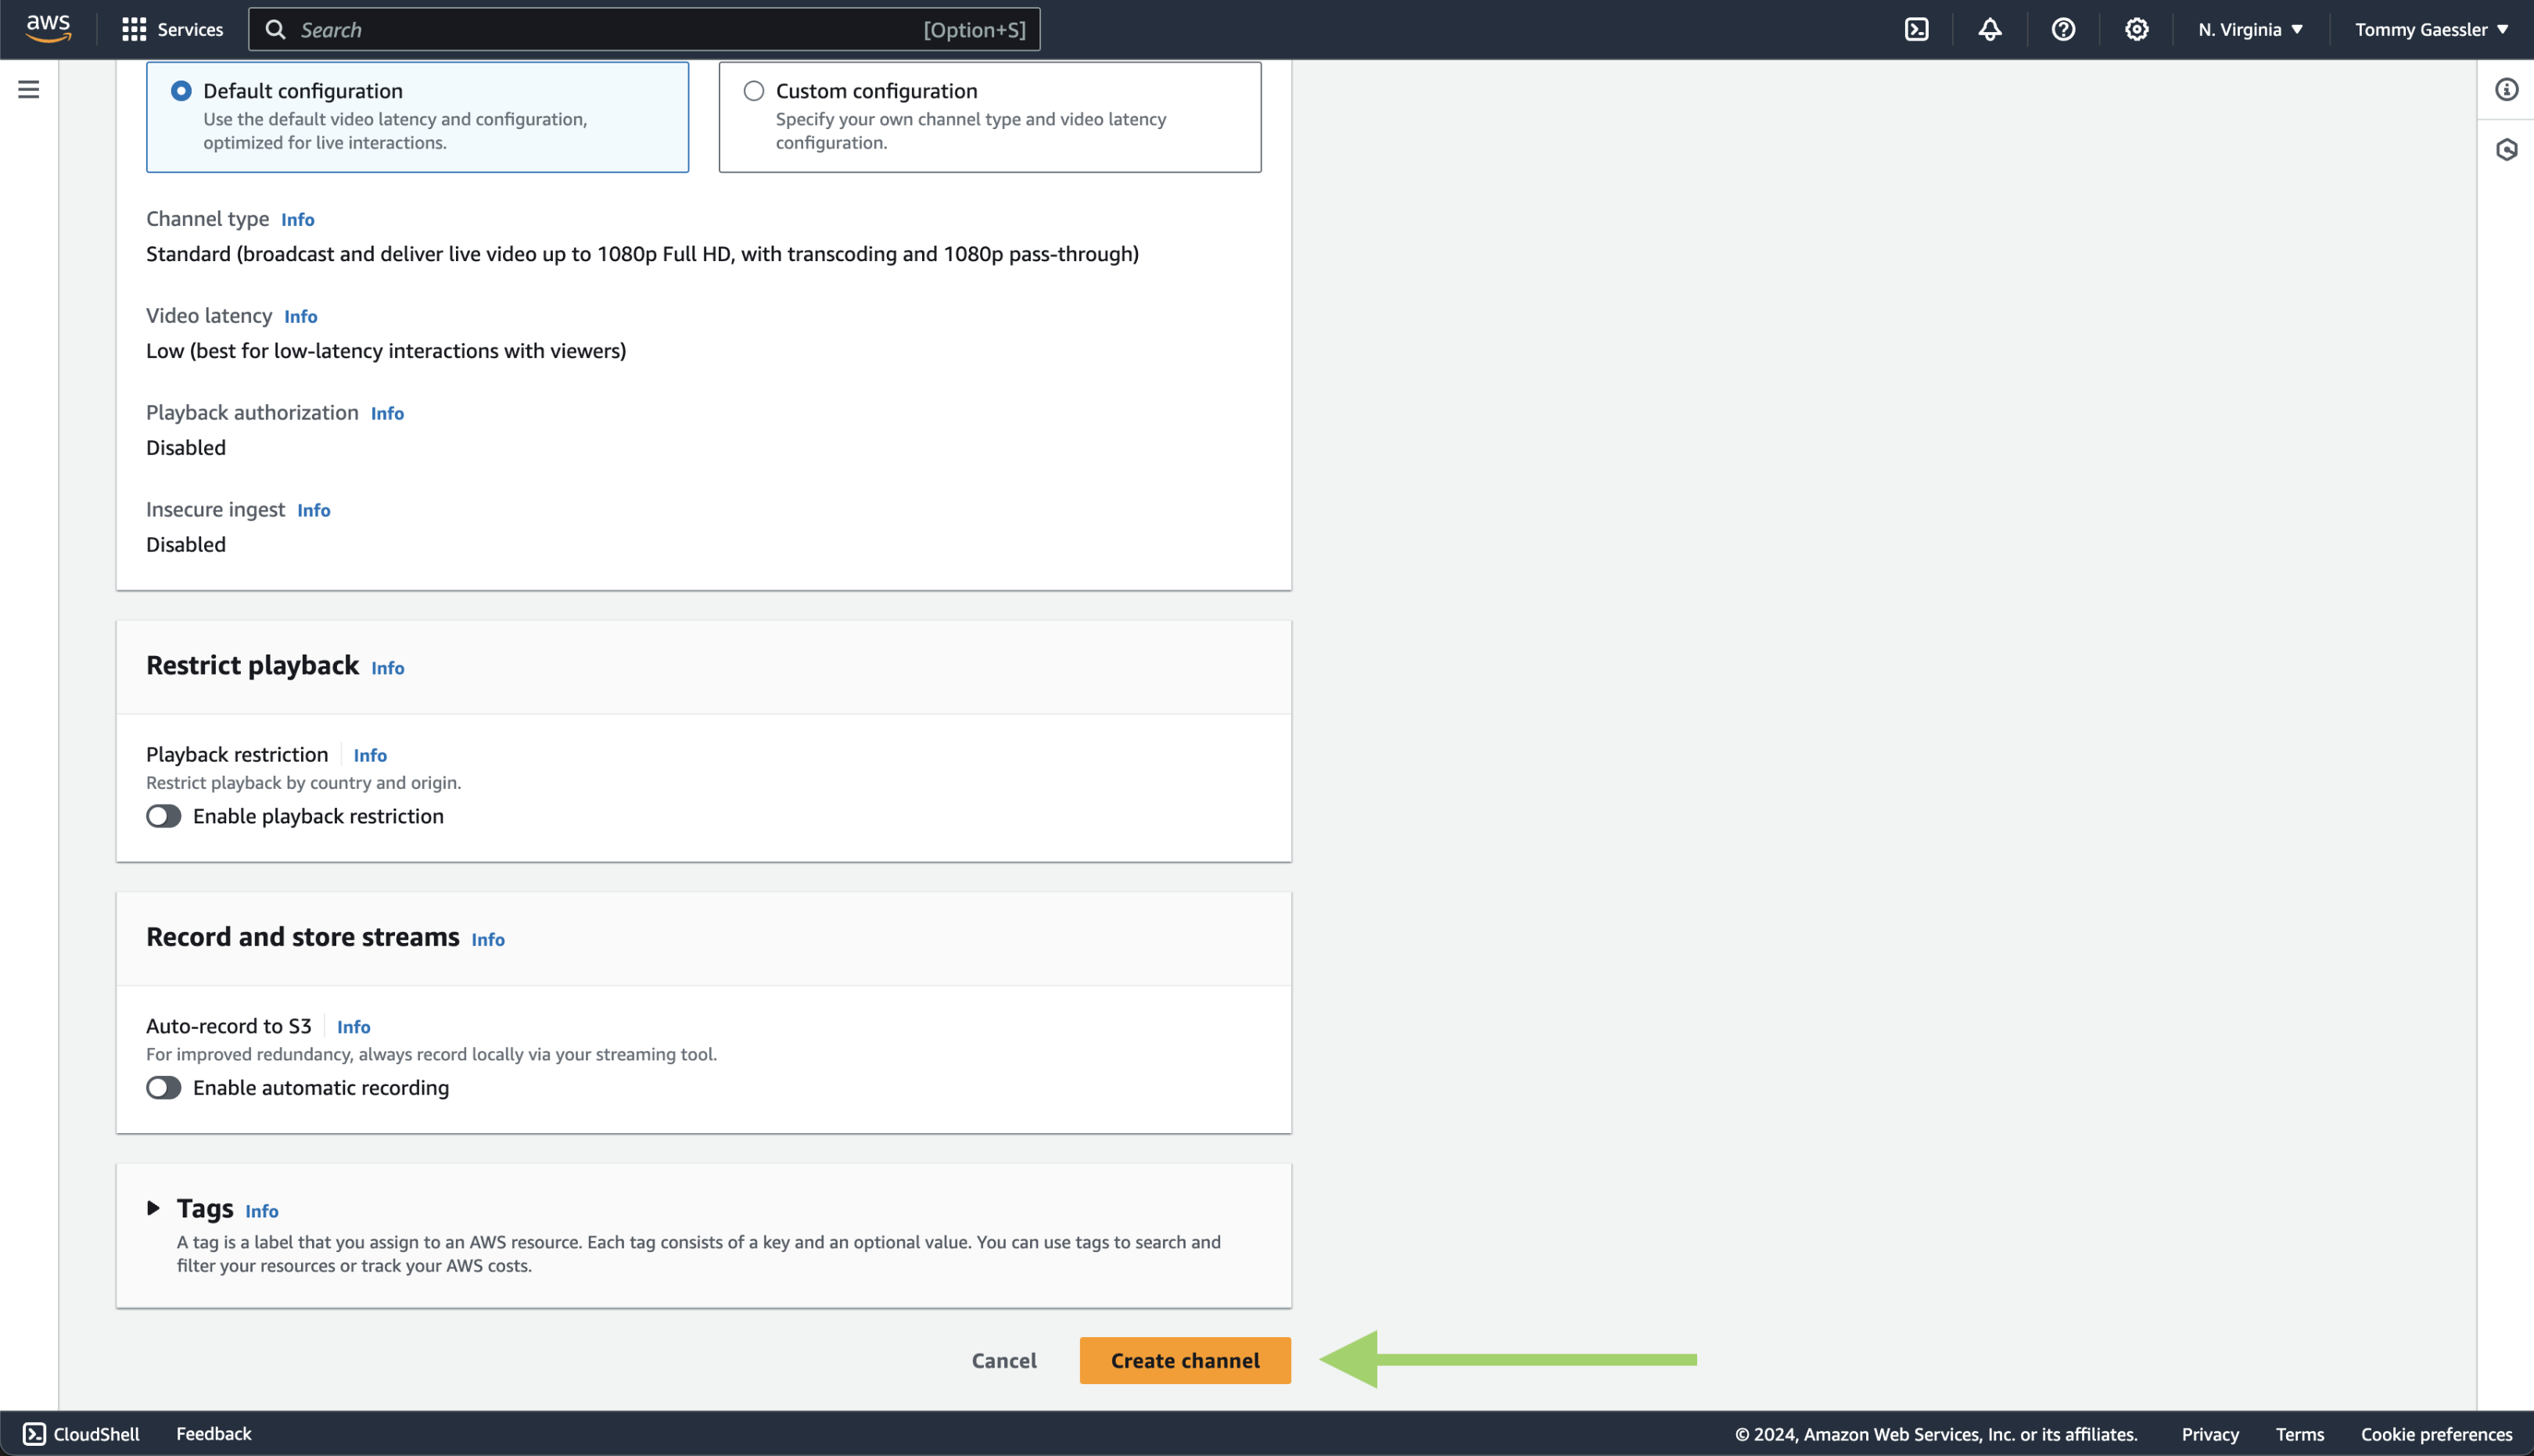
Step 3 - Click get started, add a channel name like "Zoom", and create your channel.
Step 4 - Access your Stream Key and URL from the "Stream configuration" section. Access the Broadcast URL from the "Playback configuration" section.
Streaming to another platform?
If you don't see the platform you want to stream here, don't worry, you can stream to any platform as long as you can produce the following:
- Stream URL
- Stream Key
- Broadcast URL
Join a Video SDK session on the web
Now that we've retrieved the credentials we need to stream to our third-party provider, we'll set up a simple video web app in vanilla JavaScript.
Getting started with the Video SDK
Install the Video SDK via npm. From the terminal in your project directory, run:
npm install @zoom/videosdk --save
After you've installed from npm, import ZoomVideo in the component file where you want to use the Video SDK:
import ZoomVideo from "@zoom/videosdk";
Start and joining Video SDK sessions
Step 1 - Create and declare the Zoom Video SDK client using ZoomVideo.createClient()
Step 2 - Initialize the Video SDK by calling client.init() and pass options.
Step 3 - Join a session by calling client.join(), and pass the Session Name, Video SDK JWT, Name, and Session Password.
Step 4 - Create and declare the mediaStream using client.getMediaStream() once the session has been successfully joined.
import ZoomVideo from "@zoom/videosdk";
let client = ZoomVideo.createClient();
let mediaStream;
await client.init("en-US", "Global", { patchJsMedia: true });
await client.join(
    "sessionName",
    "VIDEO_SDK_JWT",
    "userName",
    "sessionPasscode",
);
mediaStream = client.getMediaStream();
Start your video using Zoom Video SDK
The Video SDK for web can render up to 25 videos at a time on desktop browsers, and 4 videos on mobile browsers. It is recommended to show additional videos using pagination. The maximum video quality on the web platform is 720p.
Make sure to tie the startVideo function to a user button click or the browser could block access to the camera due to privacy.
Step 1 - Create a HTML video container <video-player-container></video-player-container> where you intend to display your self video.
Step 2 - Start your video by calling startVideo() on the mediaStream.
Step 3 - Once you have granted camera permission to the browser, you can attach the self view video within the video container by using mediaStream.attachVideo('user_id', 'video_quality') and passing in your user id and the video quality. Declare the result of this function call as userVideo.
- The user id can be accessed by calling
mediaSteam.getCurrentUserInfo(). - See the relevant enumeration values for the video quality input here.
Step 4 - Append the userVideo to the video-player-container by using document.querySelector('video-player-container').appendChild(userVideo).
Step 5 - Stop your video by calling the mediaSteam.stopVideo() function.
await stream.startVideo();
let userVideo = await stream.attachVideo(
    stream.getCurrentUserInfo().userId,
    RESOLUTION,
);
document.querySelector("video-player-container").appendChild(userVideo);
Controlling audio in the Zoom Video SDK
Make sure to tie the startAudio function to a user button click or the browser could block access to the microphone due to privacy.
Step 1 - To start audio, call the mediaStream.startAudio() function.
Step 2 - Unmute yourself by calling the mediaSteam.unmuteAudio() function.
Step 3 - Similarly, mute yourself by calling the mediaSteam.muteAudio() function.
Step 4 - To stop audio, call mediaSteam.stopAudio().
Share Your Screen using the Zoom Video SDK
Step 1 - Create both a HTML video and canvas element with appropriate id's. Make sure to set a height and width.
<video id="my-screen-share-content-video" height="1080" width="1920"></video>
<canvas id="my-screen-share-content-canvas" height="1080" width="1920"></canvas>
Step 2 - Identify the optimal HTML element to render the screen share on for the user's browser by calling the isStartScreenShareScreenWithVideoElement() function on the mediaStream.
Step 3 - Start your screen share and render it on the webpage by using the startShareScreen() function and pass in either the video or canvas element using document.querySelector().
if (stream.isStartShareScreenWithVideoElement()) {
    await stream.startShareScreen(
        document.querySelector("#my-screen-share-content-video"),
    );
    // screen share successfully started and rendered
} else {
    await stream.startShareScreen(
        document.querySelector("#my-screen-share-content-canvas"),
    );
    // screen share successfully started and rendered
}
Step 4 - To stop your screen share, call the stopShareScreen() function on the mediaSteam.
Start live streaming using the Zoom Video SDK
Initialize the live stream client
While in a session, call client.getLiveStreamClient() to get the Live Stream Client. Its best to declare this as new variable such as liveStreamClient.
Set and start the live stream
To set and start the live stream, call liveSteamClient.startLiveStream('stream_url', 'stream_key', 'broadcast_url'), making sure to pass in the correct Stream URL, Stream Key, and Broadcast URL.
Stopping the live stream
To stop a live stream from Zoom's side, call liveStreamClient.stopLiveStream().
Start/Stop the live stream via API
You can also leverage Zoom's Video SDK APIs to start and/or stop a live stream from your server. In order to start a live stream via API, it must first be initialized using the Update a session live stream API, and sending the corresponding Stream Key, Stream URL, and Broadcast URL in the request body. Once the live stream is initialized, you may start or stop the broadcast on Zoom's side by calling the Update session live stream status API.
Subscribe to the live stream event listener
To receive the live streaming status from the third-party side, subscribe to the live stream event listener. This event listener is useful for events on the receiving end, such as when the live steam is ended.
client.on(`live-stream-status`, (payload) => {
    console.log(`live streaming status: ${payload}`);
});
Conclusion
By now you should see how simple it is to set up a simple Zoom Video SDK app with live streaming capabilities. If you are interested in learning more about the functions and event listeners used in our walkthrough, you can find the full reference here.