Less switching, more doing: extend Zoom Contact Center productivity with Connector apps
Introducing Connector apps for Zoom Contact Center
Zoom Contact Center now supports Connector apps, making it simpler to integrate tools like CRMs or ticketing systems directly into your contact center workflows. For example, you can bring in customer records from Salesforce or view support cases from ServiceNow without leaving Zoom. In blog post, we’ll walk you through how to set up Connectors from the Zoom App Marketplace and incorporate them into your contact center flows.
Marketplace set-up
Connectors work with 3rd party applications—like Salesforce, Microsoft, Zendesk, etc.—which are built in Zoom's Marketplace. Once you create your application, you'll be working exclusively within the Connect menu.
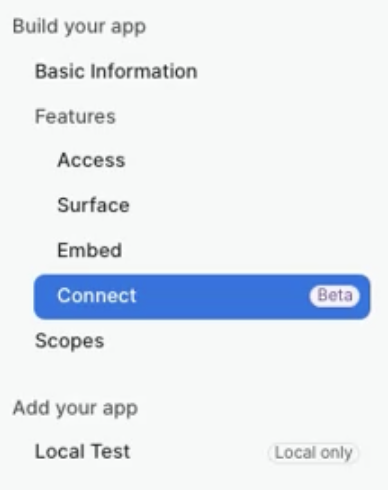
Connecting your external application
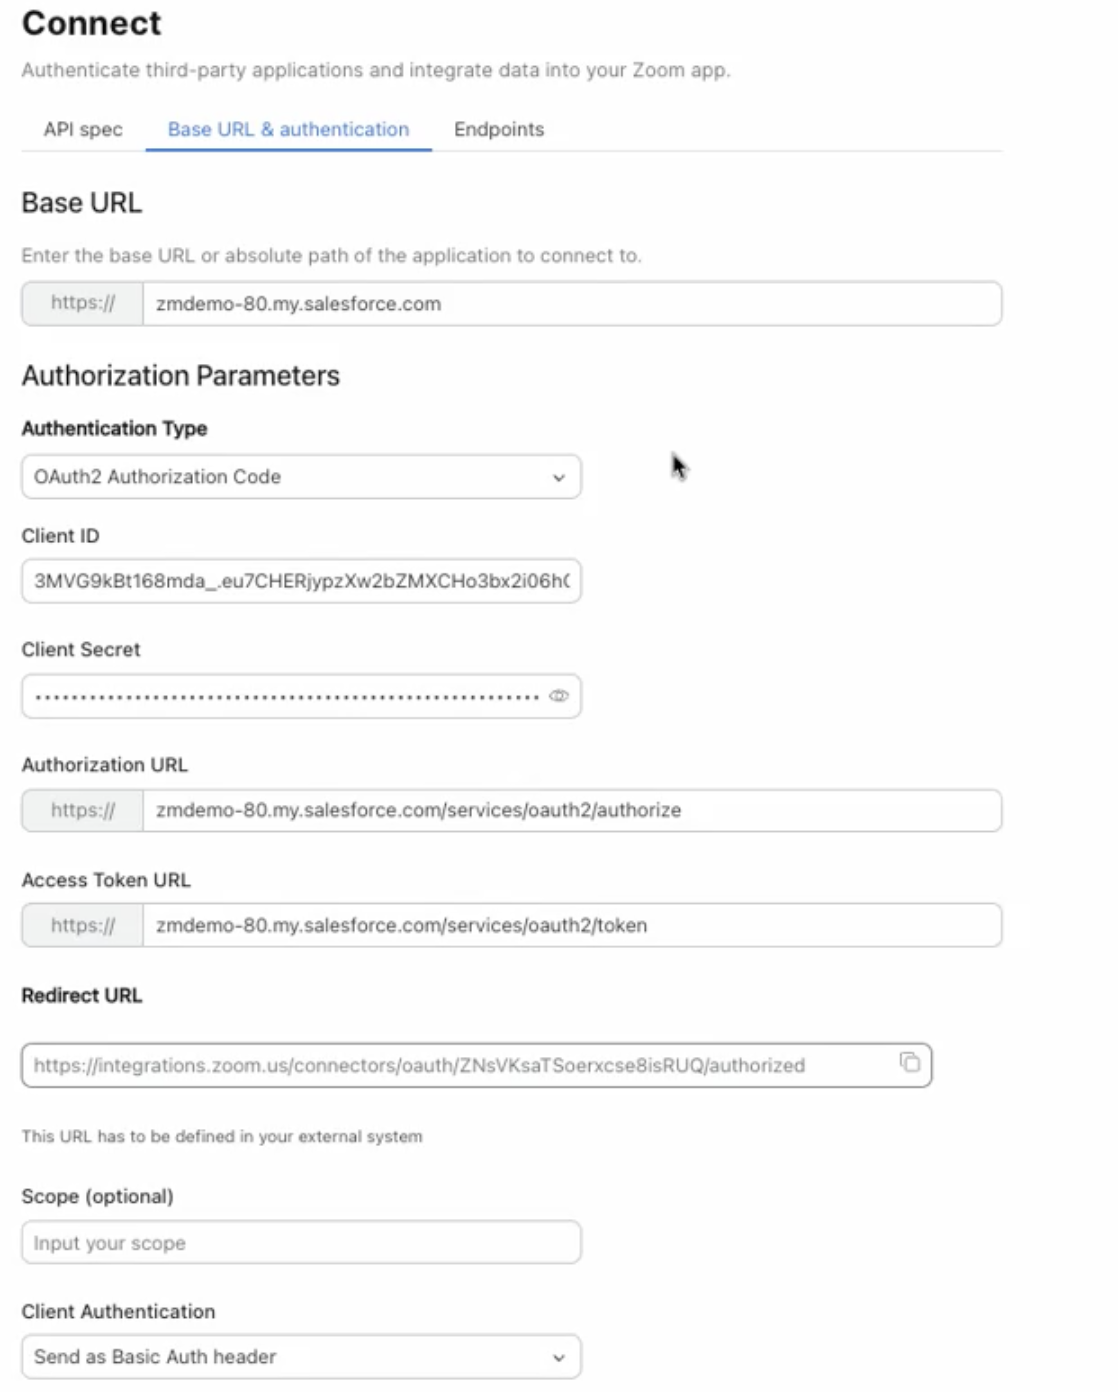
After selecting the Connect widget, you'll navigate to Base URL and Authentication to add in necessary details for establishing and authenticating the connection between your external application and your Zoom application.
- Base URL: for your application's connection
- Authentication Type: choose the one you'd like to utilize for authorizing connection
- Client ID and Client Secret: access within your external application and copy into the appropriate sections here
- Authorization URL & Access Token URL (examples shown below)
- Redirect URL: generated automatically. Copy this into your external application's configuration
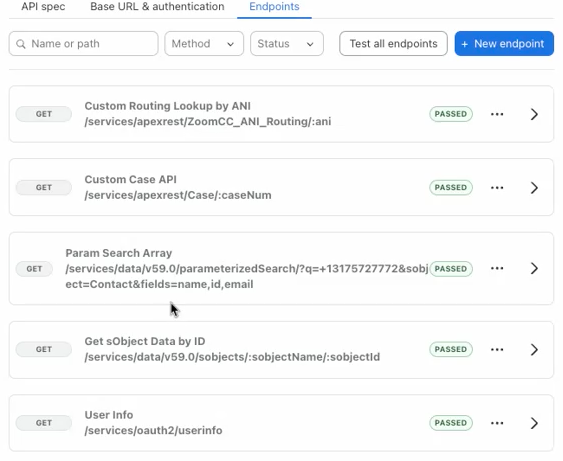
You can add in the endpoints you'd like to use with your application under the Endpoint menu from the top menu-bar (within the Connect widget). Your endpoint configuration will determine how the connector is utilized within your ZCC flow, which we'll review next.
Creating your ZCC flow
With your third-party app configured in the marketplace, you can head over to your account homepage to manage your Contact Center experience (zoom.us/my home → Contact Center Management), focusing on flows for this set-up.
Whether you're creating a new flow to use your connector or adding it into an existing one, you'll need to open your flow editor and use the Connector widget in the Advanced menu.
Configuring your connector widget
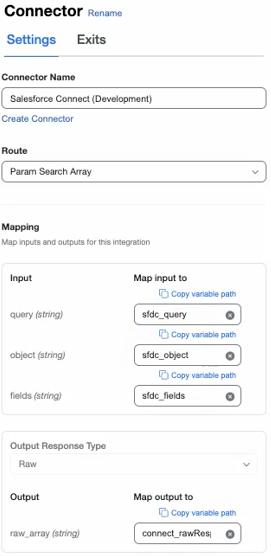
Once you've added this widget into your flow, you'll select the name of the connector application you're working with. Once selected, choose the route you'll use. These routes coordinate with the API endpoints added to your app in the marketplace set-up. To provide the needed inputs/outputs for mapping, you can create local variables for use in this flow. To do this, select flow variables in the top right corner of your flow editor. Create a variable for every parameter in the associated endpoint. Once created, map the appropriate variable to the corresponding input/output.
Reading the connector output
You can handle the output from the endpoint by attaching a new widget to your connector in your flow. For example, in a web chat flow, you can attach SendMedia to send the data back to the user in the chat interaction. If your response from your connector is a raw string, you can use an additional widget after your connector to parse the string response into readable format.
Making the most of Connector apps
With your Connector app integrated, your contact center is now better equipped to bring key external systems into daily operations. This added connectivity allows agents to access customer insights and case information without toggling between platforms—improving responsiveness and reducing friction. Whether you're incorporating CRM data to personalize interactions or connecting a ticketing system to manage support cases more efficiently, Connector apps offer the flexibility to align workflows with your business goals. As you expand your setup, continue exploring ways to improve visibility, reduce manual steps, and deliver a more consistent experience for both your teams and your customers.