Zoom Apps for Zoom Phone
Zoom Apps for Zoom Phone integrates third party web apps into the Zoom Phone client. Third party applications inside the Zoom Phone client increase agent productivity and reduce the need to switch between multiple applications. As a result, we enable you to present information and tools that are outside the native Zoom Phone experience as a single pane of glass in the Zoom Phone client.
Availability Currently the Zoom App for Zoom Phone is only available for desktop clients in Mac and Windows.
For more information about Zoom Phone, see Getting Started with Zoom Phone.
Create Zoom Apps for Zoom Phone
Important basics
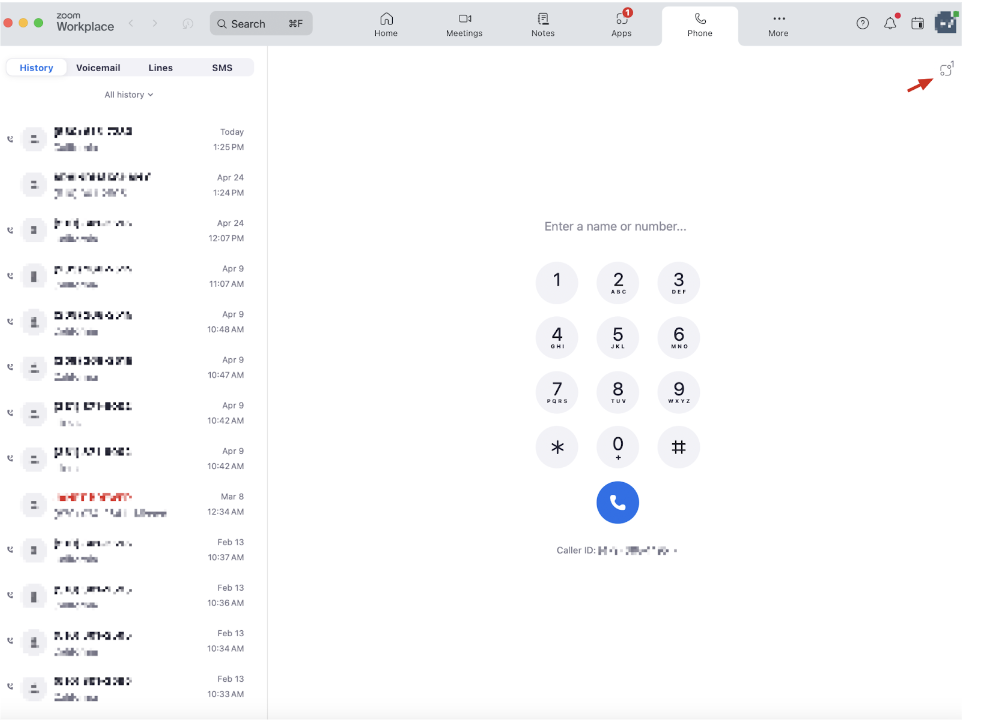
To launch Zoom Apps for Zoom Phone, choose the Zoom Apps icon in the top right corner in Zoom Phone. This action opens a phone launcher where users can access apps that are compatible with Zoom Phone.
Developers can build apps for Zoom Phones for various use cases to enhance the functionality and user experience in the Zoom Phone ecosystem. Here are some common use cases:
-
Integration with CRM Systems
Integrate Zoom Phone with your Customer Relationship Management (CRM) systems to provide contextual information about callers, such as previous interactions and notes, directly in the Zoom Phone interface.
-
Productivity Tools
Create productivity tools to schedule meetings, set reminders, and manage tasks directly from the Zoom Phone interface. These tools can help maintain organization and productivity while using Zoom Phone.
-
Custom Call Workflows
Develop custom call workflows that are tailored to specific industries or business needs.
-
Analytics and Reporting
Create apps that provide detailed analytics and reporting capabilities for Zoom Phone usage. These apps can help track call metrics, analyze trends, and identify areas for improvement.
Prerequisites
- Have a Zoom account.
- Use Zoom Apps SDK 0.16.19 or higher.
- Enable the following client settings:
- Zoom Web
- Account Management
- Account Settings
- Zoom Phone
- Automatically Call from 3rd Party Apps
- Use Zoom Desktop client 6.0.0 or later.
- Read Key concepts for Zoom Developer Platform creators.
- Review the Zoom Apps general documentation.
- Be either the Zoom account owner, account admin, or have been assigned the Zoom for developers role.
- Enable permissions for roles:
- Log in to the Zoom web portal.
- Go to User Management - Roles - Role Settings - Advanced features.
- Select the View and Edit checkboxes for Zoom for developers.
For more information, see Using role management.
App creation process
- Log in to the Zoom Marketplace and select to build a general (OAuth) app.
- Enter or update basic app information, such as the app name, access type, and OAuth.
- Choose the Zoom products and features that your app supports.
- Choose the Zoom API methods (scopes) the app uses to interact with the Zoom platform.
Preview your app and test it with internal users.
Step 1: Build a General App
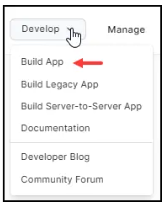
Log in to the Zoom App Marketplace and choose Develop - Build App.
A Zoom Marketplace app can engage with several Zoom features, such as:
- Embed your web app in the Zoom client through the Zoom Apps framework.
- Enable your app backend to call Zoom Open REST APIs.
- Allow your app backend to receive Webhooks and WebSockets from Zoom.
This document focuses mostly on how you can surface your web app inside the Zoom client. Depending on your requirements you can add more capabilities to your application.
Step 2: Maintain basic information
In Basic Info, you can add or update information about the app, such as the app's name, app management, app credentials, and OAuth information.
-
Update your app's name.
-
Select the edit icon (pencil) and update the name.
-
To save your changes, click anywhere outside of the app name field.
Note: By default, the build flow generates a generic name for your app.
-
-
In Select how the app is managed, select user-managed.
-
In App Credentials, the build flow automatically generates app credentials (client ID and client secret) for your app. App credentials for development differ from app credentials for production.
- Use development credentials while you are building and testing your app.
- Use production credentials once you are ready to publish your app on the Marketplace.
-
In OAuth Information, set up OAuth for your app.
-
OAuth redirect URL (required)
You can enter your development redirect URL or endpoint to set up OAuth between your app and Zoom.
-
Use Strict Mode URL (optional)
This setting allows only the redirects that exactly match the valid OAuth redirect URLs.
-
Subdomain check (optional)
This setting only allows the redirects that exactly match the subdomain of the valid OAuth redirect URLs.
-
OAuth allow lists (required)
This setting adds any unique URLs that Zoom should allow as valid redirects for your OAuth flows. This additional security measure ensures only redirection to the pre-approved endpoints you provided. Include either the complete URL (https://subdomain.domain.tld/path/to/oauth/callback) or the base URL without the path and/or query parameters (https://subdomain.domain.tld).
-
Step 3: Select Zoom products and features
-
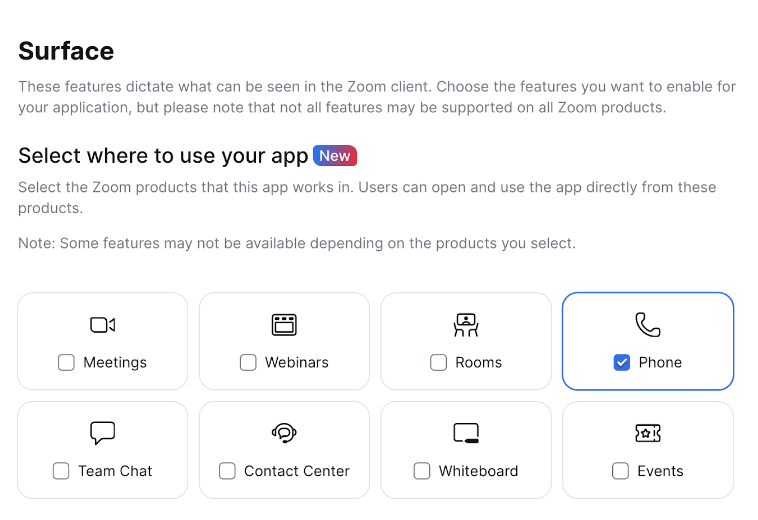
In Features, choose Surface.
-
In Select where to use your app, choose Phone and any other product you wish to surface the app.
-
In Home URL, provide an URL to your app's home page.
Review the template parameter variables that are available to your home URL. When a Zoom user opens your Zoom app inside the Zoom client, this is the URL that loads.
-
In the Domain Allow List fields, provide a list of URLs or hosts that your app uses to send requests. This list should include URLs that your front end application uses to load resources as well as backend API hosts that your web app uses to send requests.
-
In In-client App Features, select the Zoom features available to your app users in the Zoom client.
To build Zoom apps for Zoom Phone, you must use Zoom App SDK. This action enables Zoom App SDK and selects the + Add APIs button to add APIs and events. The following are phone specific Zoom Apps SDK APIs:
-
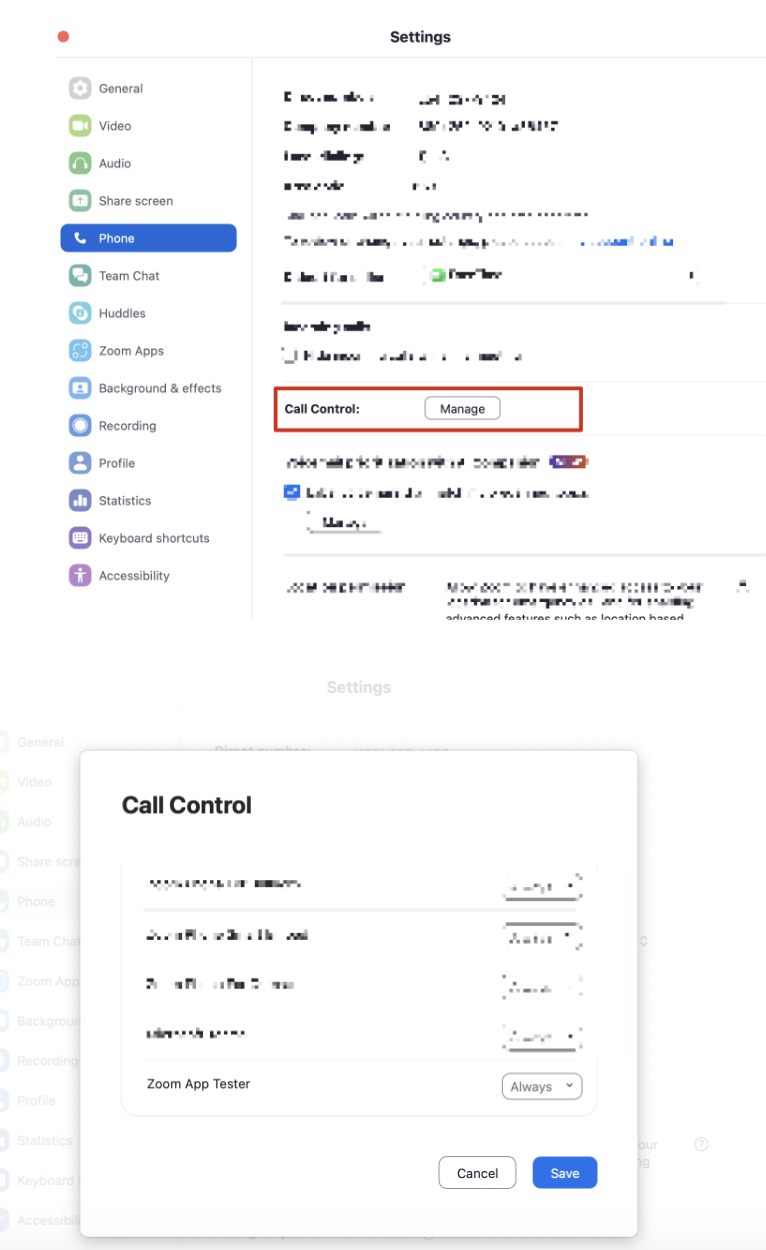
If you are unable to make a call with makePhoneCall after the first successful call, verify that the permissions for your app to make a call from Zoom Phone is set to always in the user's Zoom Client settings. You can access it from Zoom client - Settings - Phone - Call Control - Manage.
The following are the Zoom Phone specific Zoom Apps SDK events:
onPhoneContextonPhoneCalleeAnsweredonPhoneCallerEndedonPhoneCalleeRejectedonPhoneCallerMeetingInviting
You should review the Zoom Apps SDK reference for any other APIs or events you might need to include in your app, such as:
getRunningContextgetAppContextexpandAppAuthorizepromptAuthorizeonAuthorizedonRunningContextChange
Phone apps commonly use the Zoom App SDK APIs and events listed above. You can also add extra Zoom App SDK scopes and features, such as calling Zoom Marketplace OpenAPIs and receiving Marketplace Webhooks. These additional features depend on your app's requirements.
You can build apps using call recordings and transcript after a phone call with these Open API's:
Zoom Client Support requires no selection. By default, the Zoom desktop client supports Zoom Apps.
Step 4: Select scopes (API methods)
Scopes define the API endpoints and methods your app can use to access specified user resources. They also define which information and capabilities are available.
- In Scopes, choose the Zoom API methods your app is allowed to call.
- Choose Add Scopes.
- Choose the Zoom product. Then check the desired scopes and select Done.
- In Scope Description, explain how the requested scope is necessary for your app.
When you add a scope, you indicate that your app needs access to specific data for Zoom users who install it. A key principle in Zoom's security practice is minimal access. If you request to publish your app on the Zoom Marketplace, the Zoom Security Review team evaluates your application. Note that the team might reject an unnecessary scope request.
Step 5: Upload your app logo
When users access your app inside the Zoom desktop client, they see your app's icon as the visual indicator. Therefore, it is important that you upload an icon for your app.
This step happens in the Production tab of your app. But the icon also appears in the development version of your app. Therefore, if you are testing with the development version of your app, you should complete this step.
-
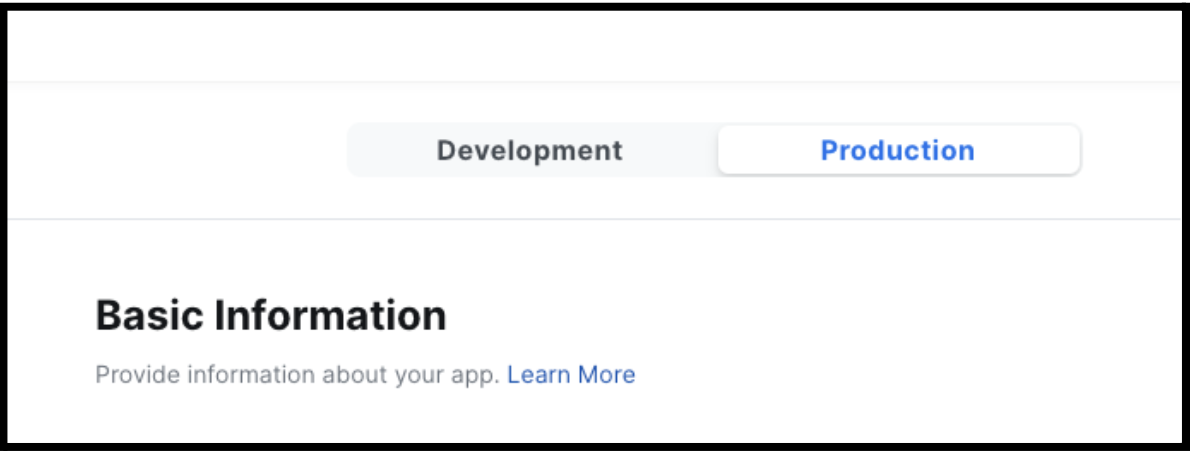
Select Production at the top of your app.
-
On the left, choose App Listing.
-
In Basic Information, follow the instructions to upload your logo.
Step 6: Test and preview your app
For information about testing your Zoom App, see Testing Zoom Apps.
Step 7: Prepare your app for production
If you intend to list your Zoom App publicly on the Zoom Marketplace for all customers to see and add, then you need to prepare your app for production and submit your app to Zoom Marketplace.
If you are developing an internal application for only users on your own Zoom account, such as a custom web app, you do not need to submit it to the Zoom Marketplace. This step is unnecessary for internal-only apps.
For more information, see the steps in Prepare your app for production.
Step 8: Submit apps for review
For information about app submission for review, see Submit apps for review.
Step 9: Publish your apps
For information on how to publish your apps in Zoom marketplace, see Publish your apps.
Resources
Enable developer tools
By default, we disable the developer tools in the webview instance of your app in the Zoom Client. To enable them, follow the steps below.
-
Exit the Zoom client on your computer.
-
Follow the steps below depending on your operating system.
-
Windows
Add the following to the
zoom.us.inifile.You can find this file in the
%appdata%/Zoom/datadirectory.[ZoomChat] webview.context.menu=true -
Mac
defaults write
[ZoomChat]
webview.context.menu=true
-
-
Restart the Zoom client.
-
Start a Zoom Contact Center engagement. Then open your application and right-click on it. From the Context menu, select Inspect.