Create a Zoom Marketplace app for Virtual Agent integrations
Create a Marketplace app in the Zoom App Marketplace to connect Zoom Virtual Agent with external APIs.
This app acts as the integration layer between your Virtual Agent and backend services such as CRM systems, ticketing platforms, or internal APIs.
A Marketplace app permits you to:
- Define custom actions that the Virtual Agent can invoke.
- Connect securely to external APIs.
- Expose real-time data to conversations.
These capabilities allow your Virtual Agent to retrieve and return dynamic data during user interactions.
How Marketplace apps fit in the integration flow
The Marketplace app sits between the Virtual Agent and your external API:
- The Virtual Agent triggers an action.
- The Marketplace app sends the request to your API.
- The API returns data to the Virtual Agent.
This pattern ensures secure, structured communication between Zoom and your external systems.
Next step
After you create the app, define API endpoints and actions. These endpoints serve as the interface your Virtual Agent uses to request and process external data.
For more information about how to create an app in the Zoom App Marketplace, see Create a Zoom App.
Create an admin-managed app
Create an admin-managed app in the Zoom App Marketplace to enable Virtual Agent integrations.
- Sign in to the Zoom Developer Portal.
- In the top navigation, choose Develop - Build App.
- Select General App as the app type. Then select Admin-managed app.
Admin-managed apps provide centralized configuration and are recommended for enterprise integrations.
Enable product surfaces
Enable the Virtual Agent surface for your admin-managed app so its actions are available within Zoom AI-driven conversations in supported Zoom products.
Select the Zoom products where your app will be available.
- Virtual Agent
- Contact Center
The app surface defines where your app runs within Zoom. For Virtual Agent integrations, you must enable Virtual Agent so actions are available in AI-driven conversations.
- Under Build your app, choose Surface.
- In Select where to use your app, choose Virtual Agent (or Contact Center) to make your app available in conversational experiences.
Configure OAuth Settings
Set up your API connection so your Virtual Agent can securely access external services.
What you do
- Under Build your app, choose Connect.
- Enter the base URL for your API (for example, https://api.yourservice.com).
- Select an authentication type (OAuth, API key, or other supported method).
- Provide required credentials (such as client ID, client secret, or API key).
Finish setup
- Add and save a test connection.
- Verify the authentication response succeeds.
- Confirm the connection is available to your Virtual Agent actions.
Result
Your app can securely call external APIs and return real-time data during conversations.
Add an API endpoint
Define the external endpoint your Virtual Agent calls during conversations.
To define the endpoint:
- Under Build your app, choose Connect - Endpoints.
- Select + New endpoint.
What to configure
| Field | Description |
|---|---|
| Action name | Unique name for the action (for example, GetOrderStatus) |
| HTTP method | Request method (GET, POST, and so on) |
| Endpoint URL | API endpoint path or full URL |
| Content type | Request format (for example, application/json) |
| Input parameters | Fields sent in the API request |
| Output mapping | Fields returned and mapped to the Virtual Agent |
Result
Creates an action that securely invokes your REST API and returns structured data.
Define Virtual Agent scopes
Select the minimum permissions your app needs to access Zoom Virtual Agent features.
What scopes do
Scopes control which API methods your app can call and what data it can read or modify (for example, knowledge base articles or contact center resources).
How to choose scopes
- Under Build your app, choose Scopes and add your scopes.
- When you configure scopes:
- Select only the permissions your app requires (least privilege).
- Avoid adding unused scopes to reduce review time and risk.
- Confirm each scope maps to a feature your app uses.
Common scopes for Virtual Agent
| Setting | Value |
|---|---|
| Redirect URL | <your-redirect-url> |
| Required scopes | zva:read, zva:write, contact_center:read |
What these scopes allow
zva:read— Read Virtual Agent resources.zva:write— Create or update Virtual Agent resources.contact_center:read— Access Contact Center data that the agent uses.
Finish setup
- Save your app configuration.
- Submit scopes for review.
- Use only approved scopes after publication.
Result
Your app can securely access and manage Virtual Agent resources with only the permissions it needs.
Create custom actions
Define actions and triggers so your Virtual Agent can call external APIs and respond to user events.
What actions and triggers do
- Actions perform operations (for example, get order status or update a record).
- Triggers start actions based on user intent or events.
How the process works
- A trigger detects user intent (for example, "Where is my order?").
- The trigger invokes the action.
- The action calls your external API.
- Your service returns data.
- The Virtual Agent uses the response to generate a real-time reply.
How to create an action or a trigger
To create an action and trigger:
1. Under **Build your app**, choose **Actions and Triggers**.
2. Select Actions or Triggers.
3. For **Actions**, select **+ New action**.
For **Triggers**, select **+ New trigger**.
The following describes how to configure your action.
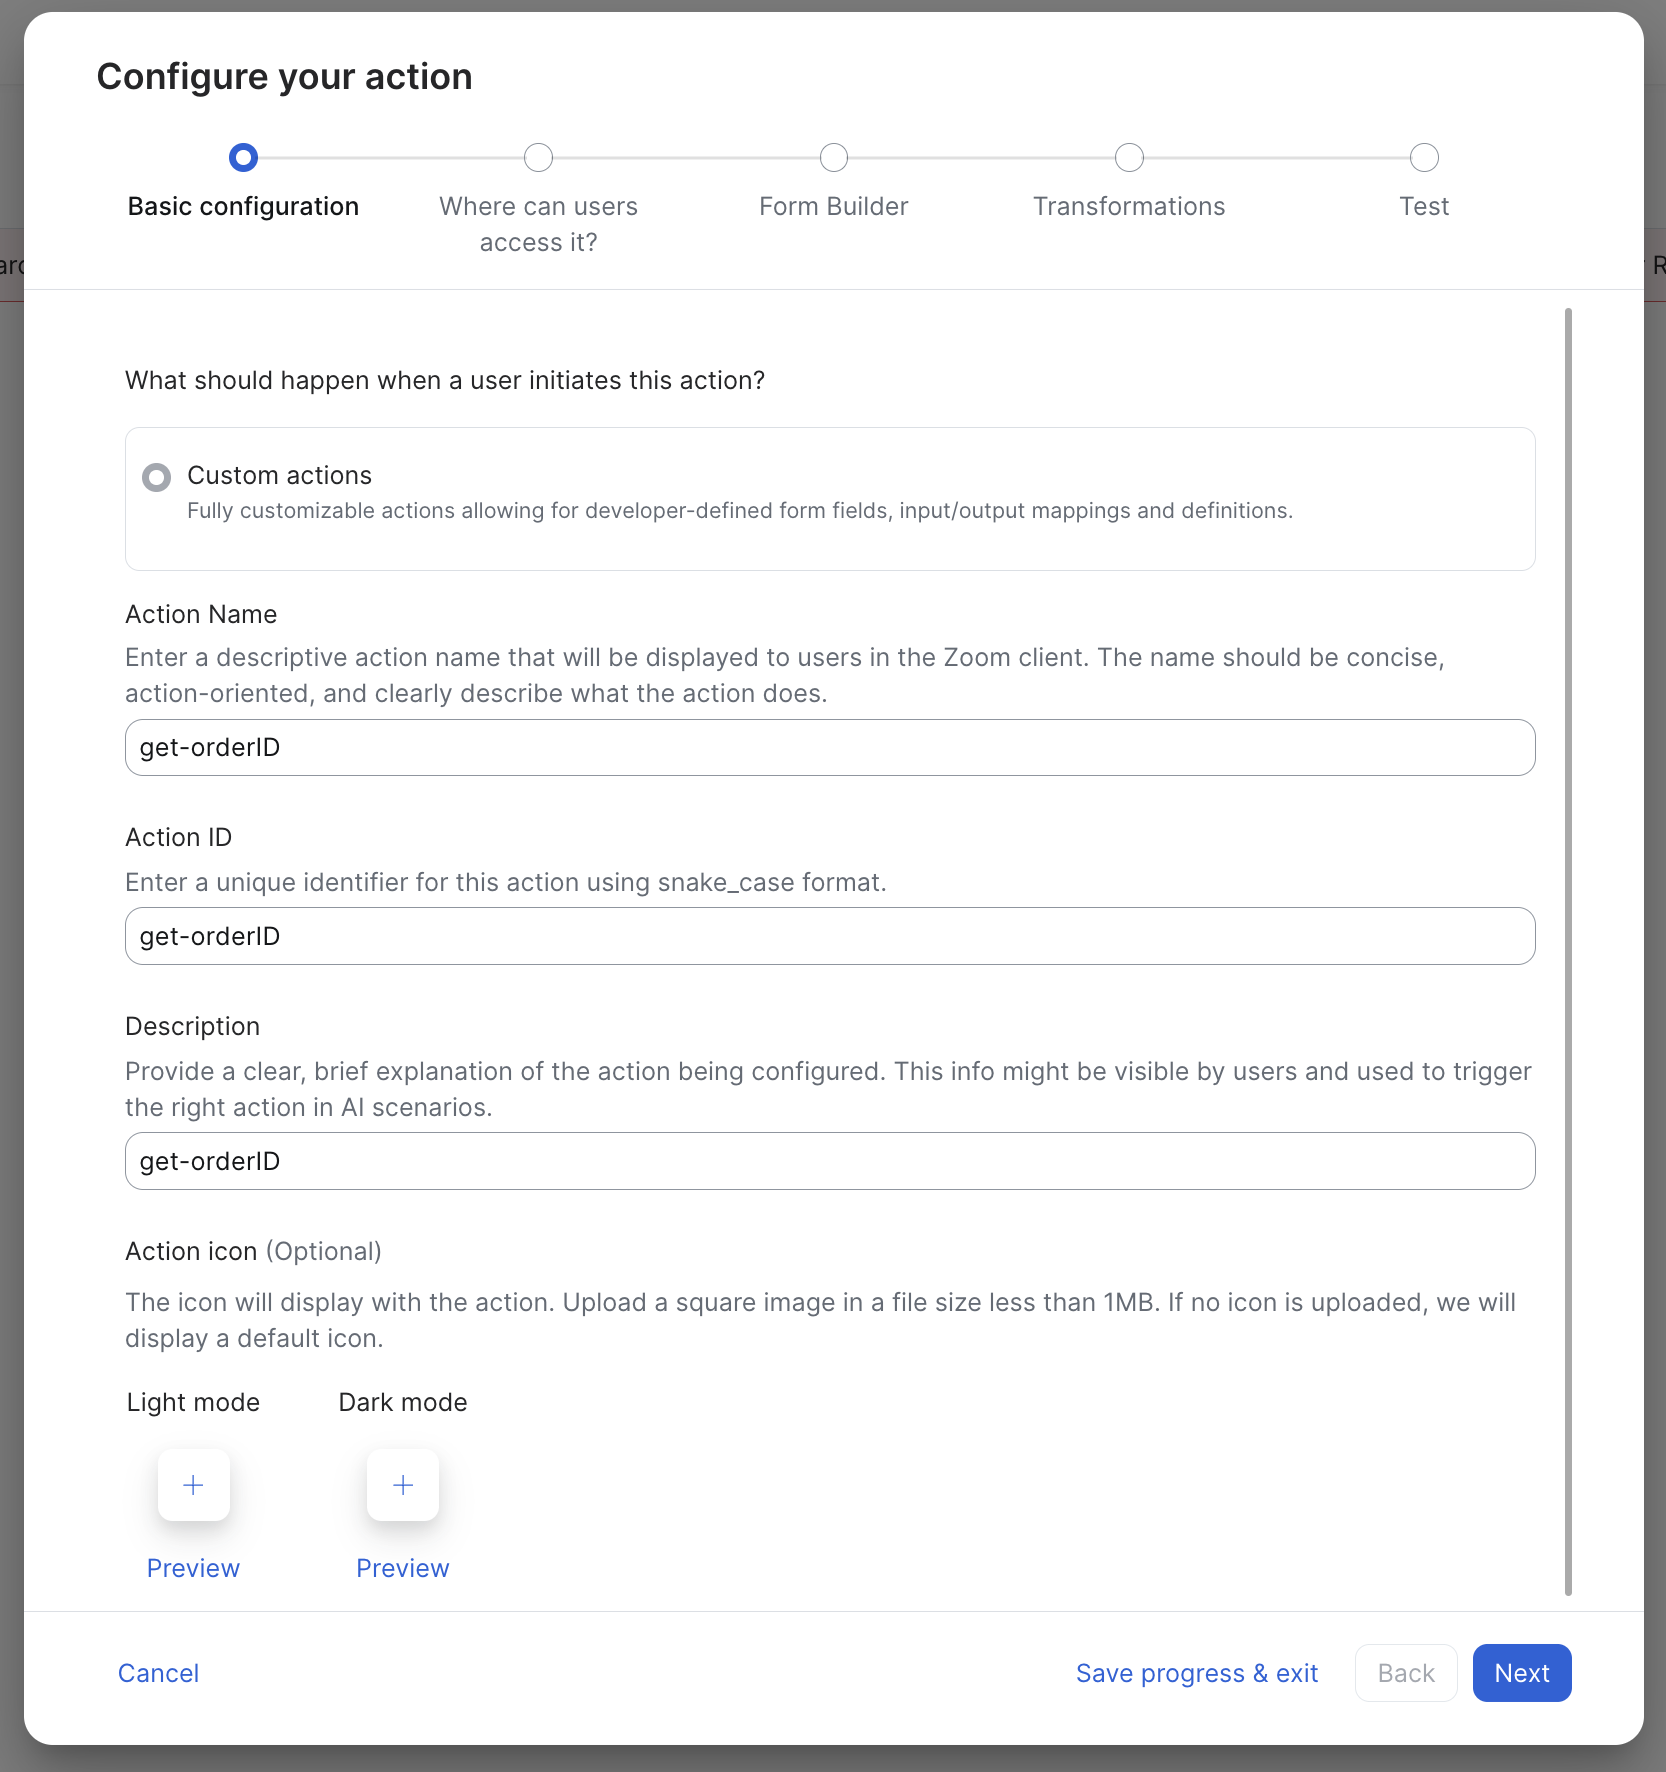
1. Configure the action (basic)
Provide clear, user-facing details so the action is easy to discover and invoke.
You must configure the:
- Action name — concise and descriptive
- Action ID — unique identifier (snake_case)
- Description — brief explanation of what the action does
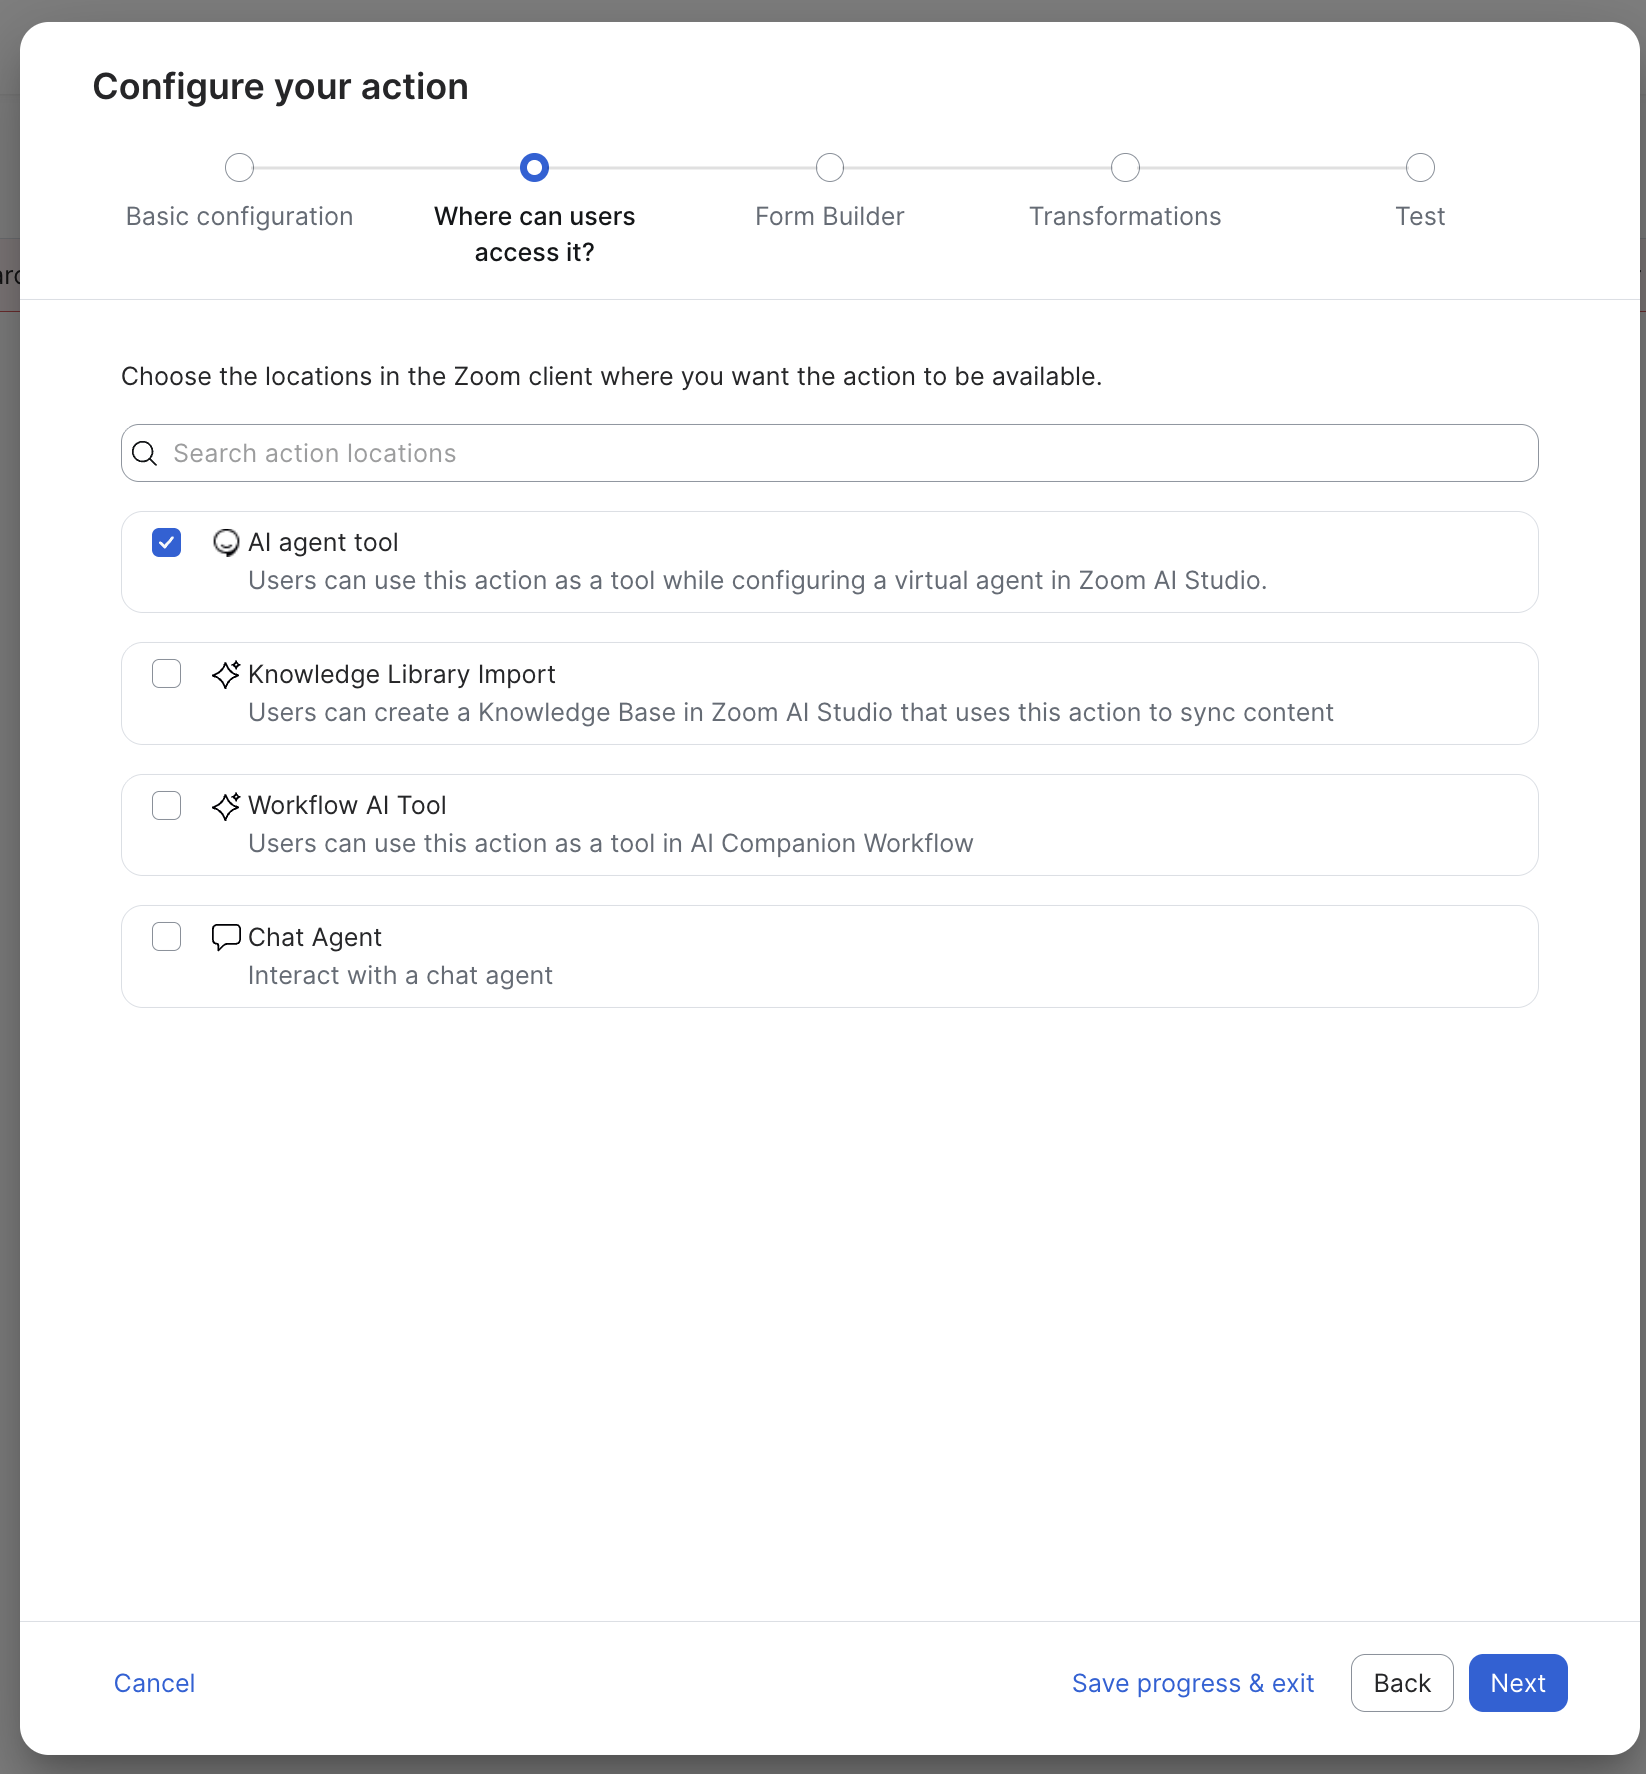
2. Choose where the action is available
Select the surfaces where users can access the action.
- AI Agent Tool — use in Zoom AI Studio agents
- Knowledge Library Import — sync content to a knowledge base
- Workflow AI Tool — use in AI Companion workflows
- Chat Agent — invoke during chat conversations
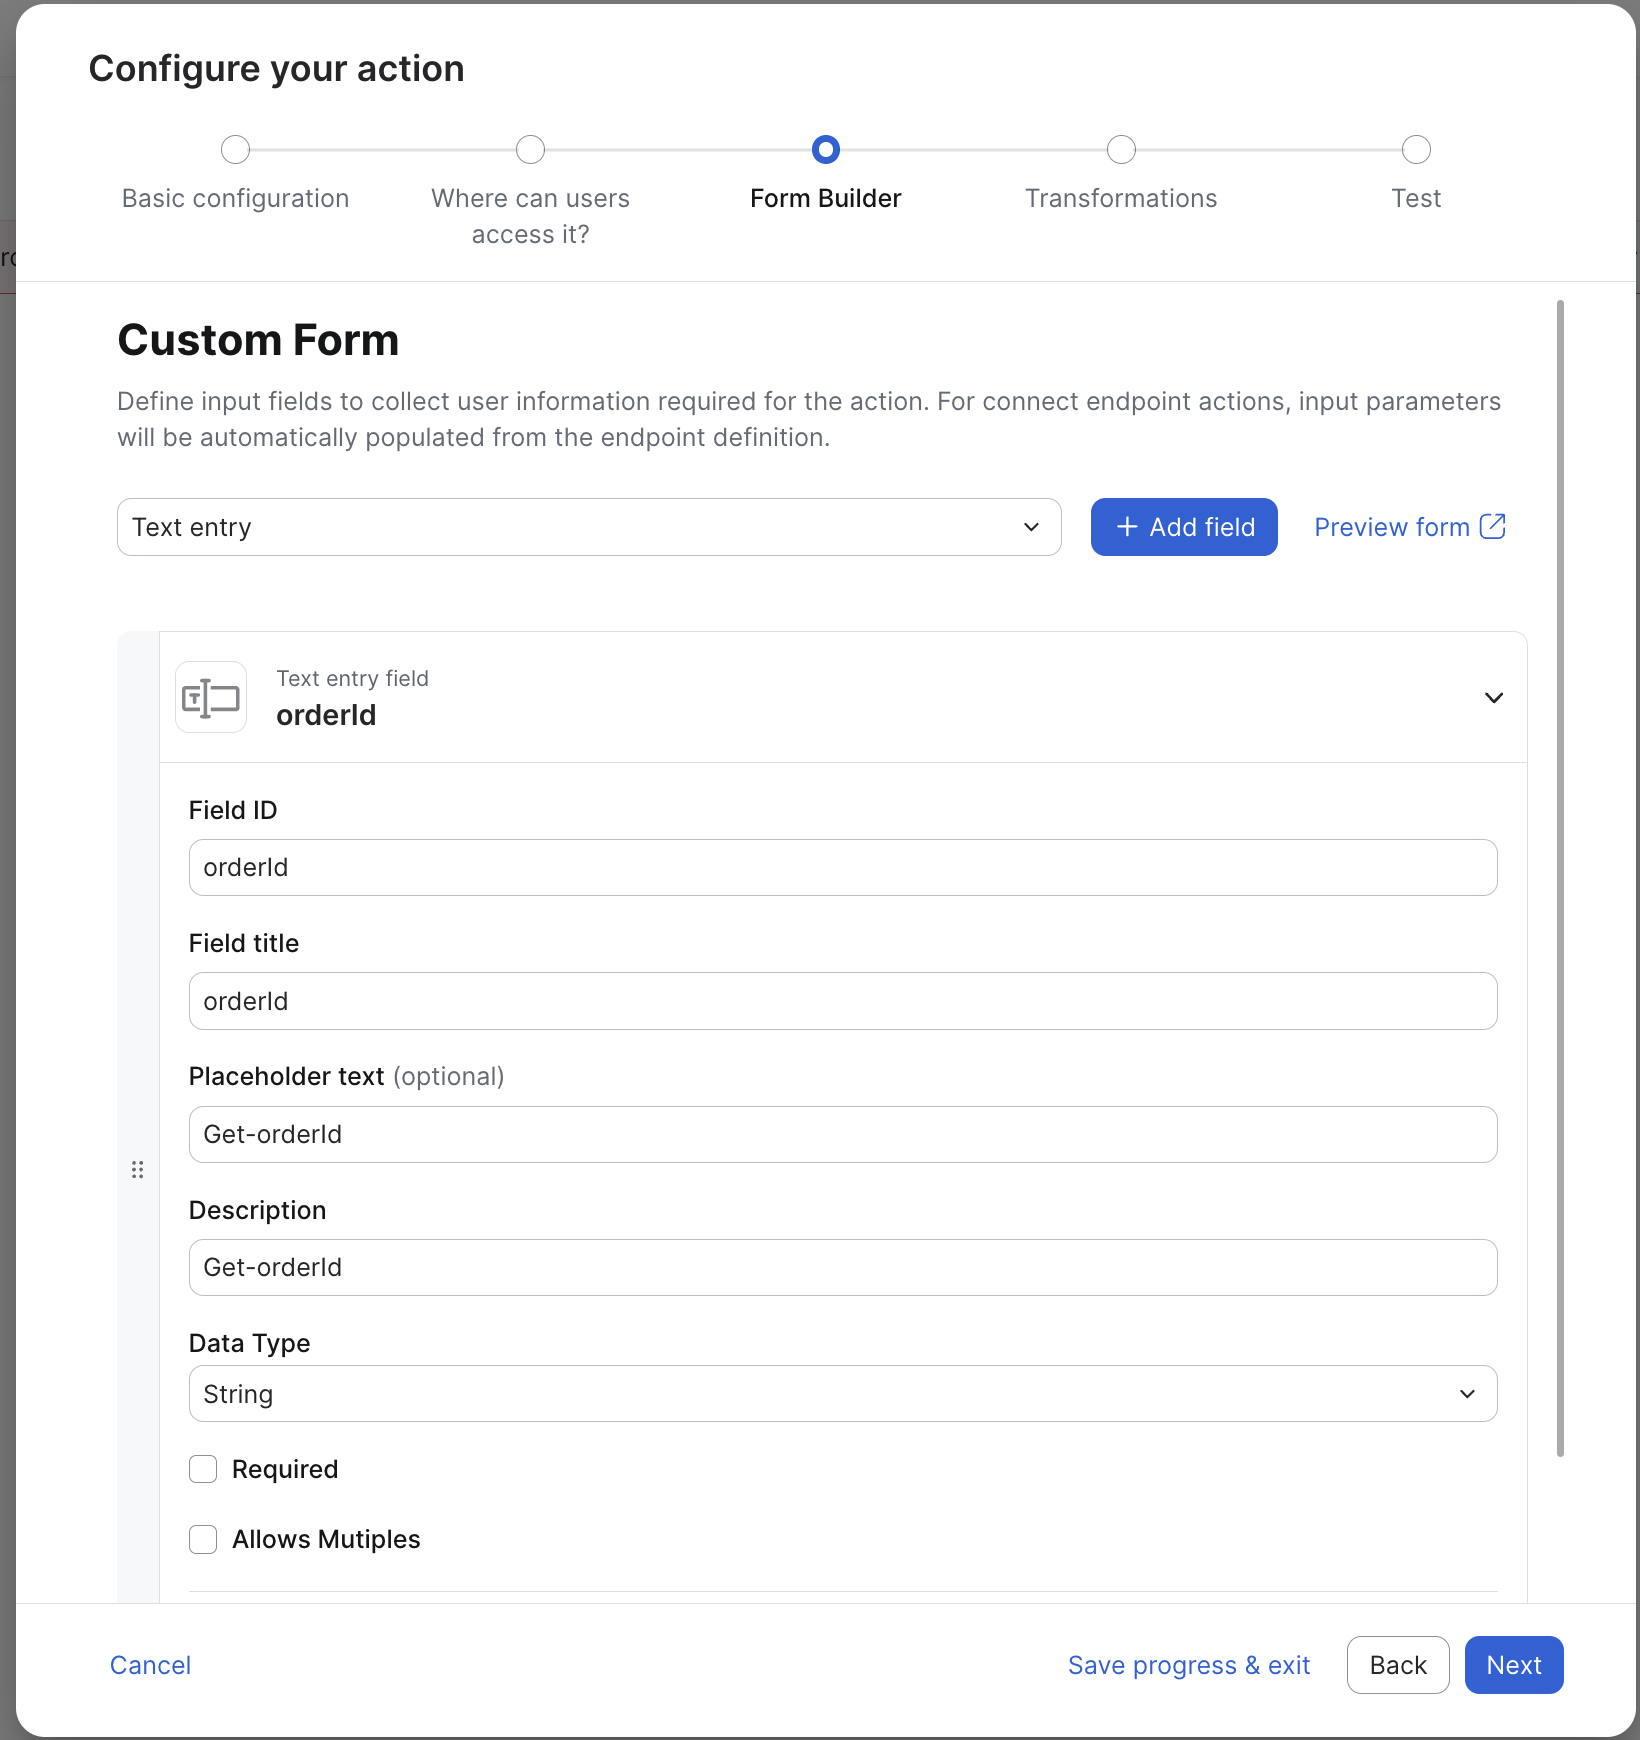
3. Define input fields (form builder)
Define the input fields to collect the data your API needs at runtime.
**Example**
- Field: orderID
- Type: Text (required)
- Description: "Enter the order ID"
**Form types**
You can choose from two types of forms:
- Connection-level forms — capture static values during app setup (for example, API keys, base URLs).
- Action-level forms — collect dynamic inputs each time the action runs.
**Result**
Your Virtual Agent can execute API-backed actions and deliver dynamic, context-aware responses during conversations.
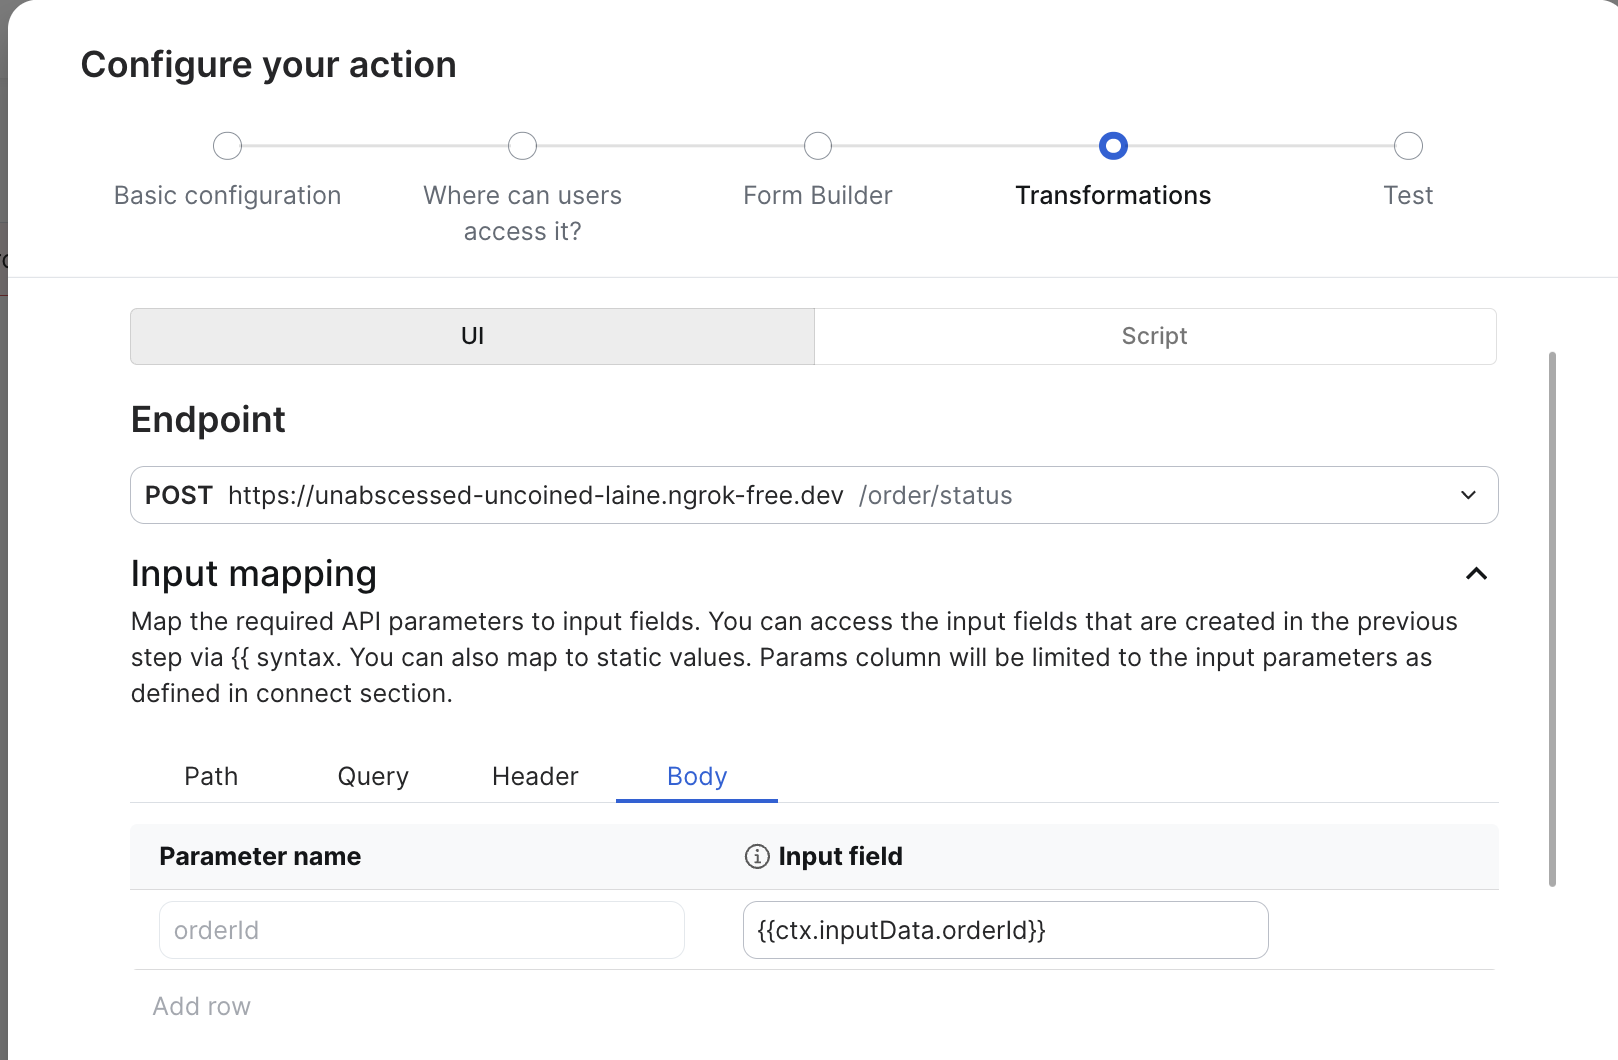
4. Configure the request payload with action transformations
To configure action transformations, you can use either:
-   A visual UI or custom JavaScript.
-   The UI for simple mappings and JavaScript for advanced logic, such as chaining API calls or transforming complex responses before sending data.
Map inputs and outputs
During transformation, define how data flows through the action.
- Input mappings: Map fields such as orderId to corresponding action parameters.
- Output mappings: Specify which response fields are returned to the user interface or form.
Keep input and output mappings consistent to ensure reliable execution and predictable results.
Define the request body
In Input mapping, you can specify the payload sent to the external API.
{
    "orderId": "{{customer.inputData.orderId}}"
}
The system dynamically populates the customer.inputData.orderId variable from user input during the conversation. This approach ensures the API receives the correct order ID.
Transform data with JavaScript (optional)
Use JavaScript to extract only required fields and return a structured response instead of the full payload. This approach provides fine-grained control over data shaping and transformation logic.
Define output variables
Define output variables to use API response data in the Virtual Agent. Map each response field to a variable that AI Studio can reference during conversations.
Why output mapping matters
Output mapping helps you:
- Align API field names with your app’s naming conventions.
- Control which fields appear in the final response.
Control response parameters
Choose how you manage response fields.
- Block fields at the Connect Endpoint level.
- Allow all fields through the endpoint and filter them in output mapping.
Example output fields
| Field | Description |
|---|---|
status | Current order status |
estimatedDelivery | Estimated delivery date |
Finalize and publish
- Run a local test. Then submit the app for approval.
- After approval, open AI Studio.
- In Tools, confirm the action appears.
The system also replicates the action in the Marketplace so other developers can find and integrate it.
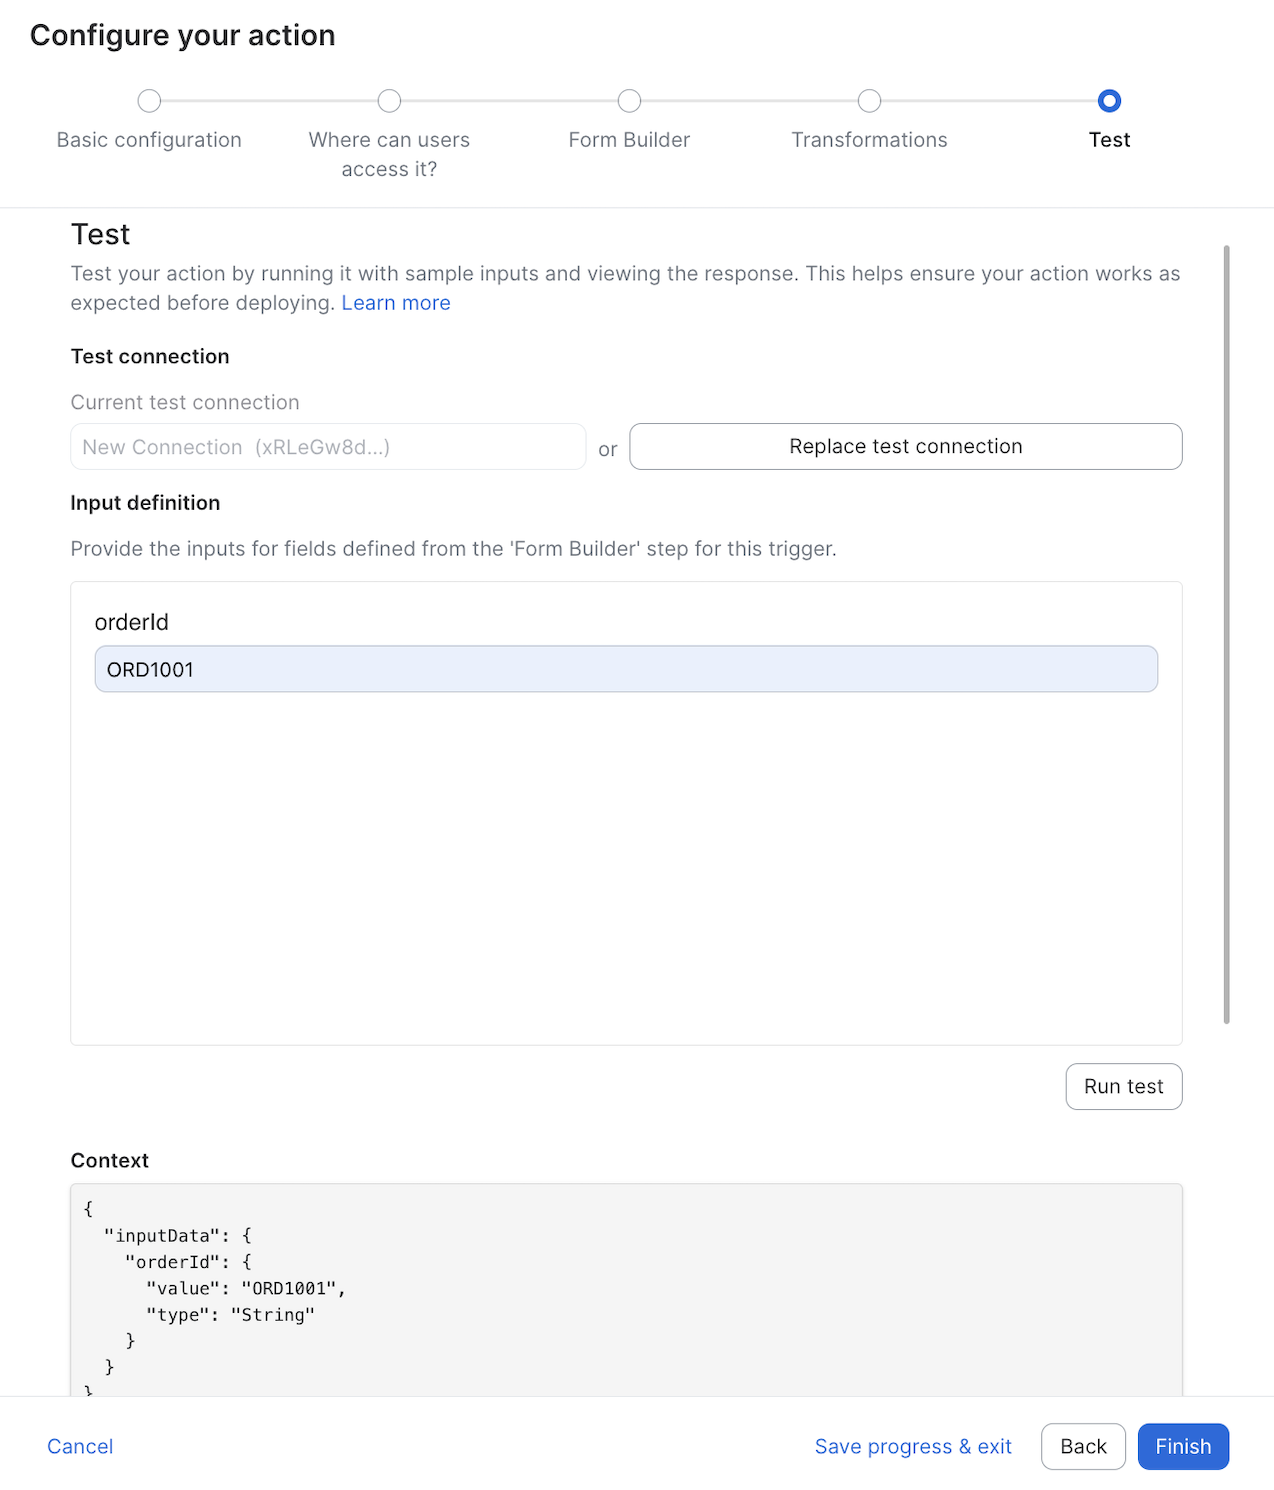
Publish and sync the action in AI Studio
How to publish and sync an action
- Go to AI Studio.
- Select the Tools Template.
- Open Marketplace.
- Choose Sync.
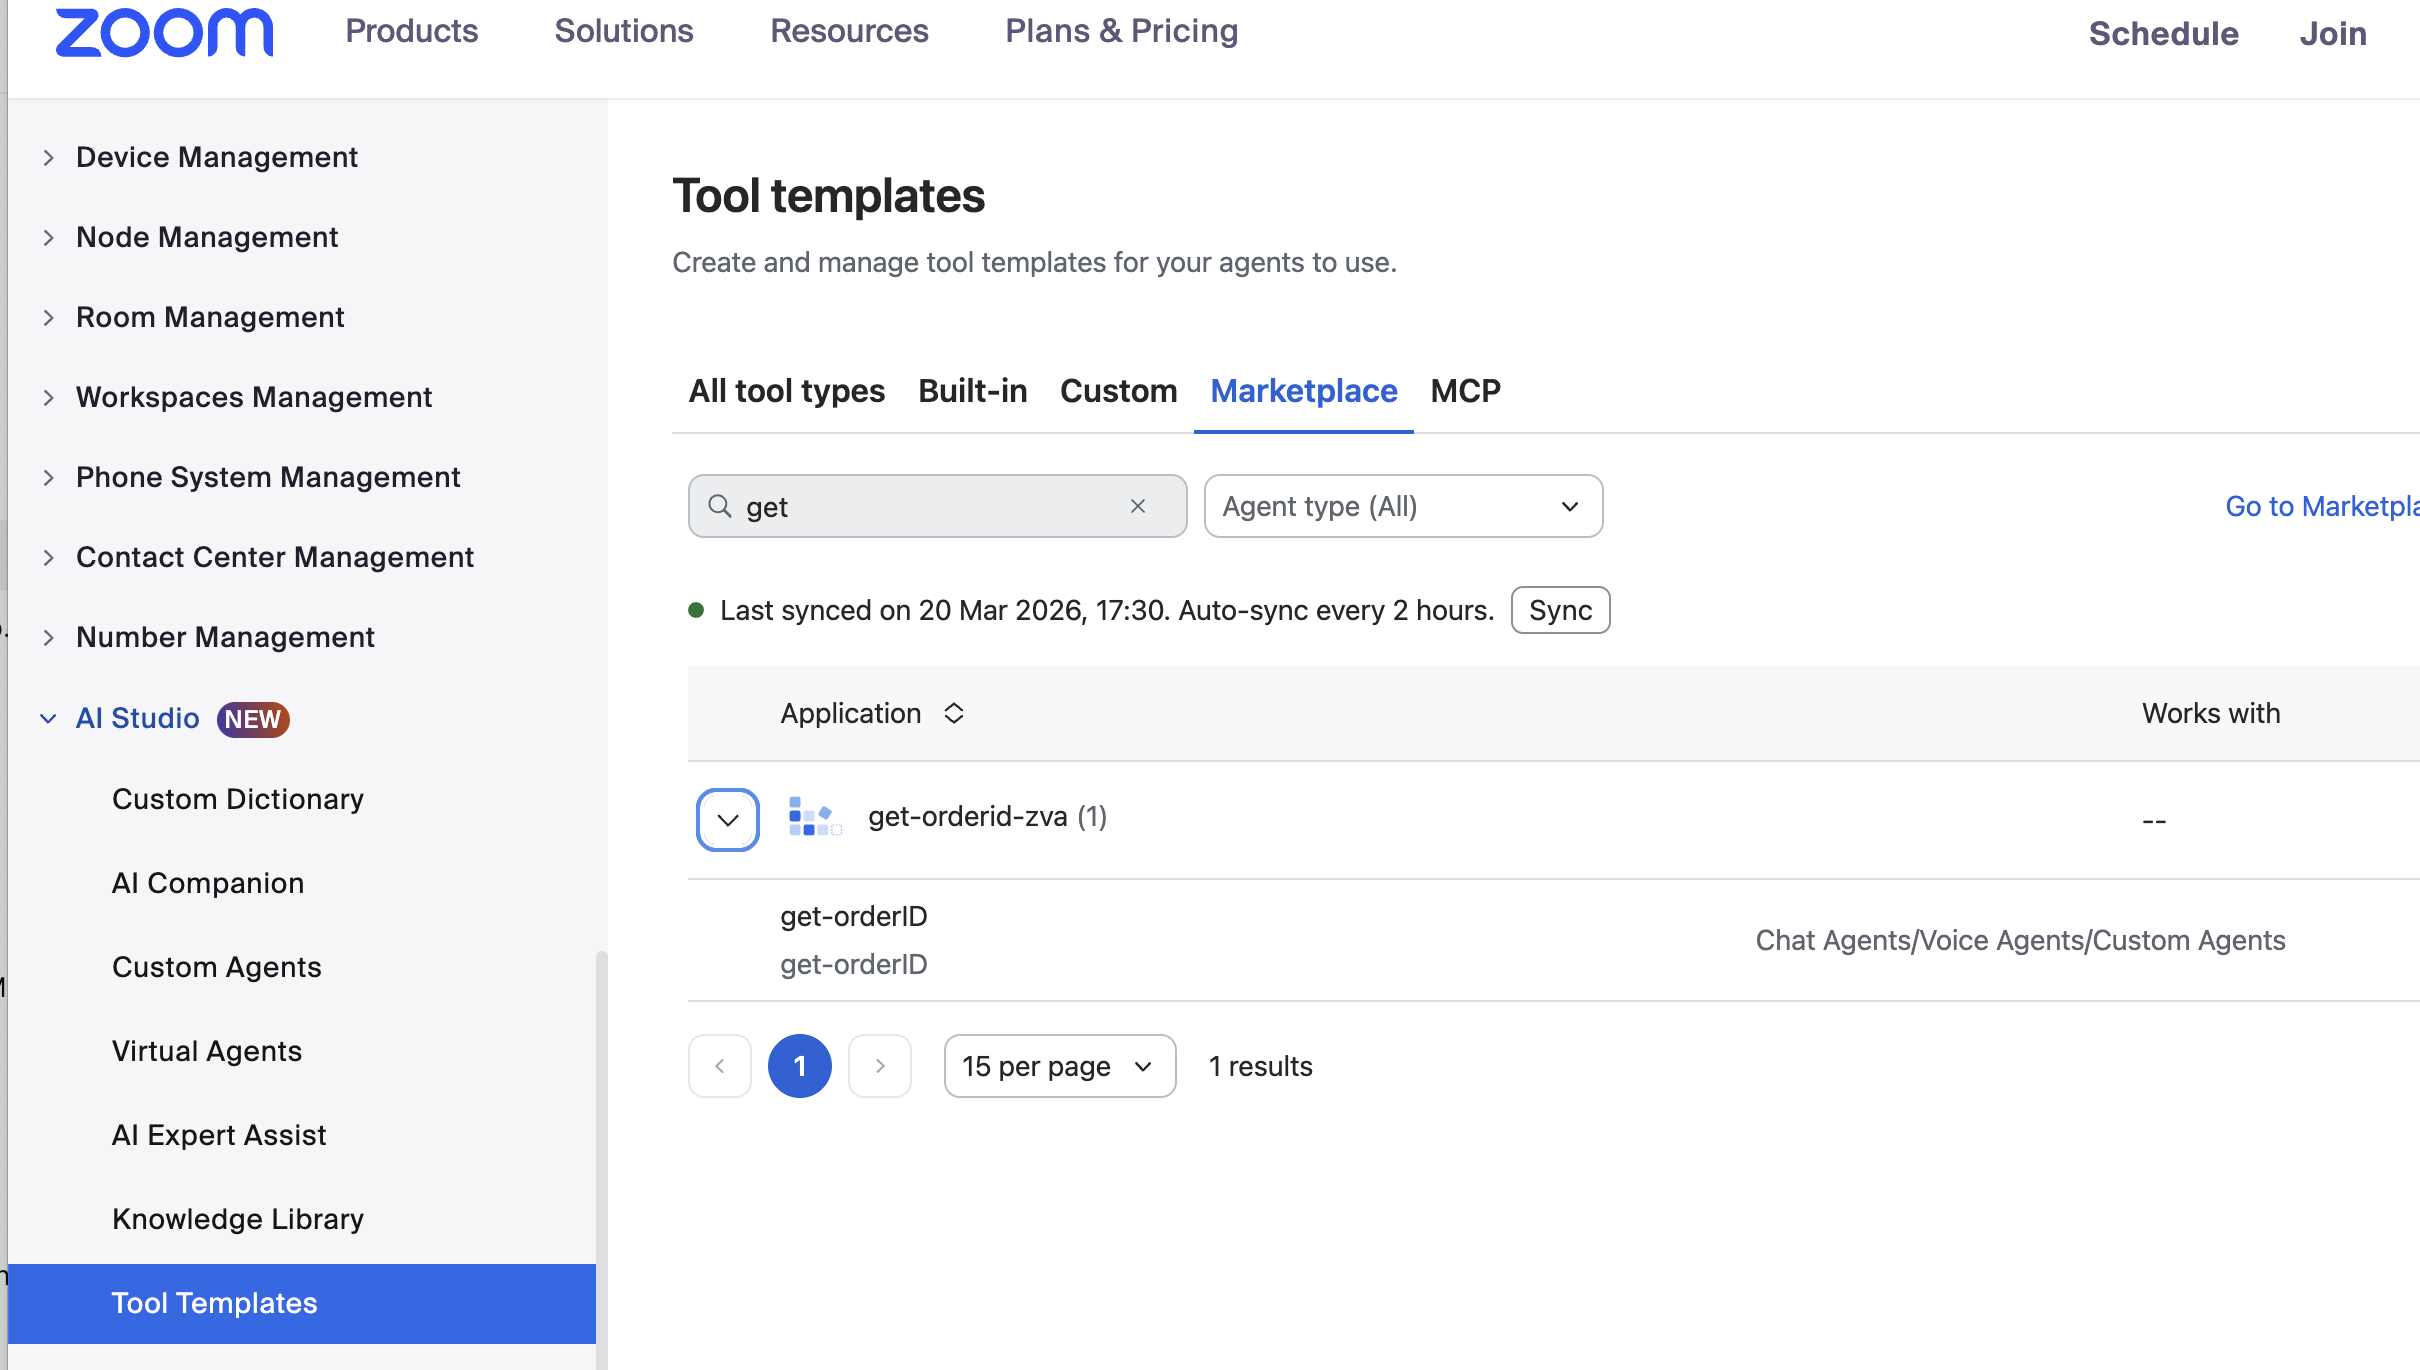
What happens after you sync
Syncing completes the setup and makes the action available for other developers to copy and integrate.