Unsplash Chatbot for Zoom Team Chat
How to Build a Zoom Chatbot from scratch using Node.js, PostgreSQL, the Unsplash API, and Heroku.
In this article we will build a Zoom Chatbot that sends Unsplash photos! You can code along or you can skip the coding and one click deploy the completed code to a Heroku server.
Table of contents:
- Local Chatbot on your own Zoom account
- Encrypted database (optional)
- Production deployment (optional)
- Publish to the Zoom App Marketplace (optional)
Section 1. Local Chatbot on your own Zoom account.
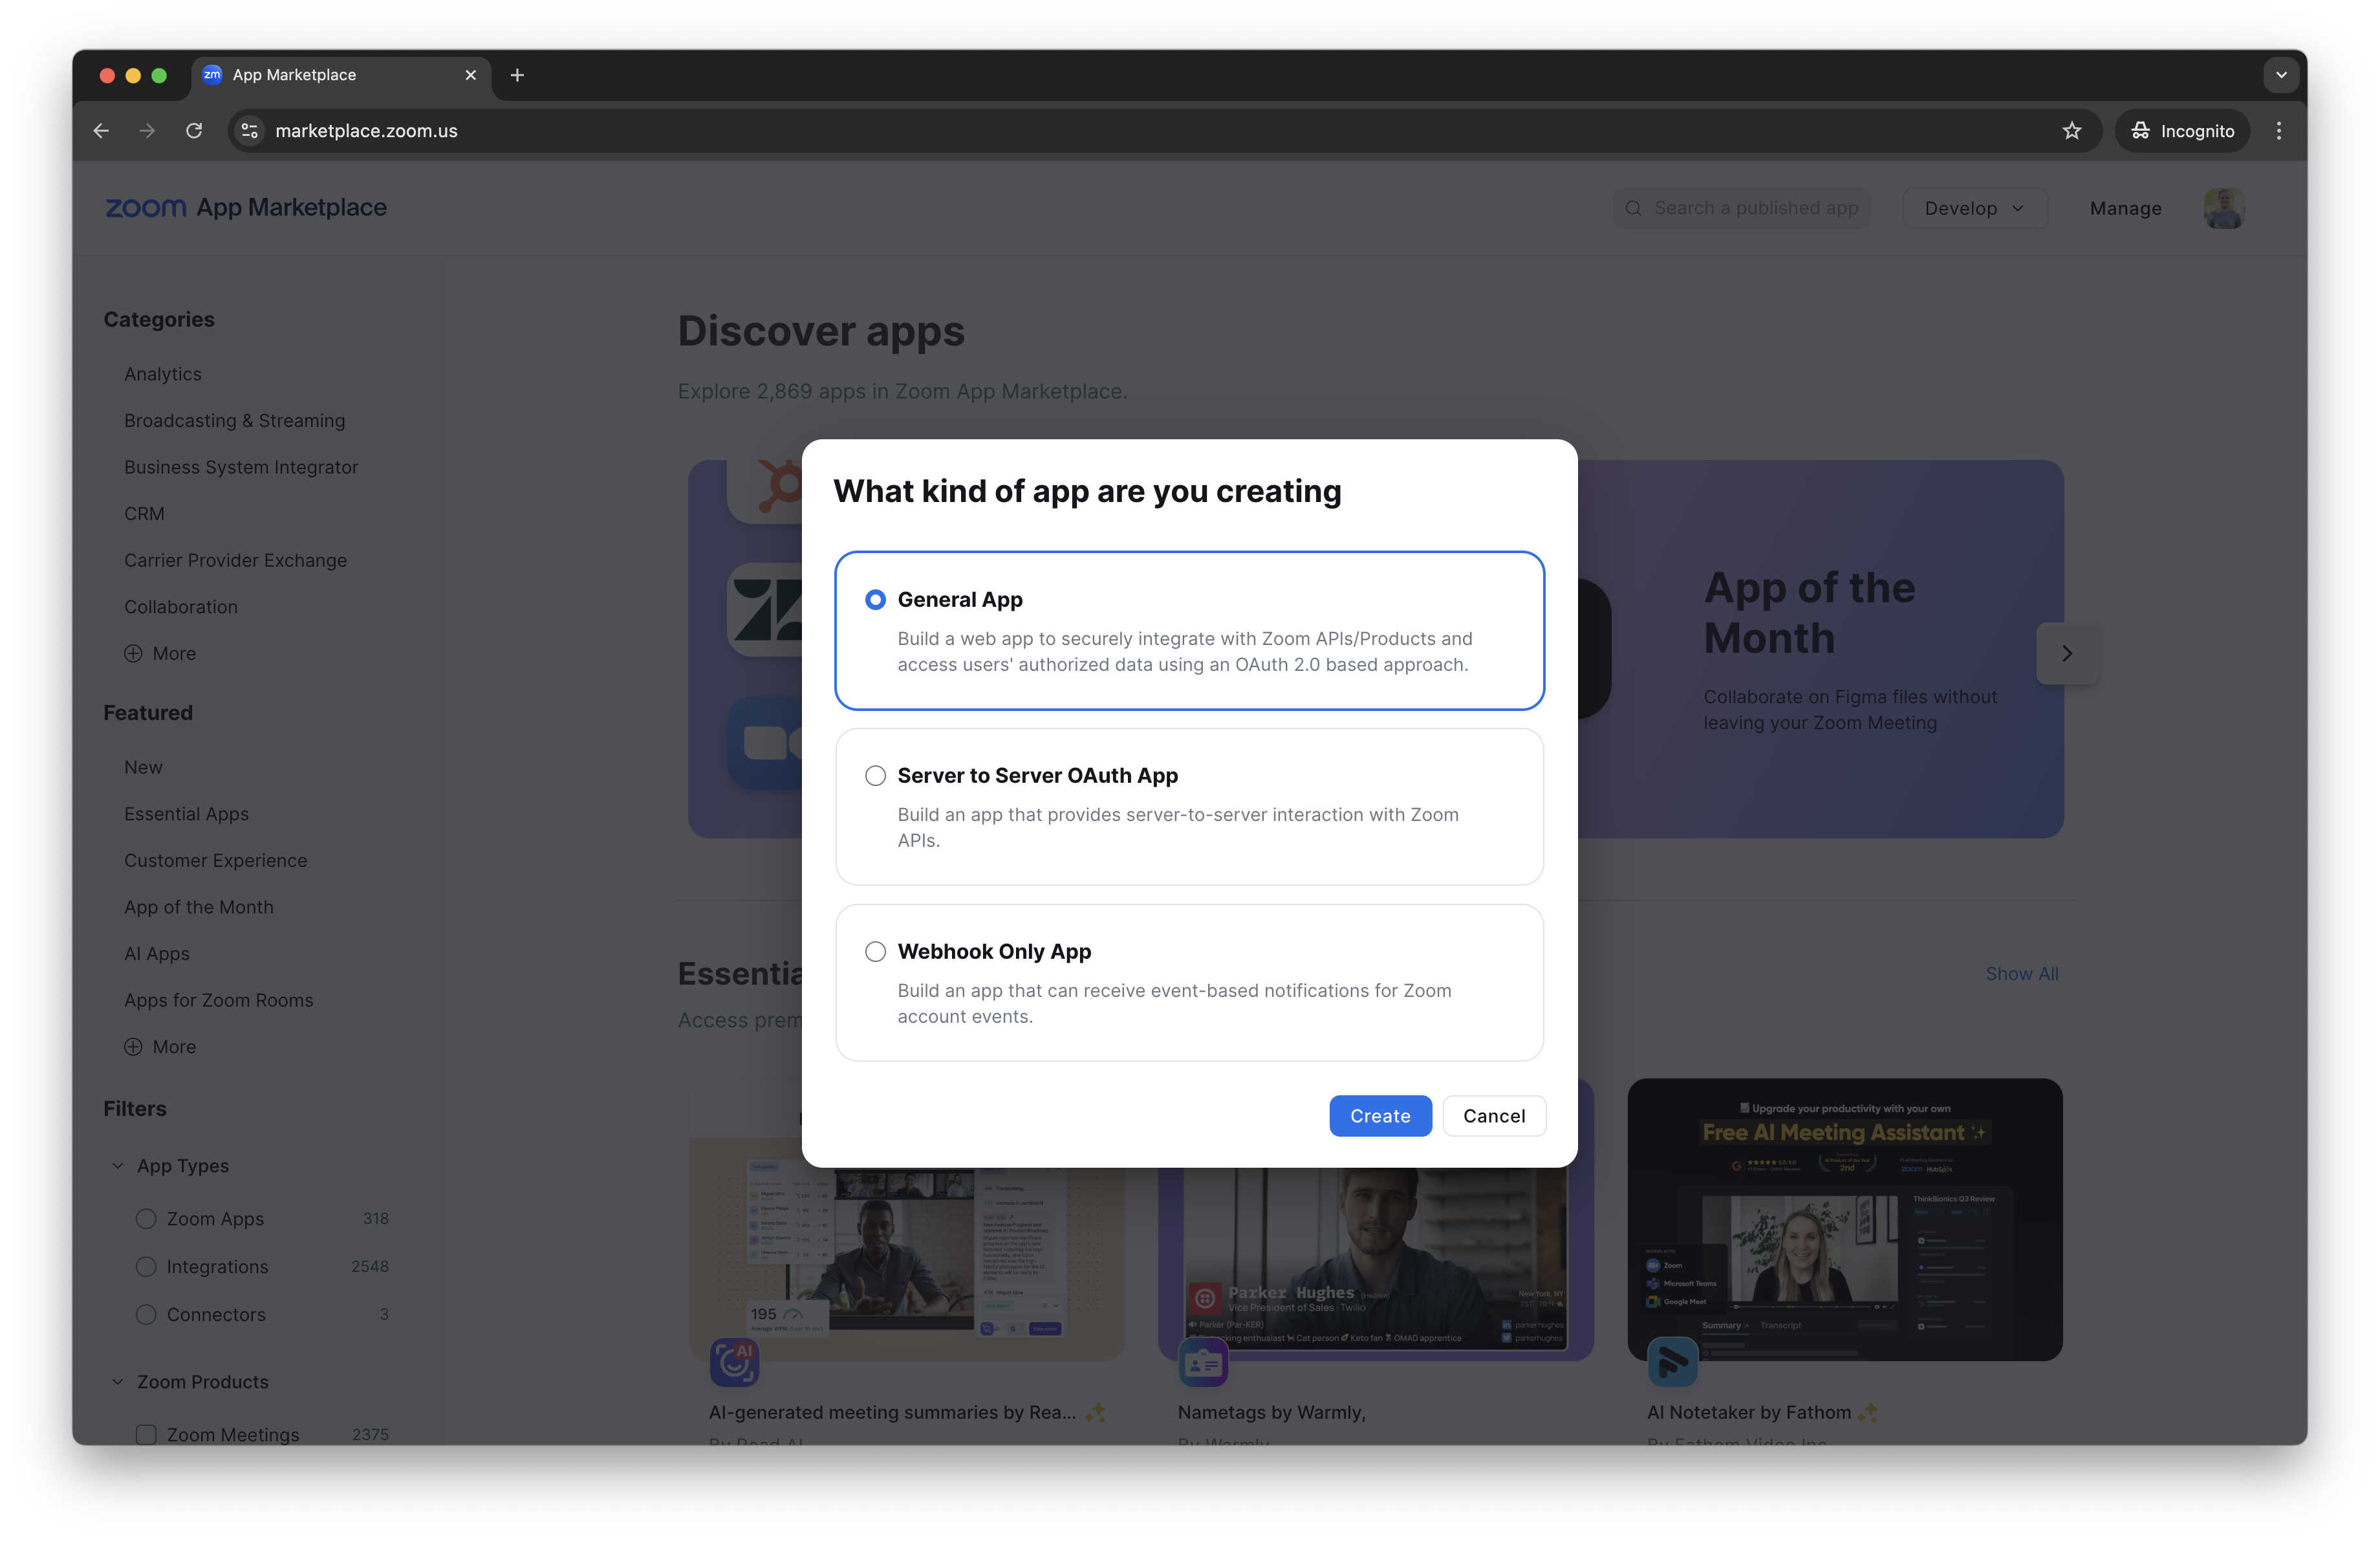
Create an App on the Zoom App Marketplace.
On the popup, click General App and click Create:
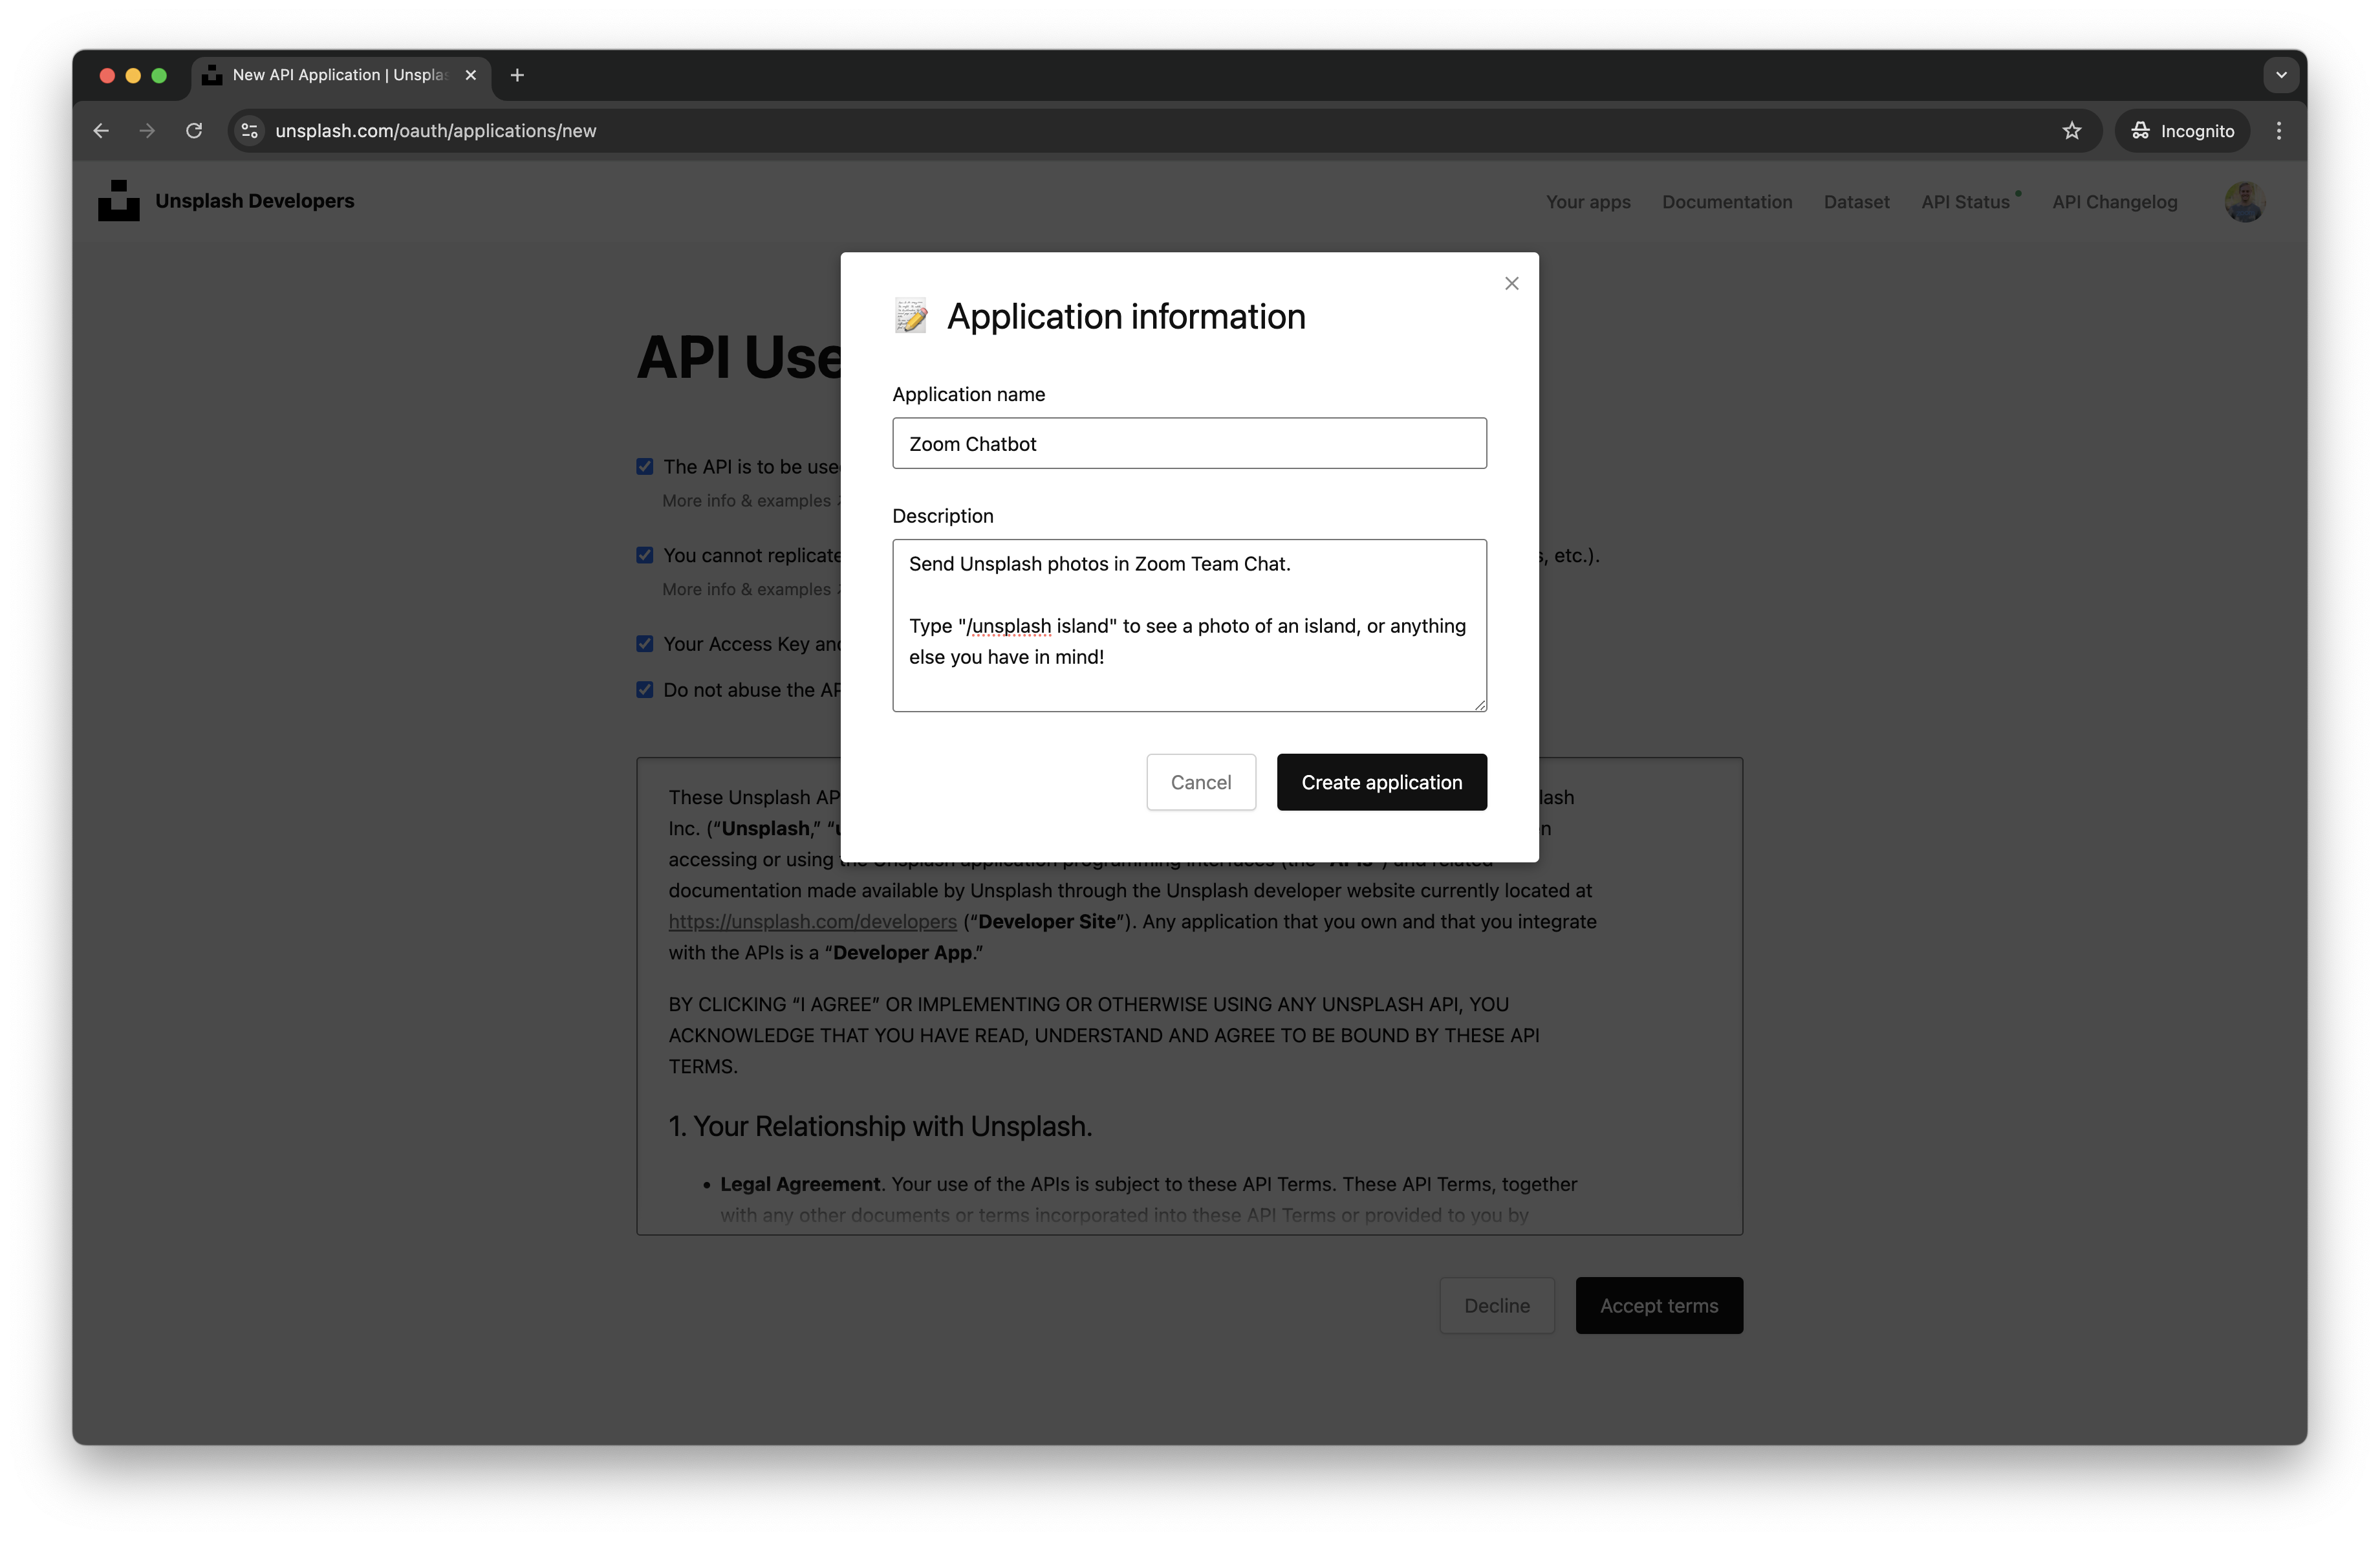
Give your application a name and description, and click Create application:
Install Node.js if you don't have it already.
Create a new folder where you want your Zoom Chatbot to live:
$ mkdir zoom-chatbot
$ cd zoom-chatbot
Initialize git and npm. For the npm prompts just hit enter to use the default settings:
$ git init
$ npm init
Create your index.js, .gitignore, and .env files:
$ touch index.js .gitignore .env
Add these two lines to your .gitignore file:
.env
node_modules
Add the start script to your package.json file in the scripts object:
"start": "node index.js"
Then install these dependencies:
$ npm install express dotenv body-parser --save
Add the following Node.js express server skeleton to your index.js file. It includes routes for a basic landing page, OAuth Redirect URL, and our Bot Endpoint URL:
require("dotenv").config();
const express = require("express");
const bodyParser = require("body-parser");
const axios = require("axios");
const app = express();
const port = process.env.PORT || 4000;
app.use(bodyParser.json());
// routes:
app.get("/", (req, res) => {
    res.send("Welcome to Unsplash for Zoom Team Chat!");
});
app.get("/authorize", (req, res) => {
    res.redirect(
        "https://zoom.us/launch/chat?jid=robot_" + process.env.ZOOM_BOT_JID,
    );
});
app.post("/unsplash", (req, res) => {
    console.log(req.body);
    res.send("Chatbot message received");
});
app.listen(port, () =>
    console.log(`Unsplash for Zoom Team Chat listening on port ${port}!`),
);
Now let's run our app! I prefer to run my app with nodemon which reloads my index.js file every time I make a change and save:
$ npm install nodemon -g
$ nodemon
Go to localhost:4000 in your browser, and you should see “Welcome to Unsplash for Zoom Team Chat!”
Great our Node.js server works!
We need our Zoom Chatbot to be able to send requests to our localhost server. To do that we can use a tool called Ngrok to turn our localhost:4000 into a live web server.
After installing Ngrok, keep your localhost server running, open a new terminal tab in your project root and start your ngrok server. (You may need to add ngrok to your path.)
$ ngrok http 4000
Copy the https url (for me it's https://hardy-moved-mako.ngrok-free.app), paste it in your browser, and hit the enter key. You should see the same page as when you went to localhost:4000, but now your server is accessible outside of your local machine.
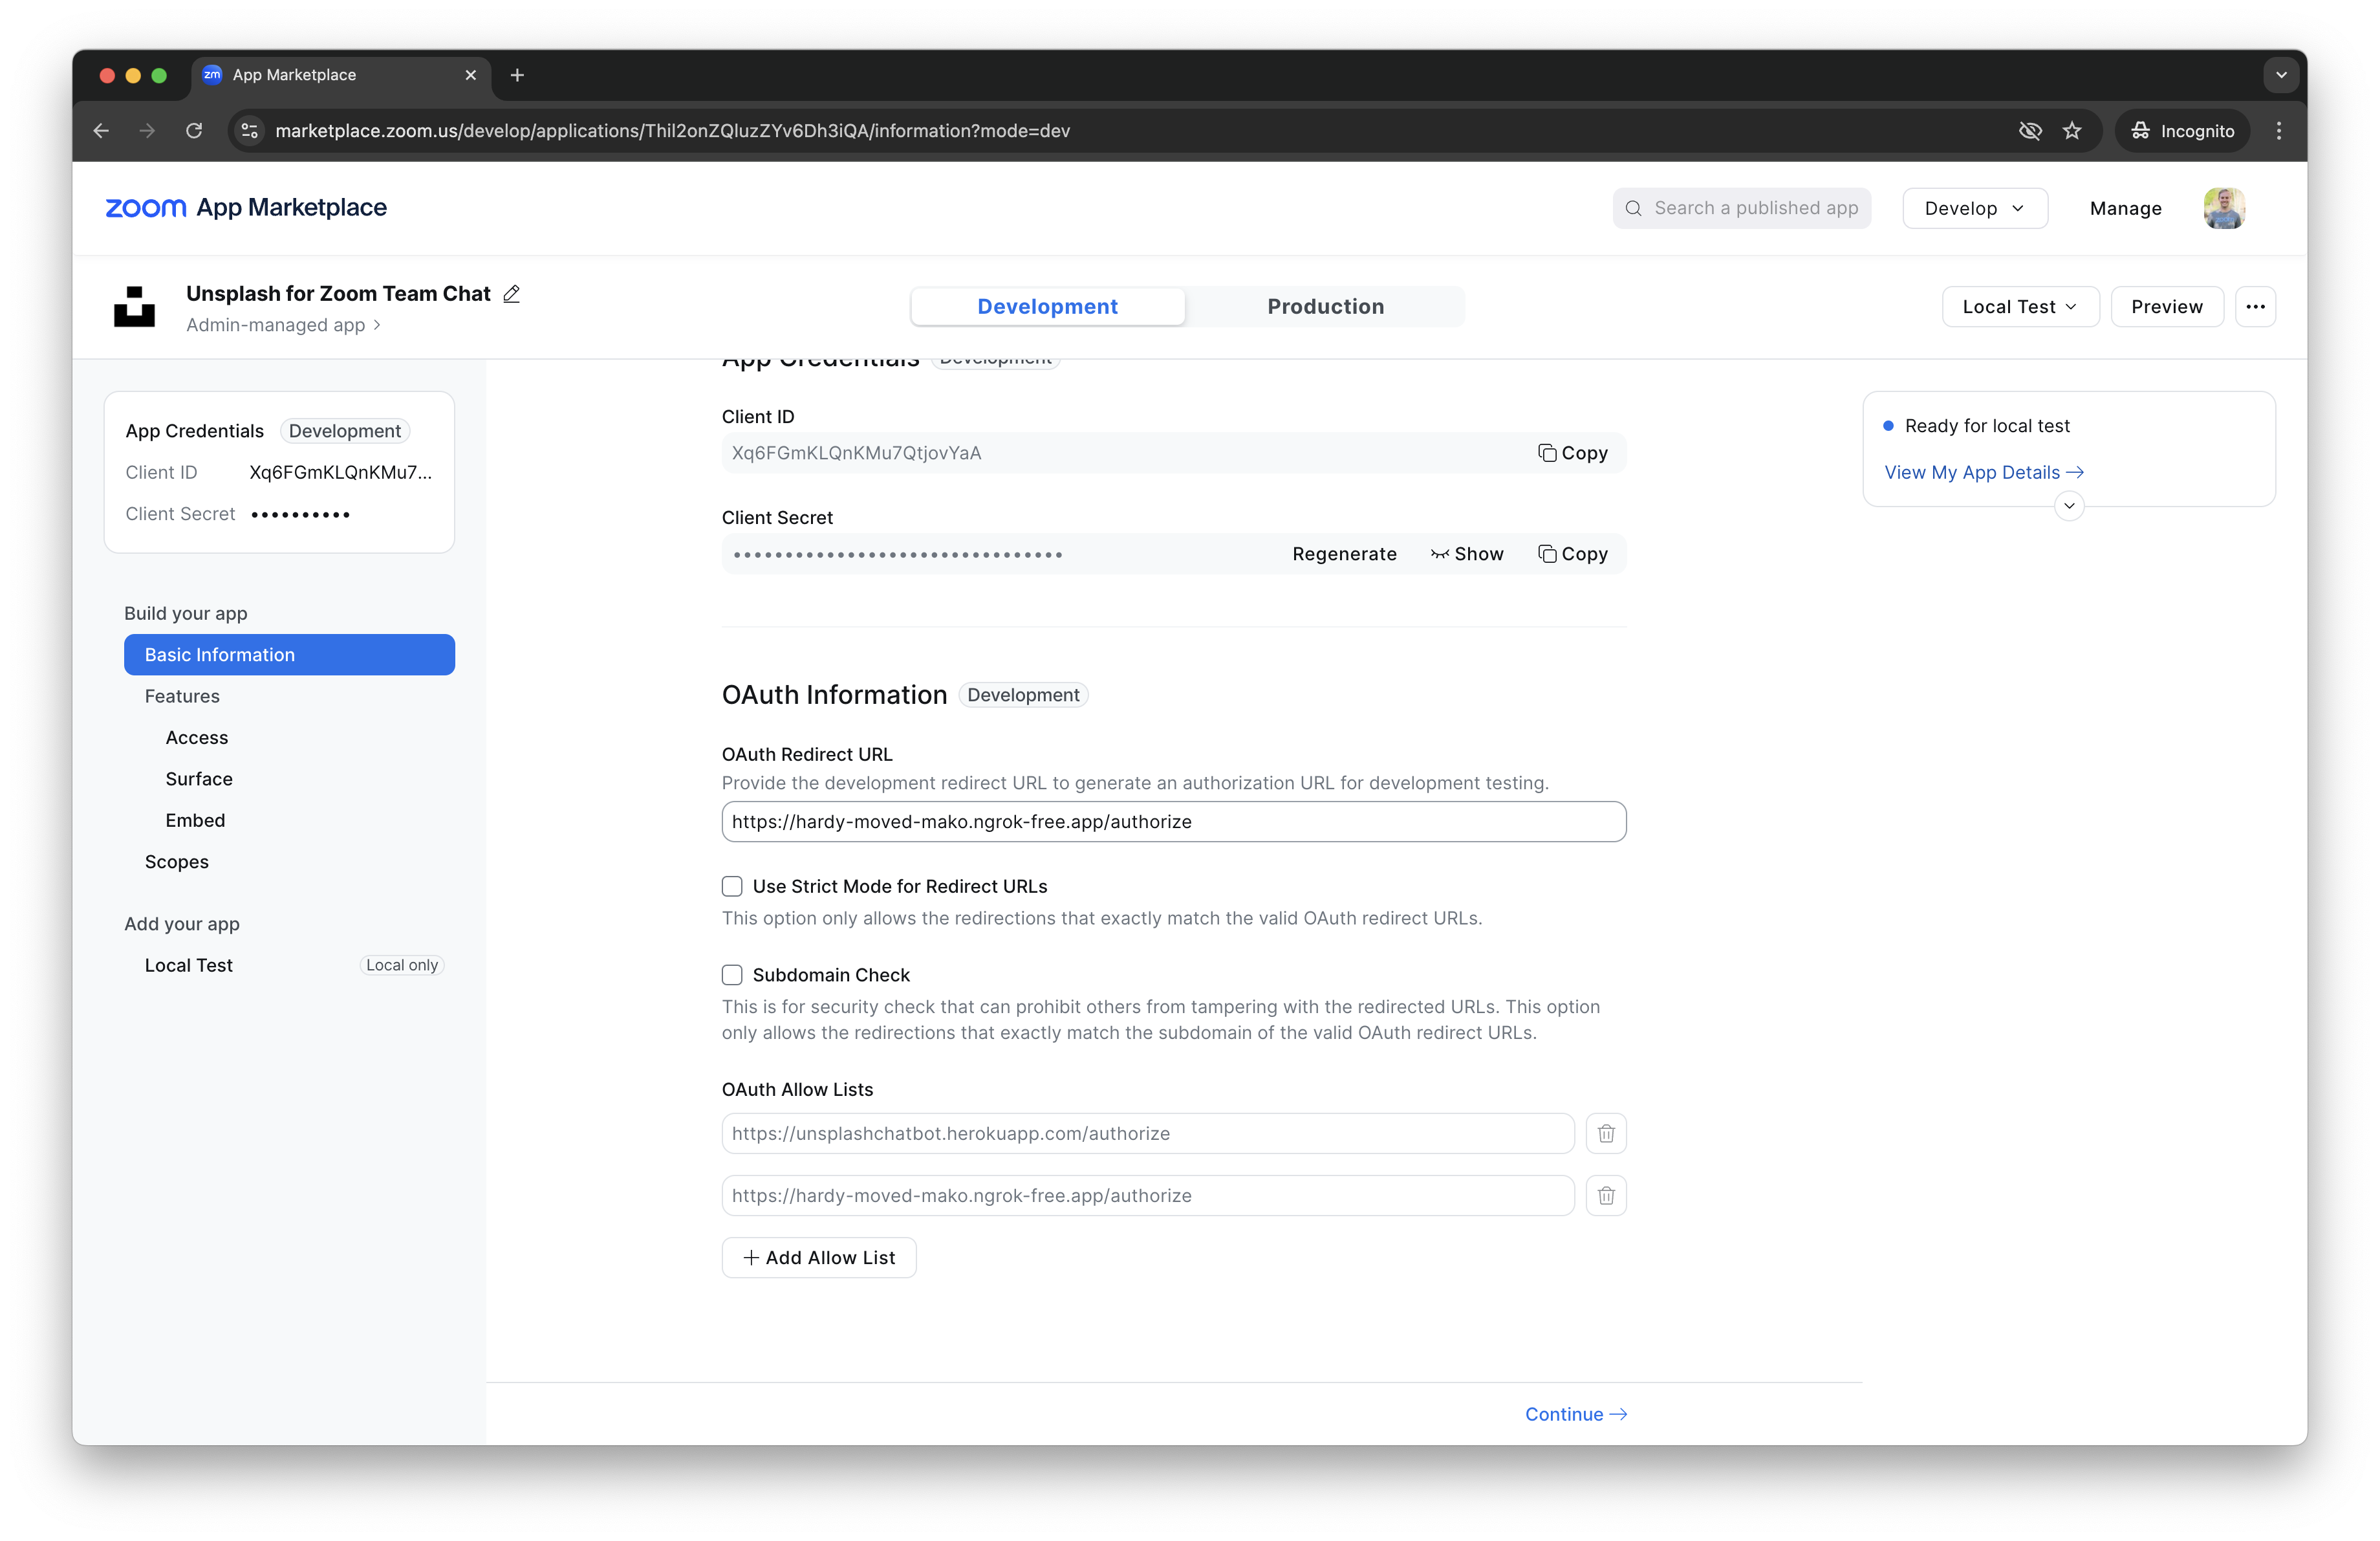
Now we want to add the ngrok url to our Zoom App and configure what our Zoom Chatbot can do by setting the scopes. Go to the Zoom App Basic Information page and add the ngrok url into the Development Redirect URL for OAuth input with “/authorize” on the end. After a user installs our app, they will be taken to the “/authorize” path that we have in our code, where we thank them for installing our app! We also want to set our ngrok url as our OAuth Allow List URL so Zoom knows where requests will come from.
NOTE: For this section stay on the Development tab.
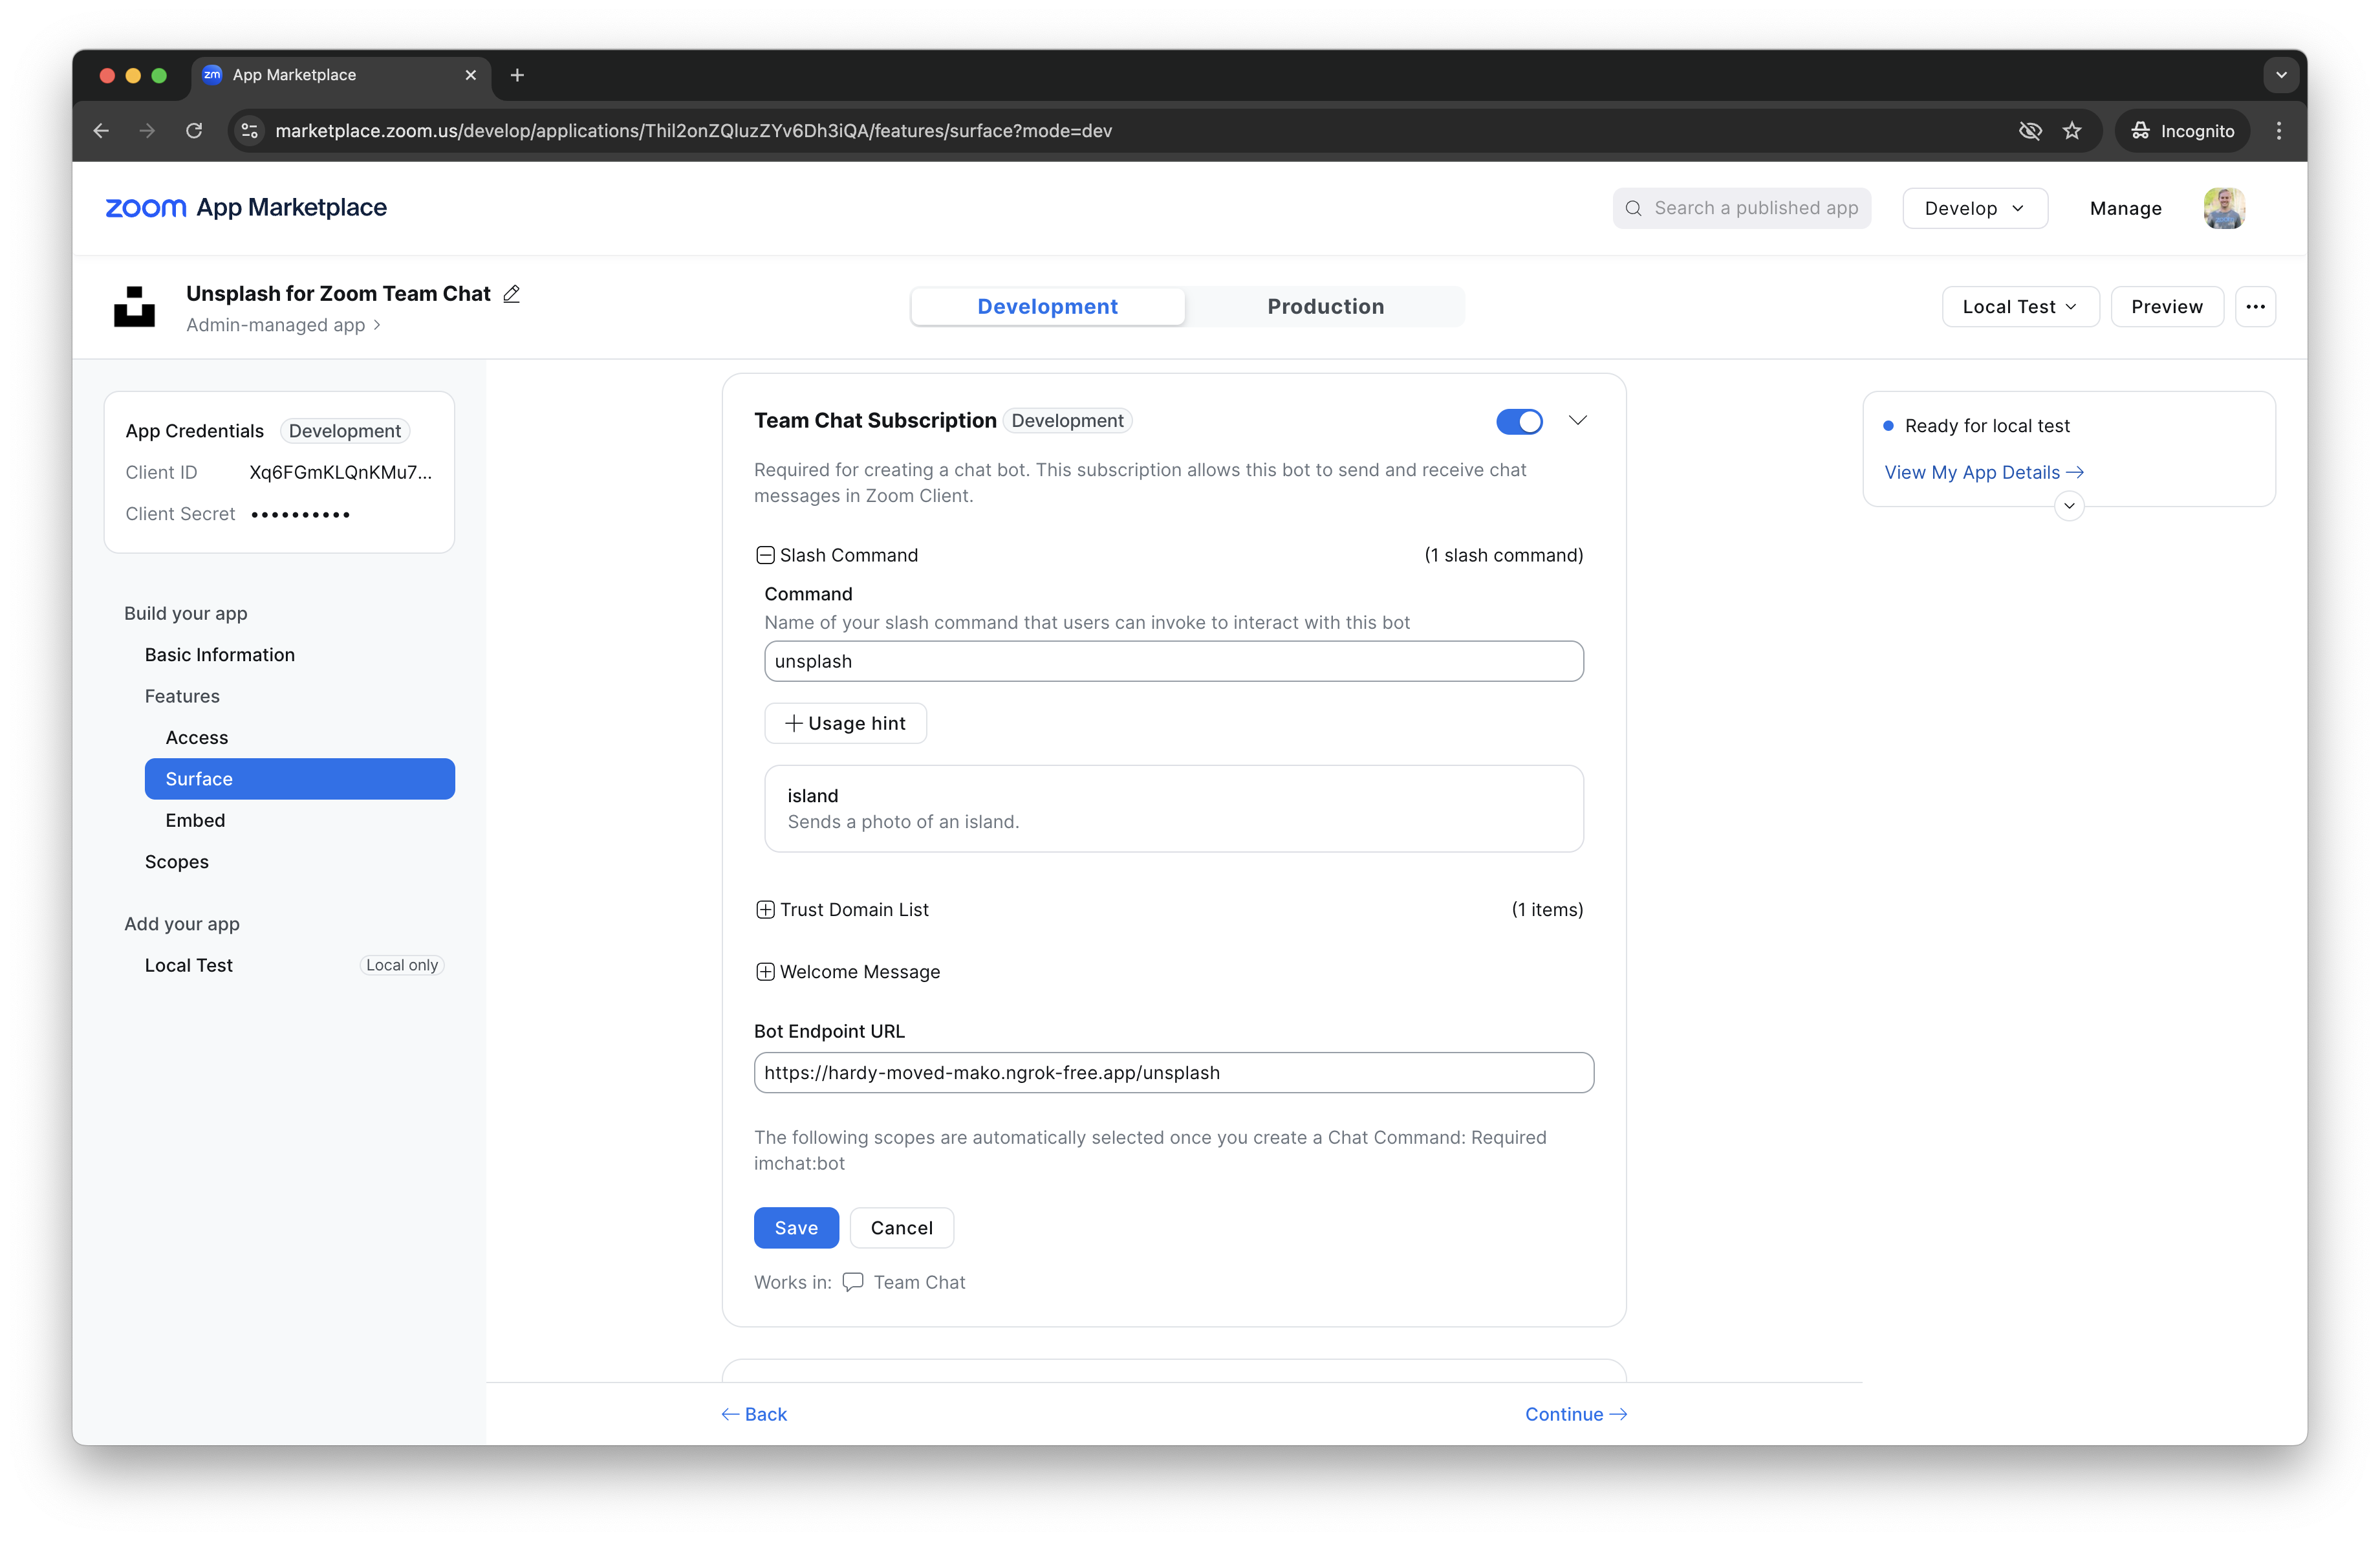
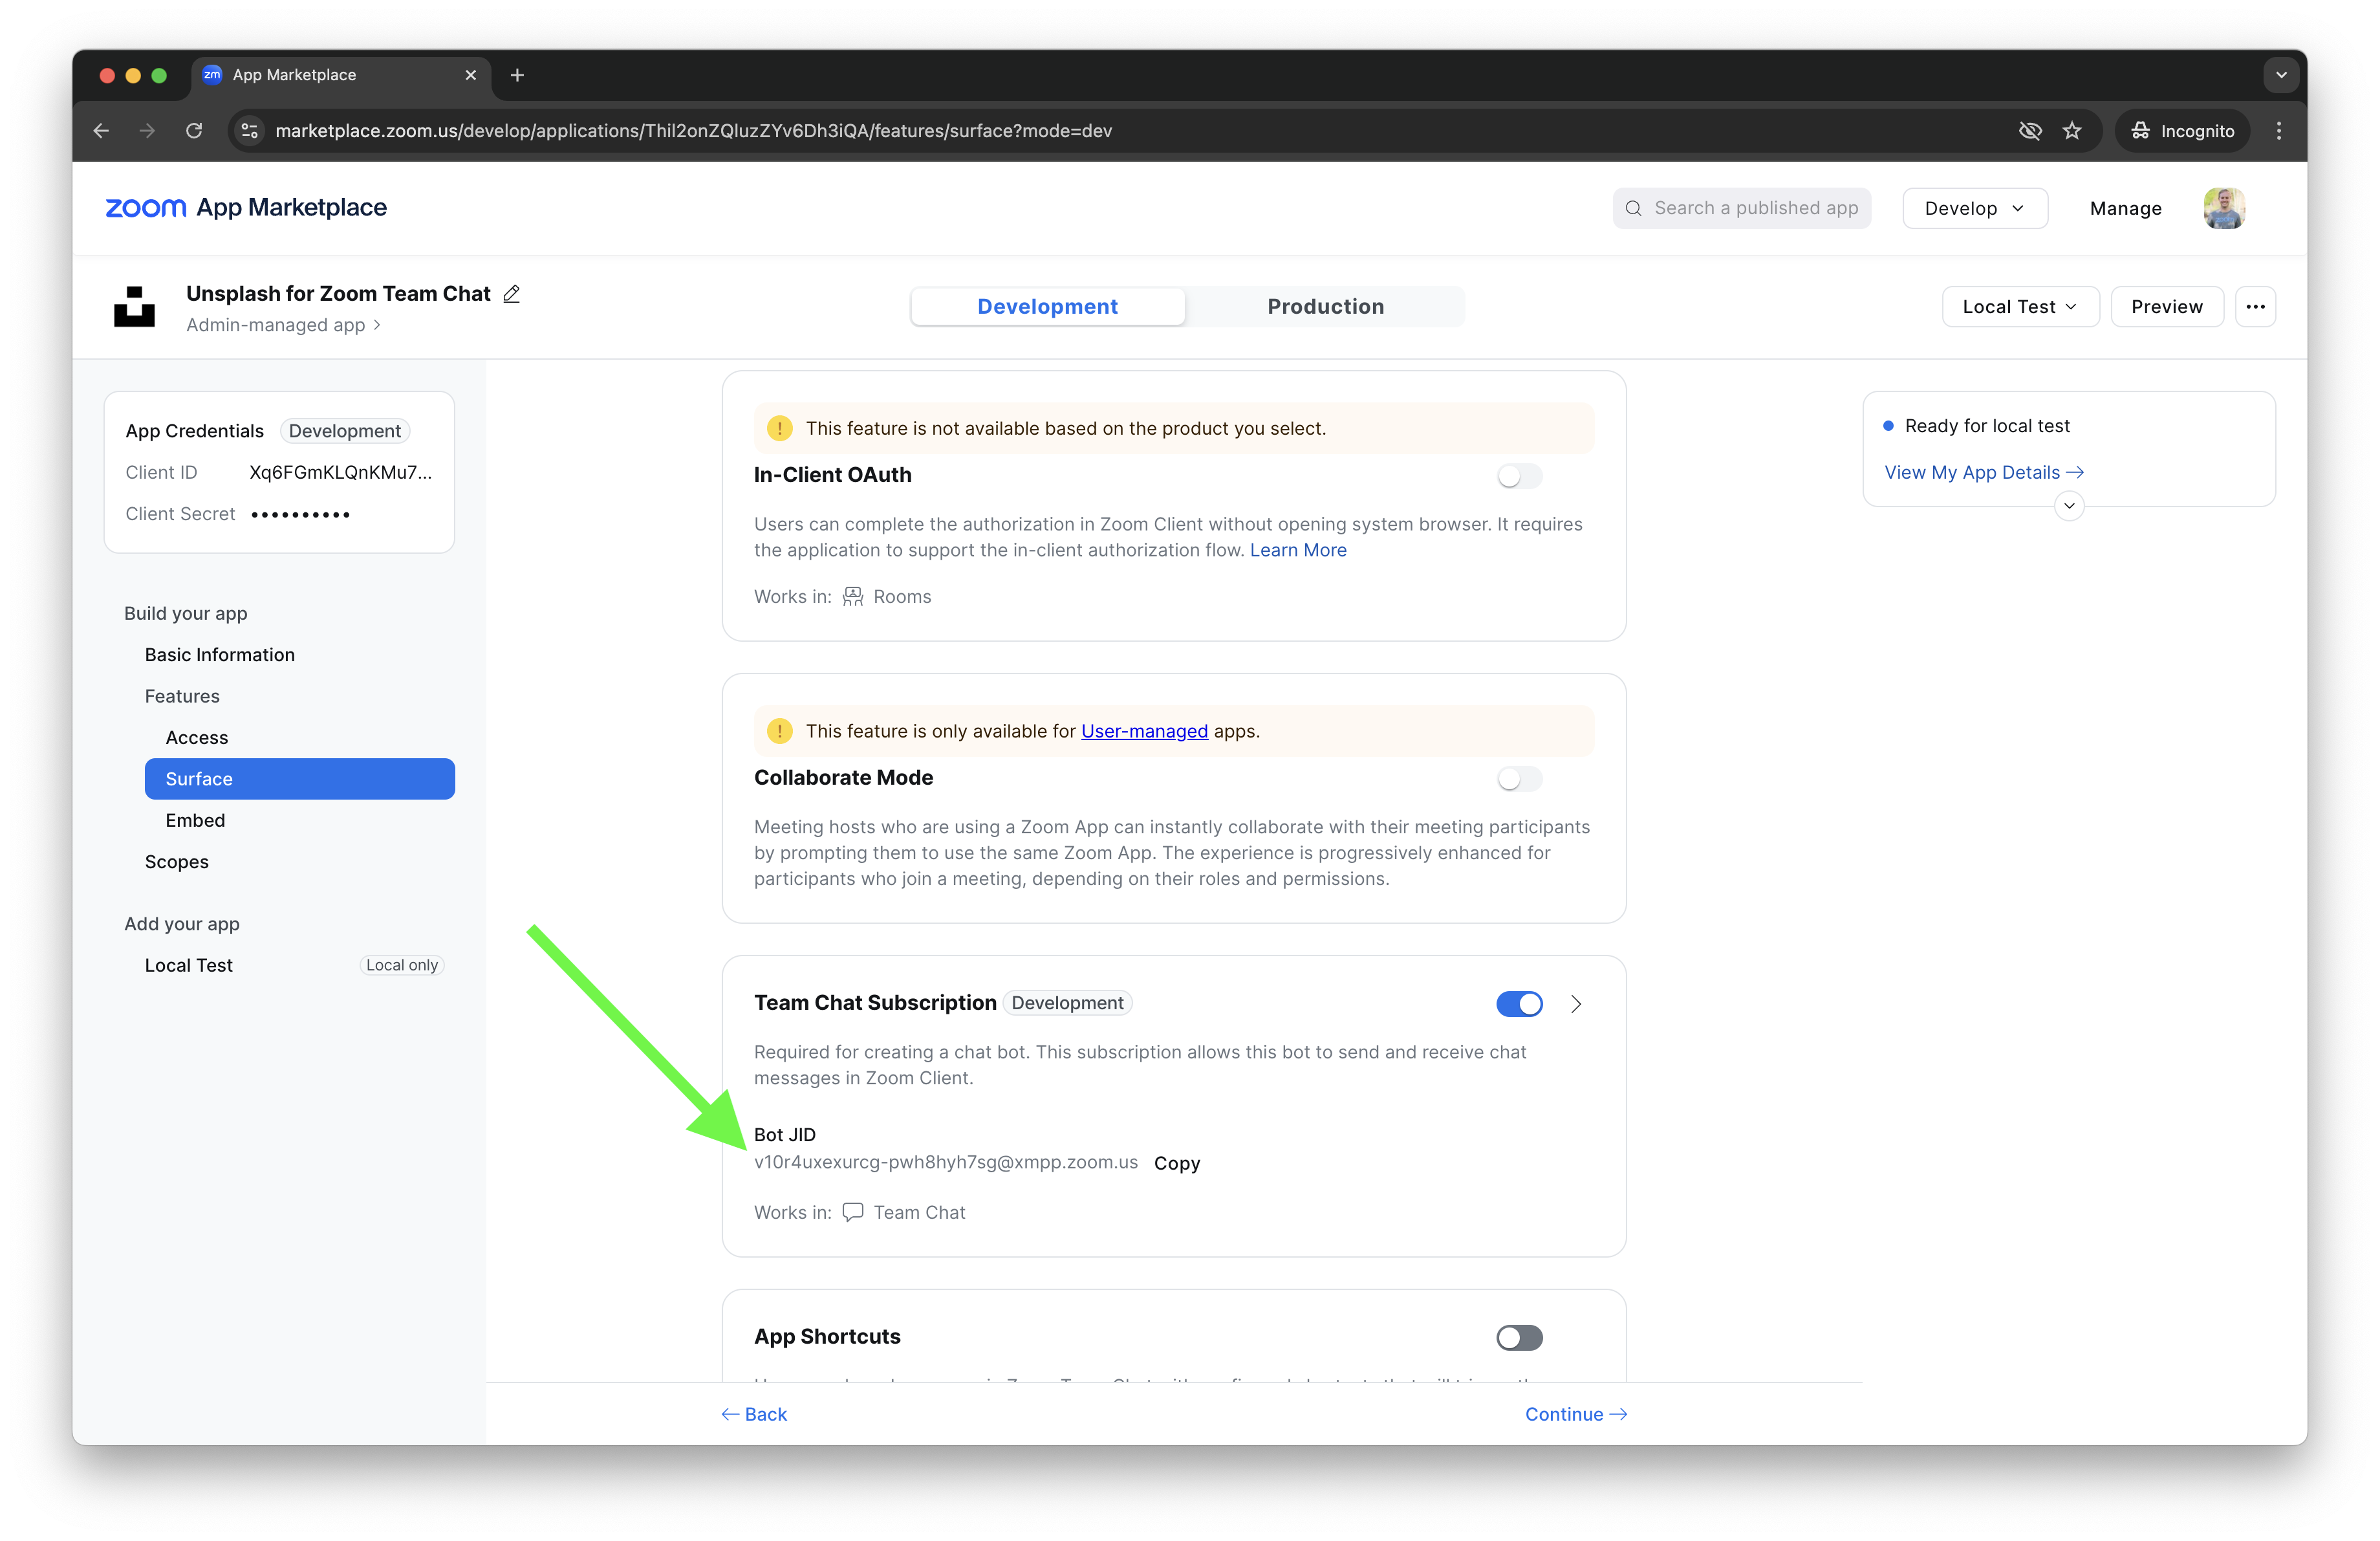
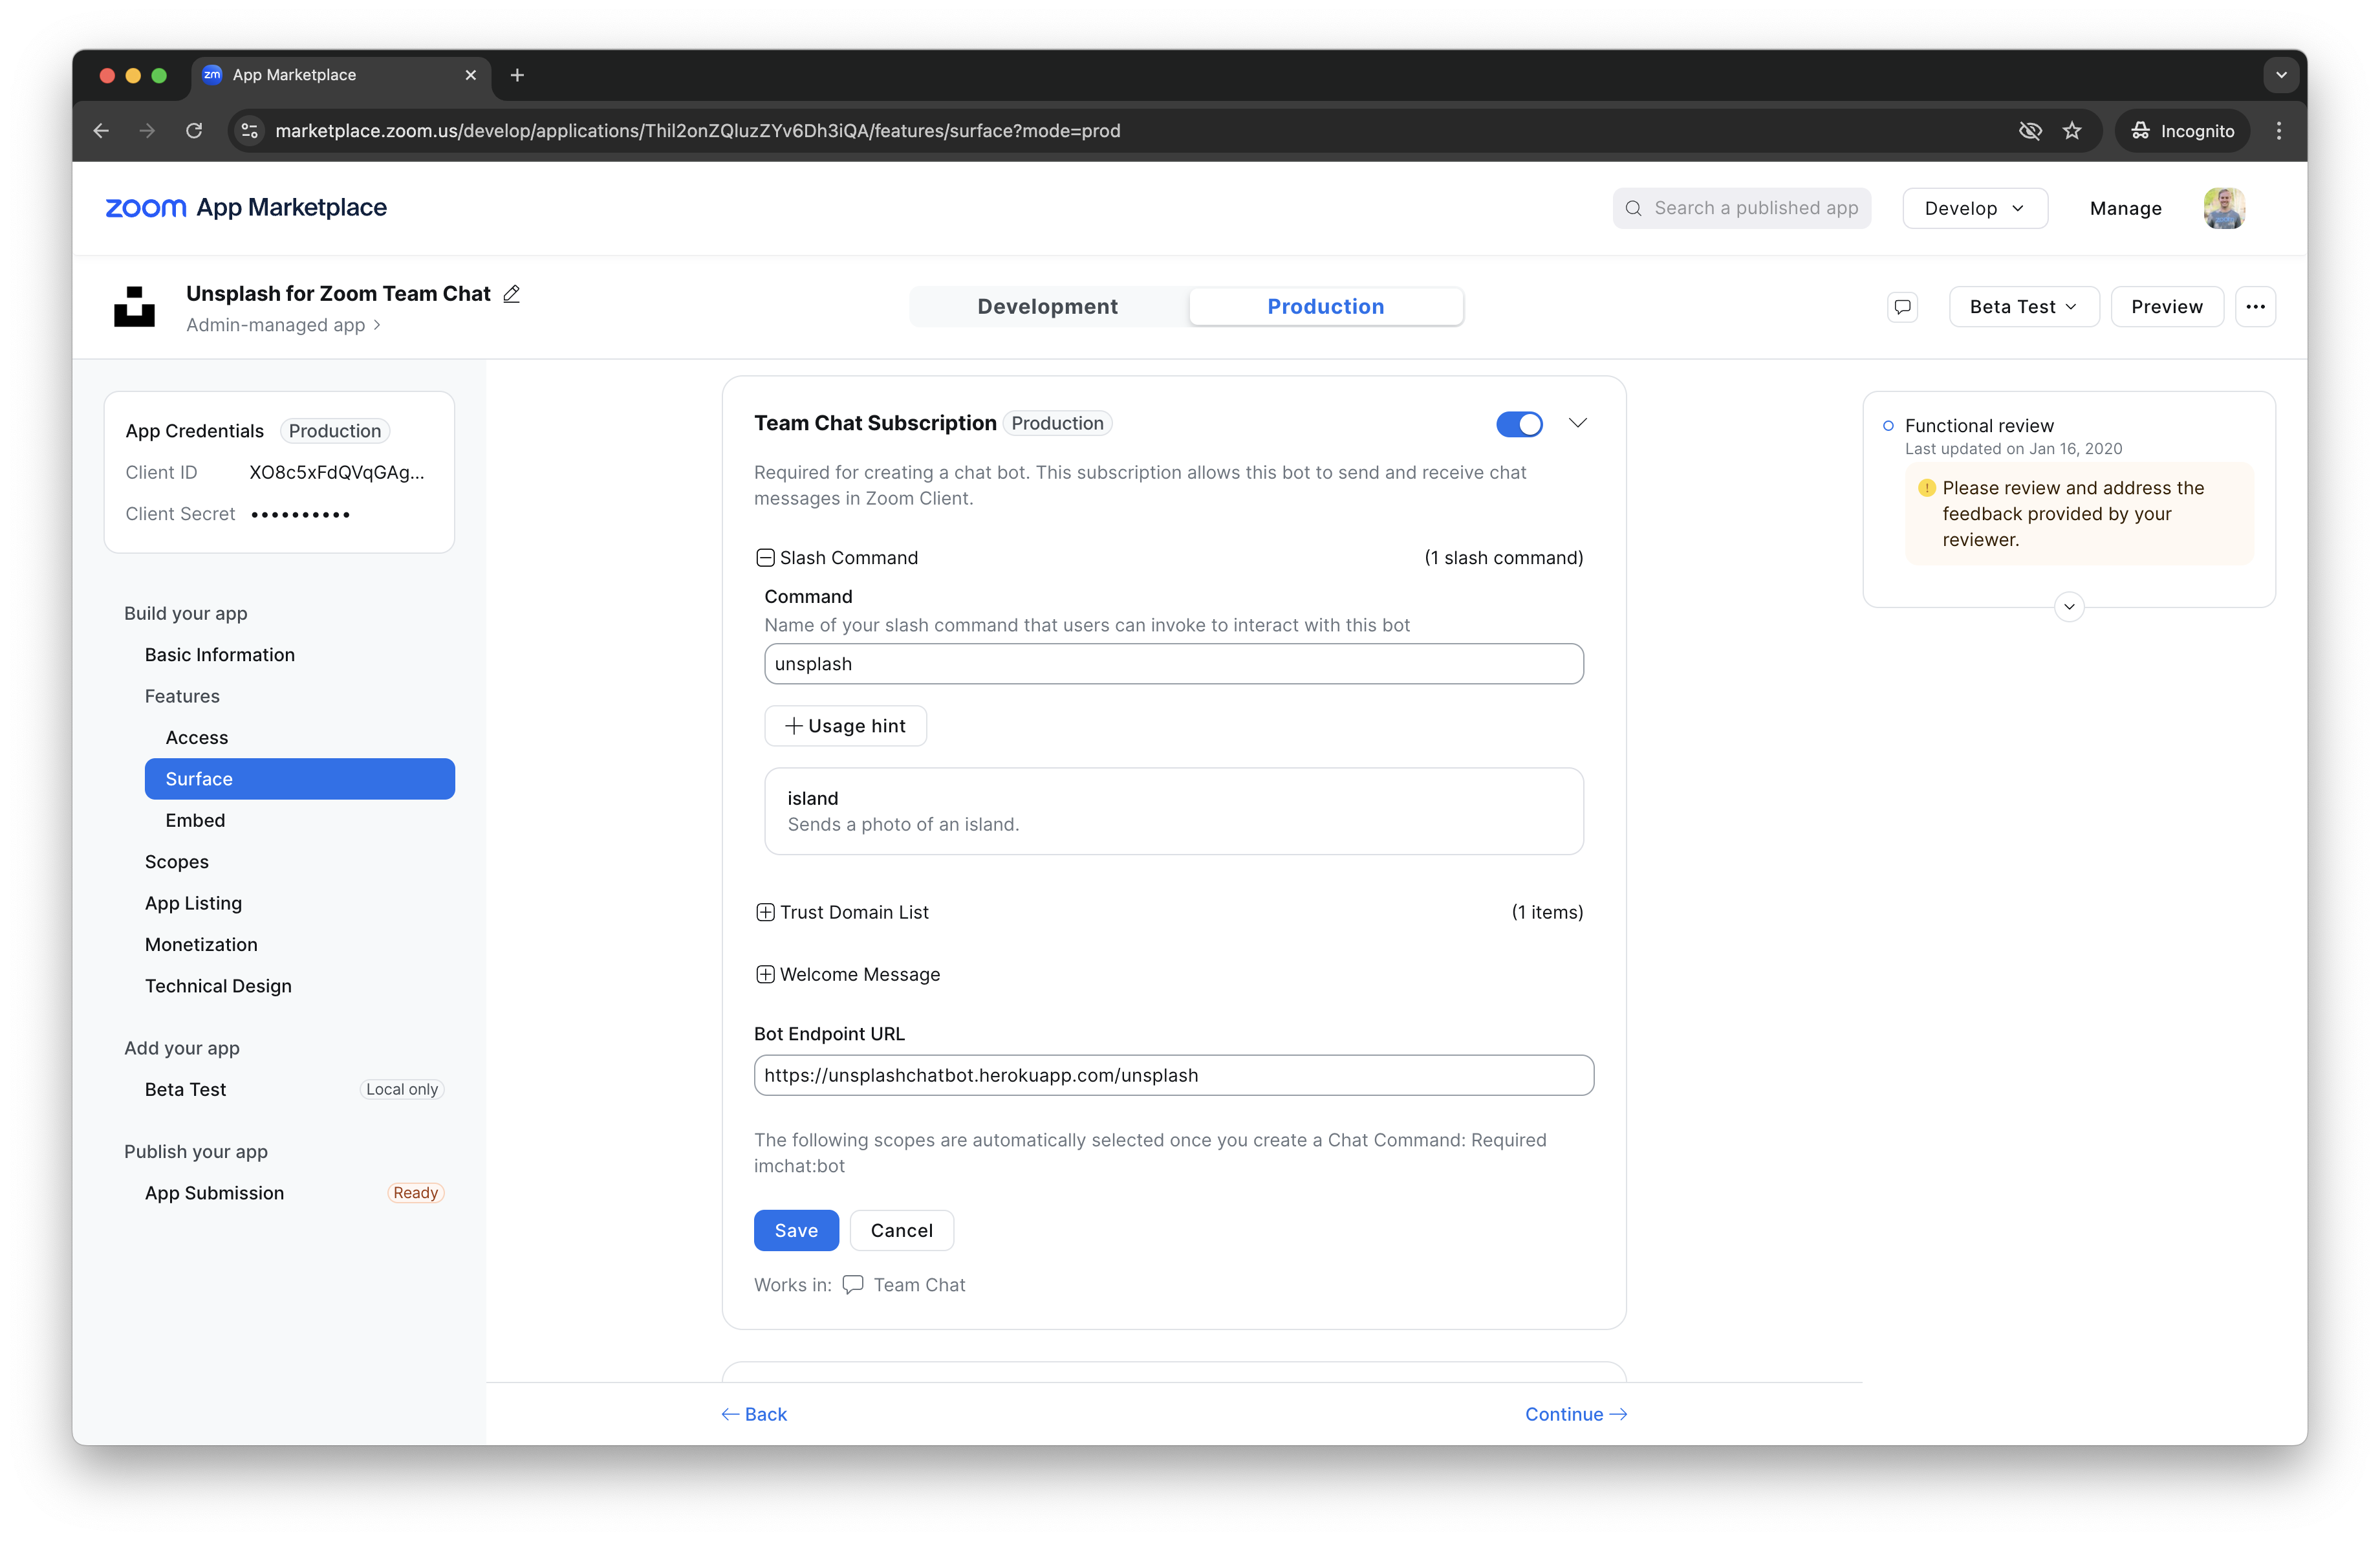
On the Features -> Surface page, in the Team Chat Subscription section, add a name you would like to use to talk to your Zoom Chatbot, like “unsplash” in the “Command” field.
Then add your ngrok url with “/unsplash” on the end in the Bot endpoint URL. If you look at your index.js file you'll notice we have a “/unsplash” path that will receive these requests. (The path has to be “/unsplash” unless you changed this in the code.)
Make sure to click the blue Save button:
After saving, note your Bot JID, we will need it in the next step:
Now that we have all our Zoom and Unsplash Developer credentials, and our Zoom Bot JID, add the following code to your .env file, replacing the placeholder values with your apps values:
UNSPLASH_ACCESS_KEY(Your Unsplash Access Key, it's the same for production and development, found on your Unsplash App Page)ZOOM_CLIENT_ID(Your Development Zoom Client ID, found on your Zoom App Basic Information page)ZOOM_CLIENT_SECRET(Your Development Zoom Client Secret Found on your Zoom App Basic Information page)ZOOM_BOT_JID(Your Development Zoom Bot JID Found on your Zoom App Features -> Surface page)ZOOM_WEBHOOK_SECRET_TOKEN(Your Development Zoom Webhook Secret Token, found on your Zoom App Features -> Access page)
UNSPLASH_ACCESS_KEY=Required
ZOOM_CLIENT_ID=Required
ZOOM_CLIENT_SECRET=Required
ZOOM_BOT_JID=Required
ZOOM_WEBHOOK_SECRET_TOKEN=Required
NOTE: You may have to re-save index.js or restart your localhost server (not ngrok, keep that running) for the .env file changes to be picked up.
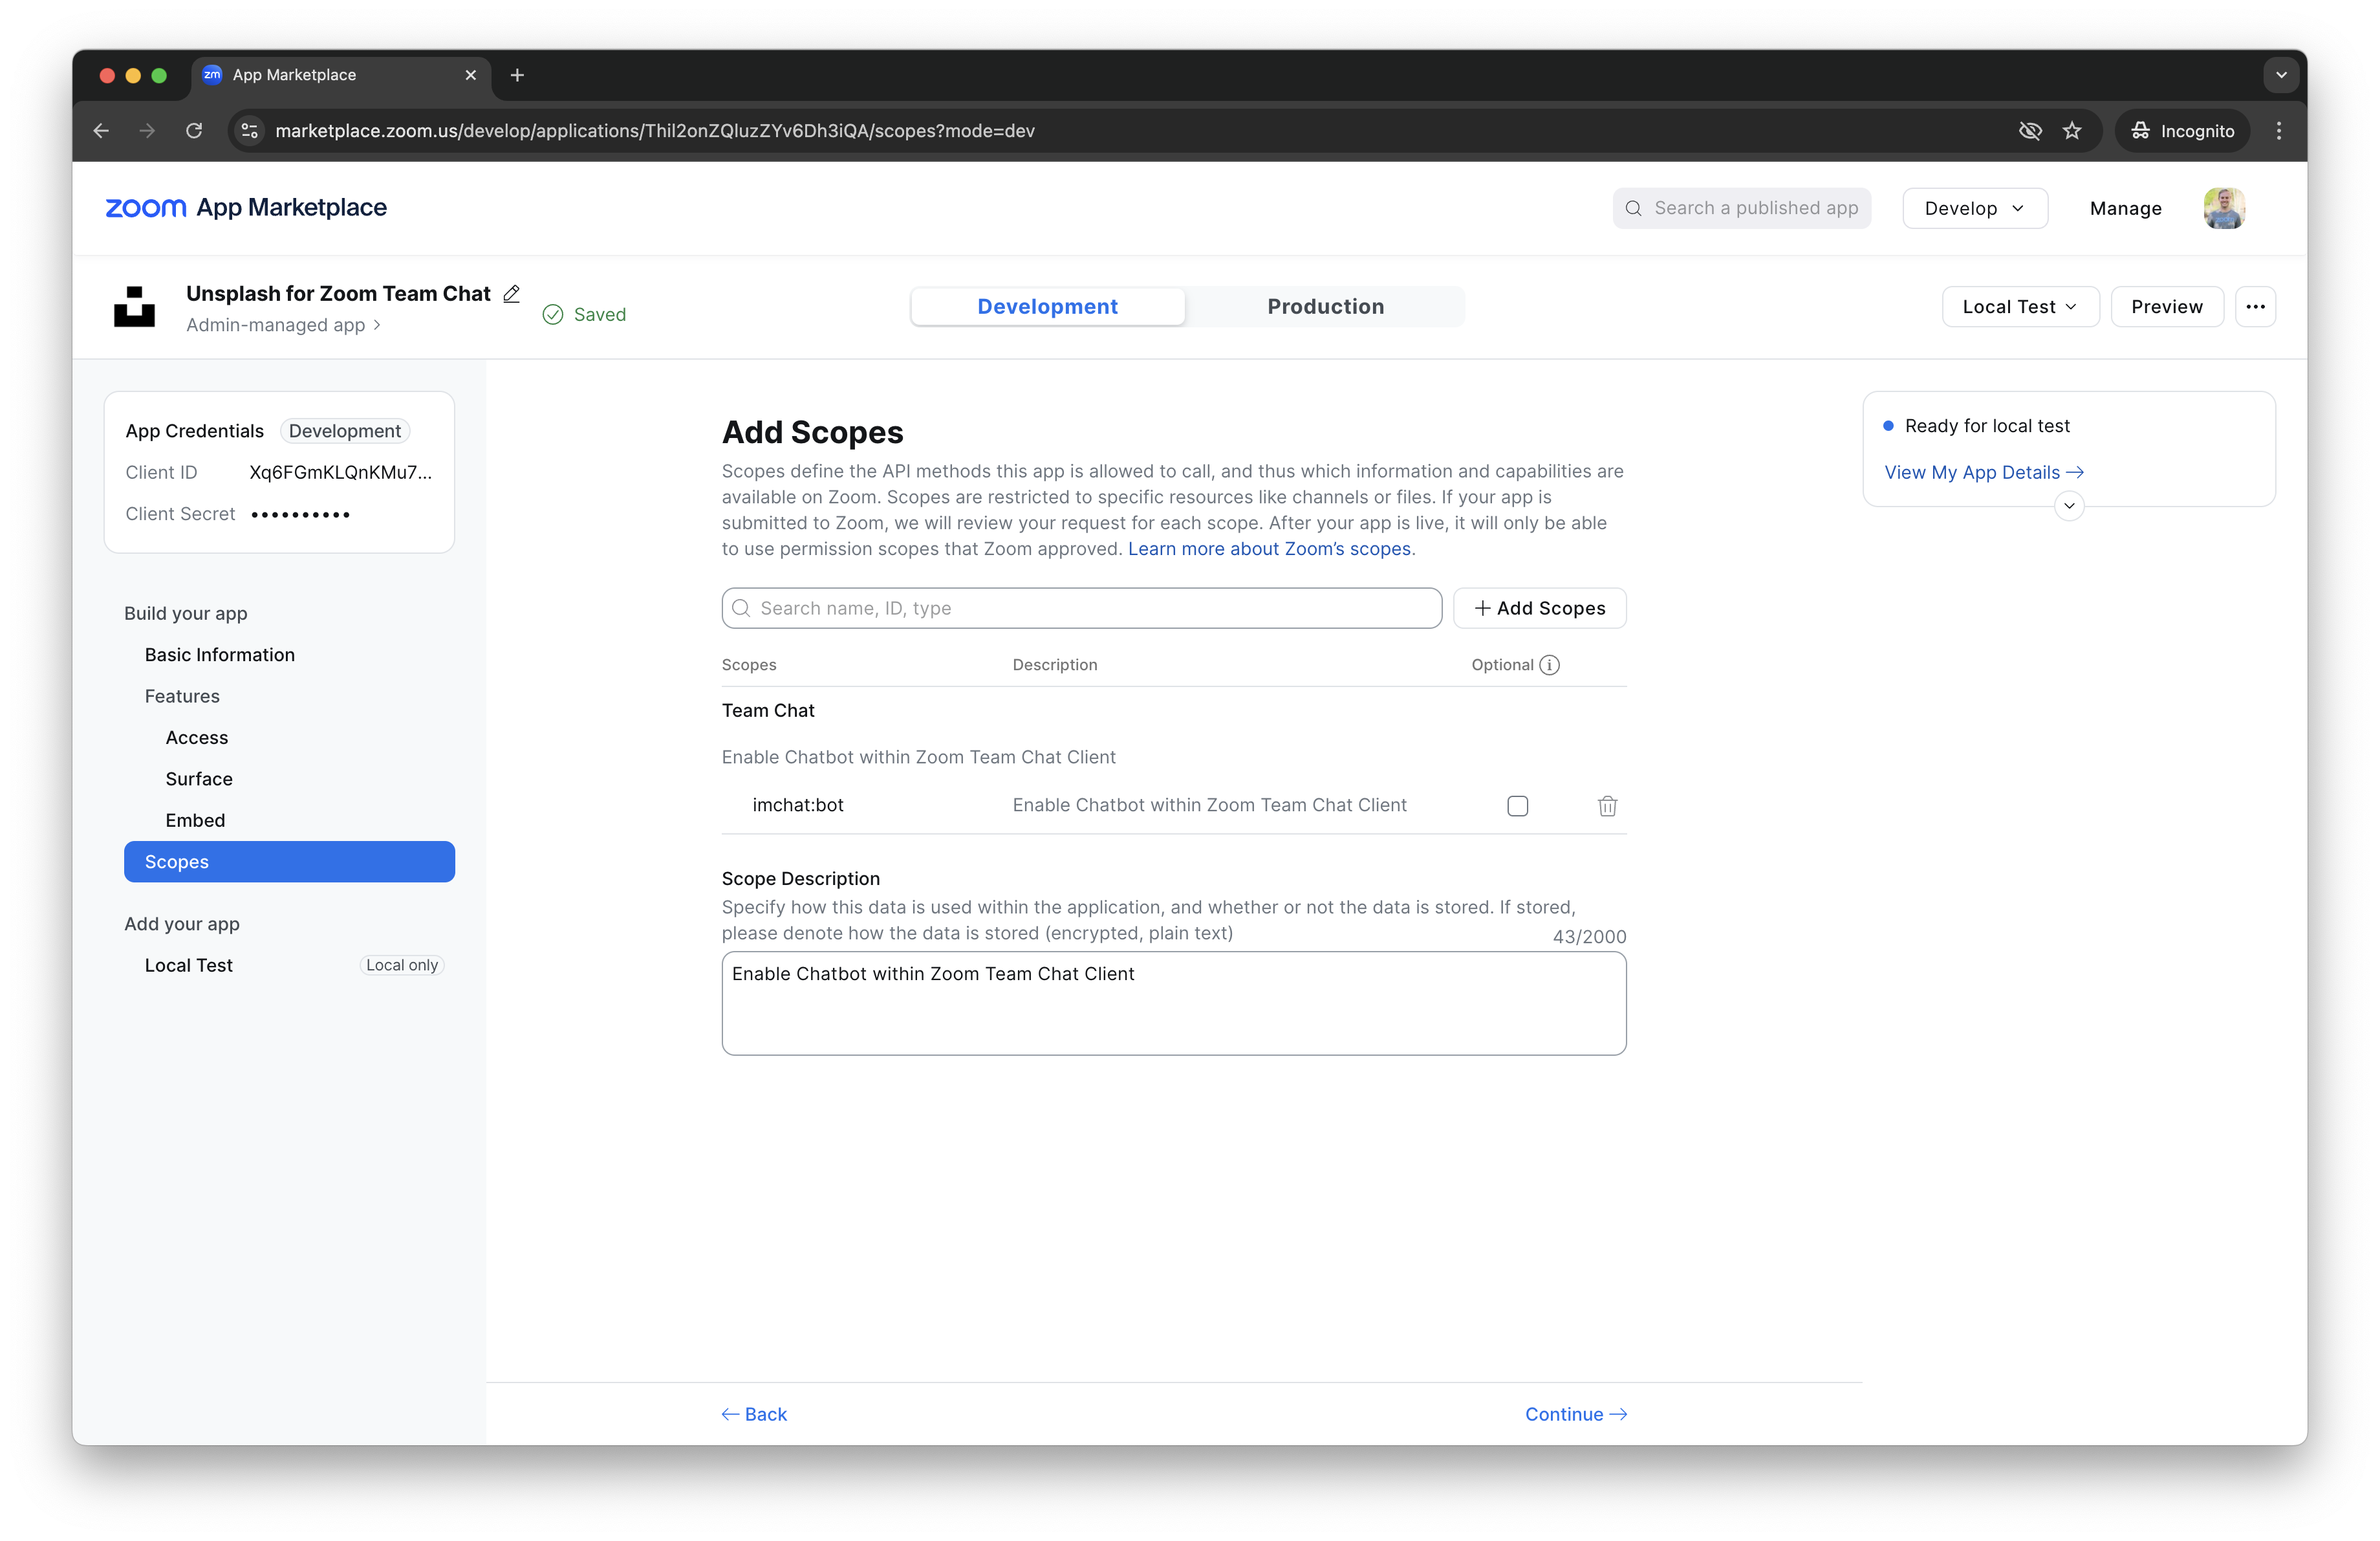
Then, on the Scopes page, click Add Scopes and find the “imchat:bot” scope which enables your Zoom Chatbot within Zoom Chat. It may be added automatically. Add a scope description as well:
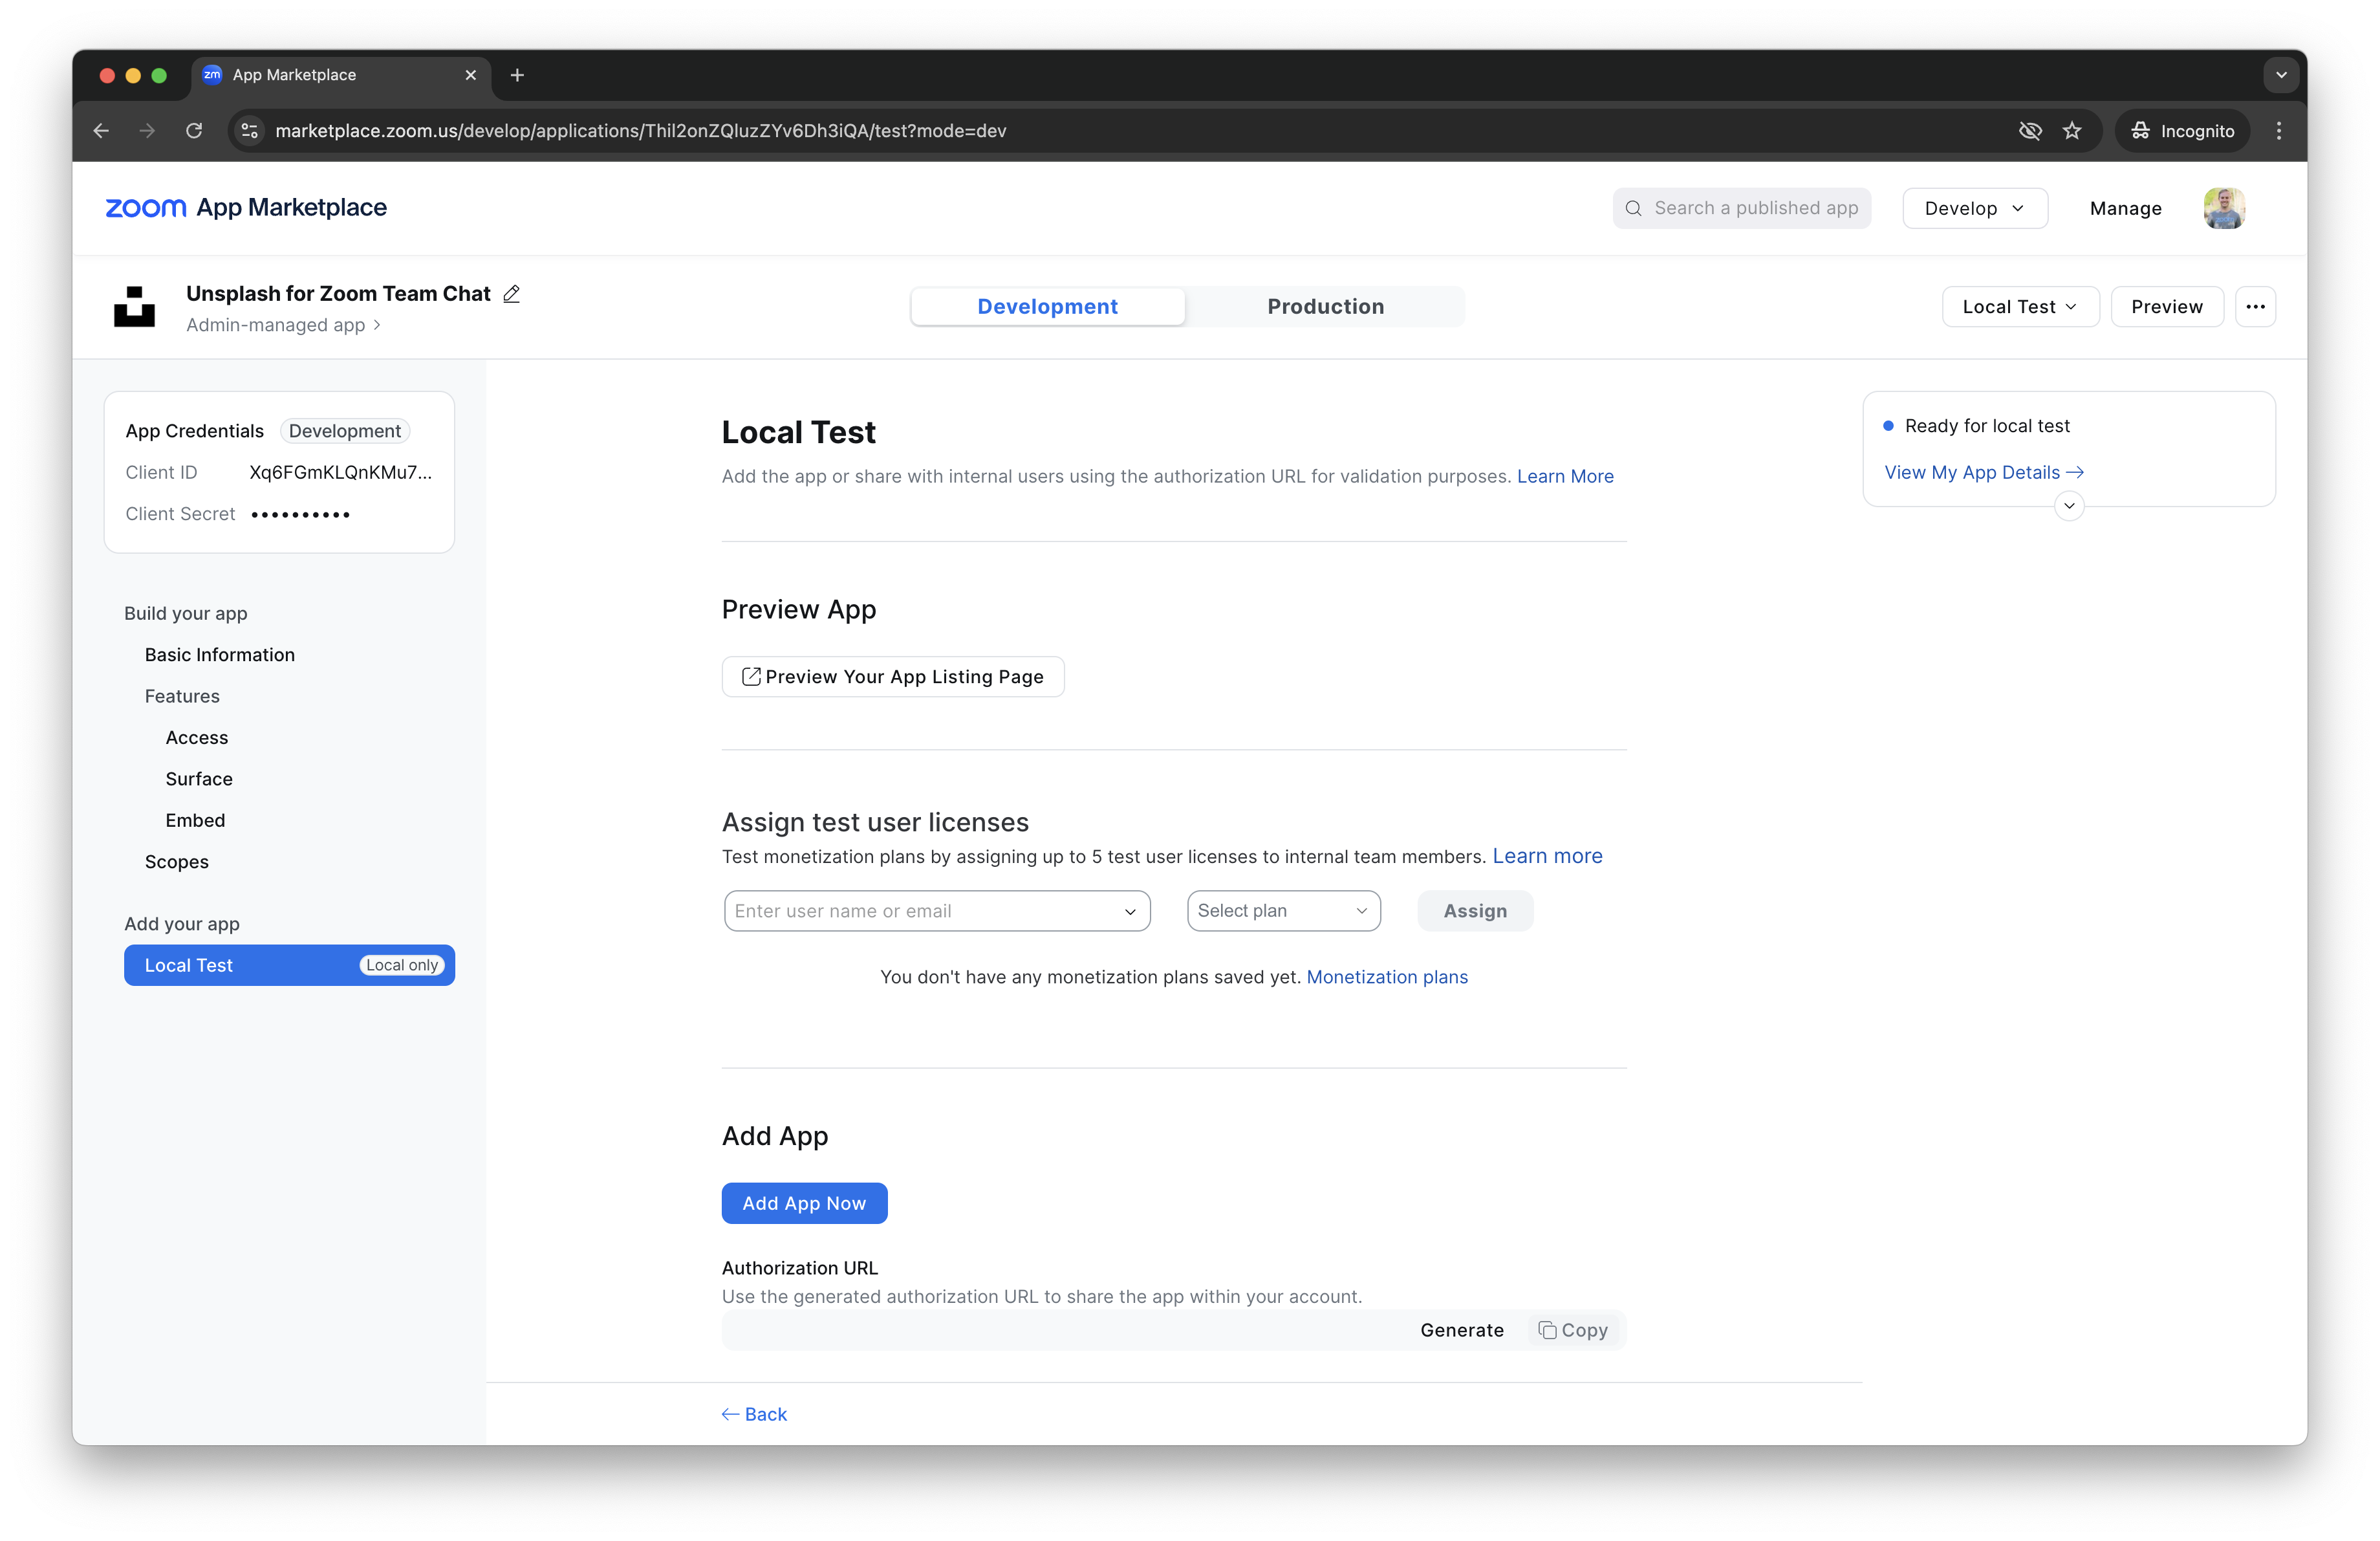
Now we can install our app to the Zoom Client! It doesn't do much yet, but let's see how it works! Click on the Local Test link on the left side menu and Add App Now:
Click the blue Allow button to install your Zoom Chatbot to your Zoom Client:

Our Chatbot is installed! We even used deep linking to open the Zoom Client to our Chatbot!
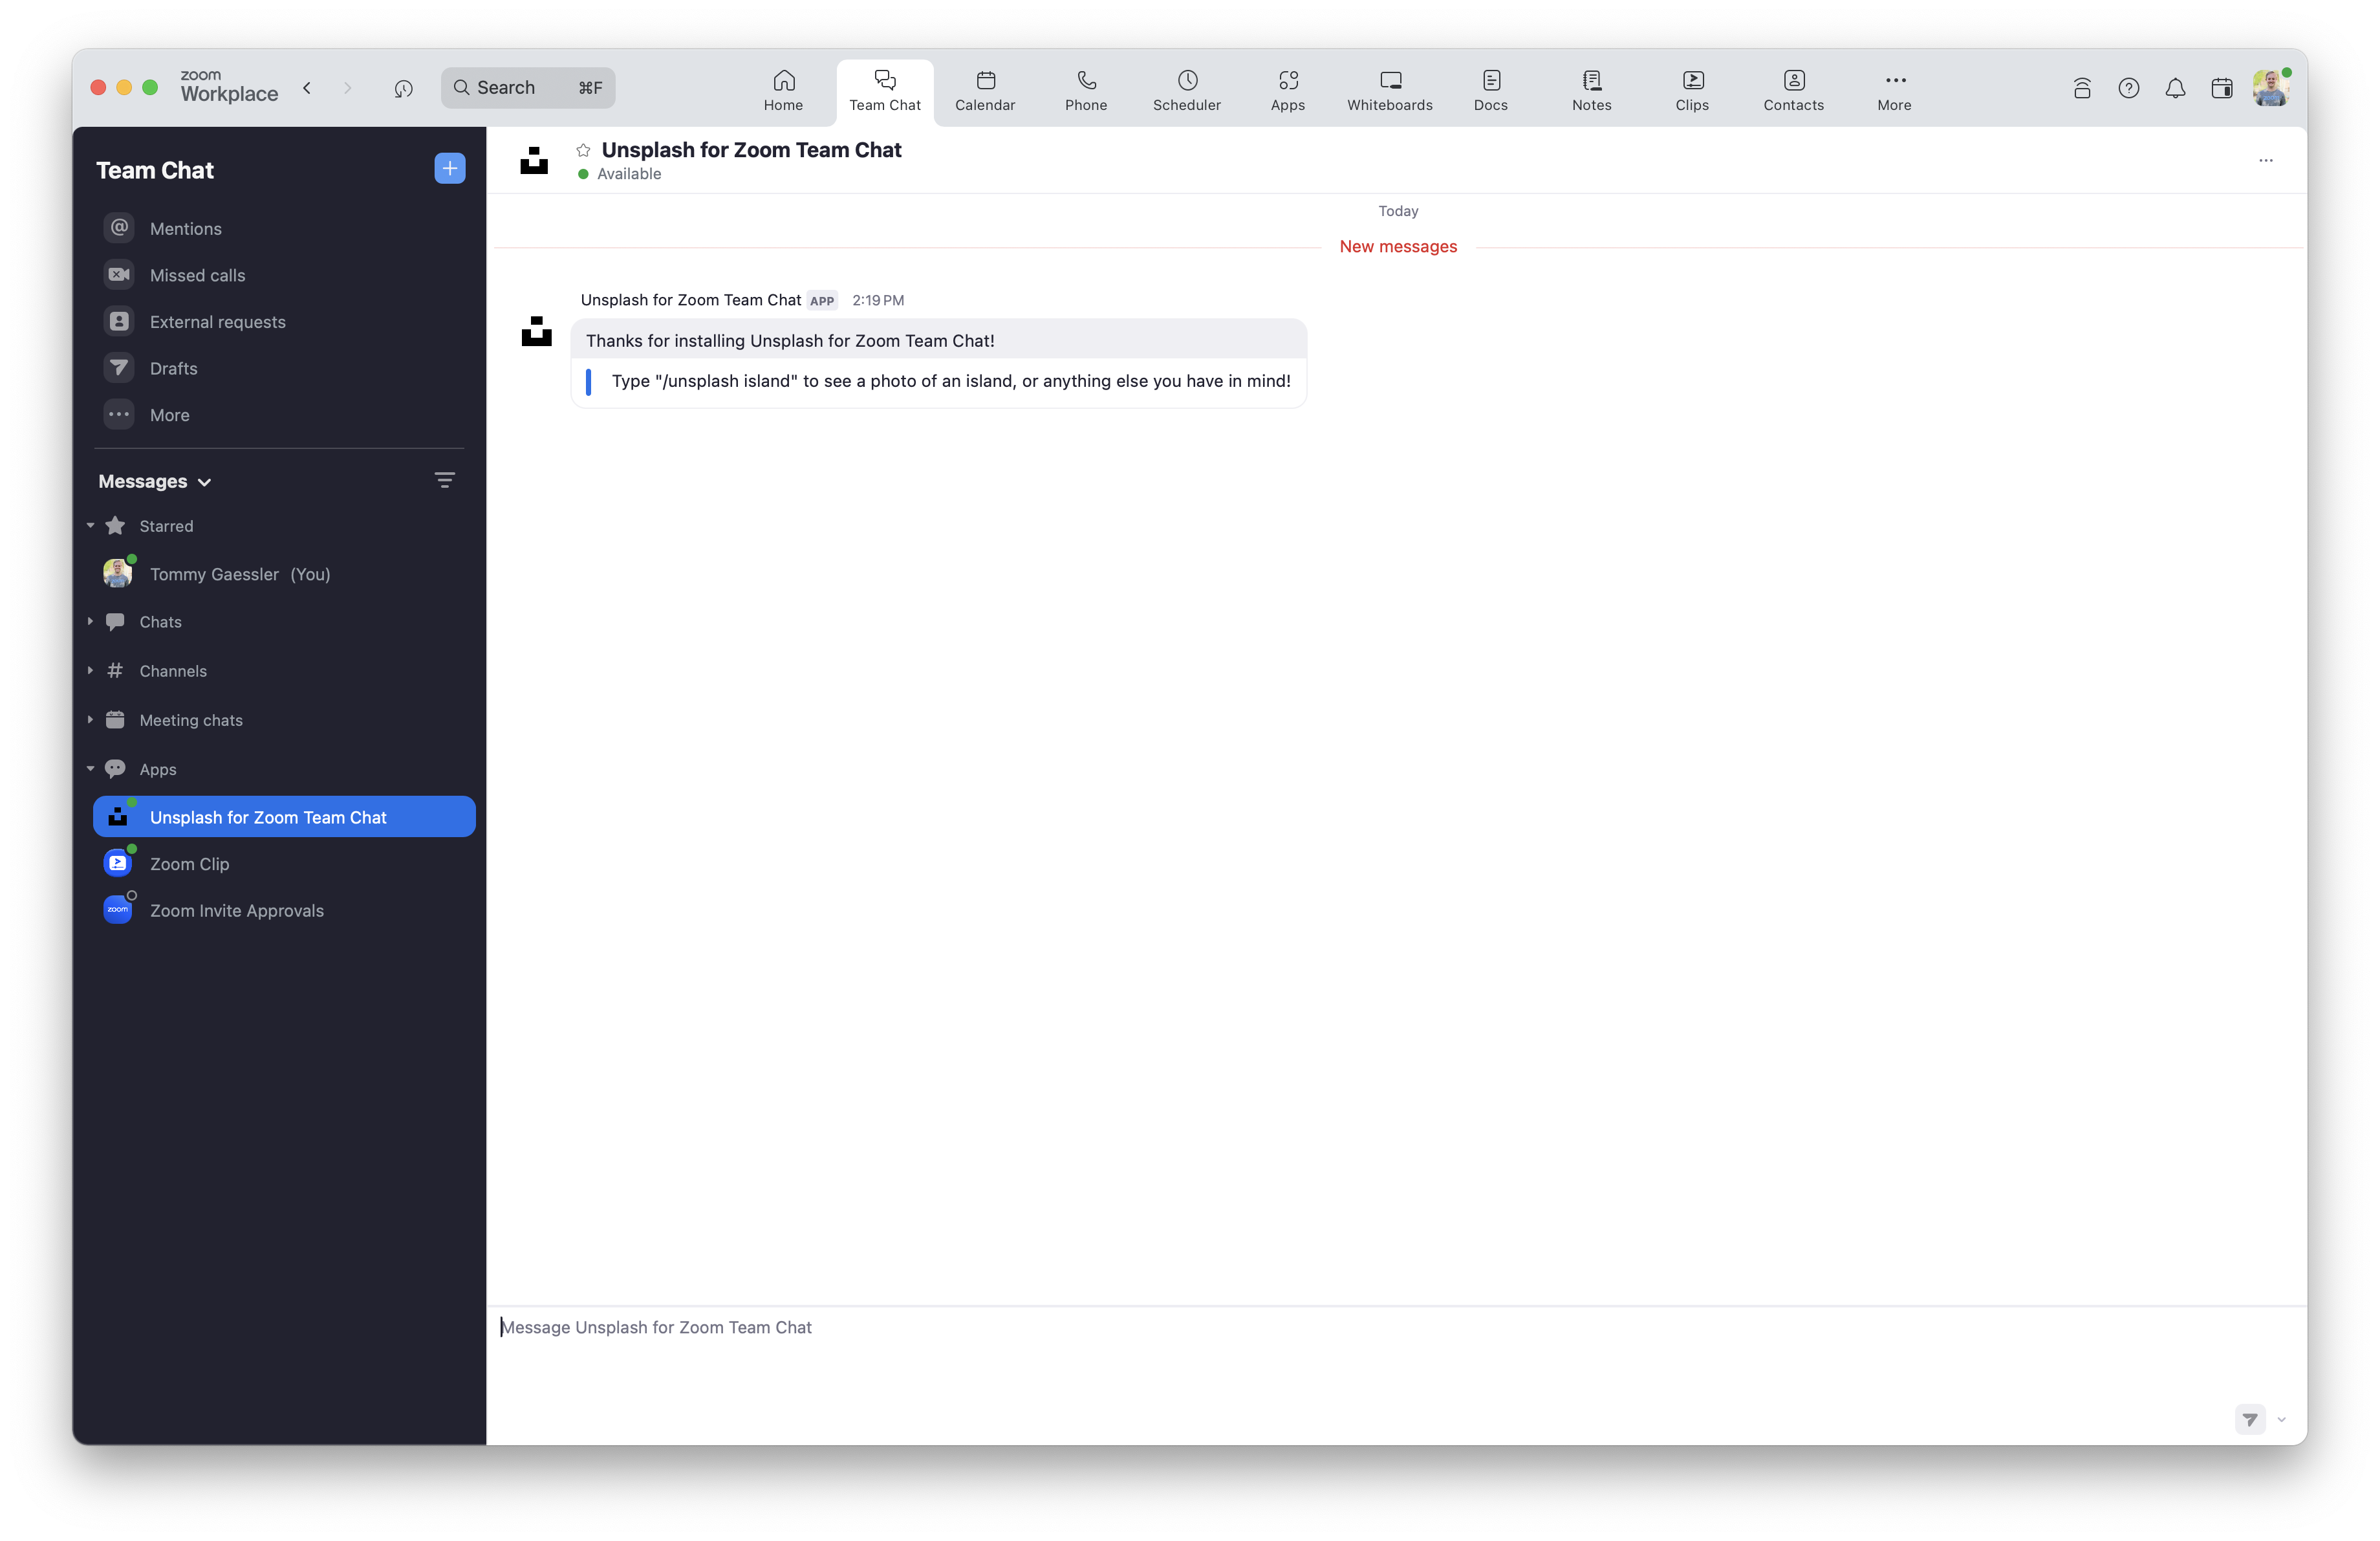
Now lets try sending a message to our chatbot and see what it sends to our server. Type “hi”, hit enter, and look at your terminal (the tab that you ran the nodemon command):
{
   event: 'bot_notification',
   payload: {
      robotJid: 'v12qbexyetsaokavo42lclfa@xmpp.zoom.us',
      toJid: 'kdykjnimt4kpd8kkdqt9fq@xmpp.zoom.us',
      userJid: 'kdykjnimt4kpd8kkdqt9fq@xmpp.zoom.us',
      cmd: 'hi',
      accountId: 'gVcjZnWWRLWvv_GtyGuaxg',
      userId: 'KdYKjnimT4KPd8KKdQt9FQ',
      name: 'Tommy Gaessler',
      timestamp: 1558736172787
  }
}
Awesome, our Zoom Chatbot and Node.js Server are now connected! With this data and a Zoom access_token we can create a POST request to the Zoom send chatbot message endpoint. This http request allows us to send messages as the Chatbot.
All we need now is the Zoom access_token. Let's make a call to get a Zoom access_token.
We will be making a get request to Unsplash's random photo api endpoint, and passing in a query param of a search term! The search term will come from what we send to our Zoom Chatbot!
Replace the code inside your “/unsplash” route with webhook validation and the webhook event type logic.
Also update your helper functions to get a Zoom access token, get an Unsplash photo and post it to Zoom Team Chat:
app.post("/unsplash", (req, res) => {
    var response;
    if (verifyWebhook(req)) {
        response = {
            message: "Authorized request to Unsplash for Zoom Team Chat.",
            status: 200,
        };
        console.log(response.message);
        if (req.body.event === "endpoint.url_validation") {
            response = {
                message: {
                    plainToken: req.body.payload.plainToken,
                    encryptedToken: validateWebhook(req),
                },
                status: 200,
            };
        } else if (req.body.event === "bot_notification") {
            console.log("Zoom Team Chat App message received.");
            getUser(req.body.payload);
        } else if (req.body.event === "bot_installed") {
            console.log("Unsplash for Zoom Team Chat installed.");
        } else if (req.body.event === "app_deauthorized") {
            console.log("Unsplash for Zoom Team Chat uninstalled.");
            deleteUser(req.body.payload);
        } else {
            console.log(req.body);
            console.log(
                "Unsupported Zoom webhook event type: ",
                req.body.event,
            );
        }
        console.log(response.message);
        res.status(response.status);
        res.json(response);
    } else {
        response = {
            message: "Unauthorized request to Unsplash for Zoom Team Chat.",
            status: 401,
        };
        console.log(response.message);
        res.status(response.status);
        res.json(response);
    }
});
// helper functions:
function verifyWebhook(req) {
    const message = `v0:${req.headers["x-zm-request-timestamp"]}:${JSON.stringify(req.body)}`;
    const hashForVerify = crypto
        .createHmac("sha256", process.env.ZOOM_WEBHOOK_SECRET_TOKEN)
        .update(message)
        .digest("hex");
    const signature = `v0=${hashForVerify}`;
    return req.headers["x-zm-signature"] === signature;
}
function validateWebhook(req) {
    return crypto
        .createHmac("sha256", process.env.ZOOM_WEBHOOK_SECRET_TOKEN)
        .update(req.body.payload.plainToken)
        .digest("hex");
}
function getUser(payload) {
    getAccessToken(payload);
}
function getAccessToken(payload) {
    axios
        .post(
            "https://api.zoom.us/oauth/token?grant_type=client_credentials",
            {},
            {
                headers: {
                    Authorization:
                        "Basic " +
                        Buffer.from(
                            process.env.ZOOM_CLIENT_ID +
                                ":" +
                                process.env.ZOOM_CLIENT_SECRET,
                        ).toString("base64"),
                },
            },
        )
        .then((body) => {
            console.log("Successfully received Team Chat App token from Zoom.");
            getPhoto(payload, body.data.access_token);
        })
        .catch((error) => {
            console.log("Error getting Team Chat App token from Zoom.", error);
        });
}
function getPhoto(payload, accessToken) {
    axios
        .get(
            `https://api.unsplash.com/photos/random?query=${payload.cmd}&orientation=landscape&client_id=${process.env.UNSPLASH_ACCESS_KEY}`,
        )
        .then((body) => {
            console.log("Successfully received photo from Unsplash.");
            var photoBody = [
                {
                    type: "section",
                    sidebar_color: body.data.color,
                    sections: [
                        {
                            type: "attachments",
                            img_url: body.data.urls.small,
                            resource_url: body.data.links.html,
                            information: {
                                title: {
                                    text: "Photo by " + body.data.user.name,
                                },
                                description: {
                                    text: "Click to view on Unsplash",
                                },
                            },
                        },
                    ],
                },
            ];
            sendChat(payload, accessToken, photoBody);
        })
        .catch((error) => {
            console.log(
                "Error getting photo from Unsplash.",
                error.response.data.errors,
            );
            var errorsBody = [
                {
                    type: "section",
                    sidebar_color: "#D72638",
                    sections: error.response.data.errors.map((error) => {
                        return { type: "message", text: error };
                    }),
                },
            ];
            sendChat(payload, accessToken, errorsBody);
        });
}
function sendChat(payload, accessToken, messageBody) {
    axios
        .post(
            "https://api.zoom.us/v2/im/chat/messages",
            {
                robot_jid: process.env.ZOOM_BOT_JID,
                to_jid: payload.toJid,
                account_id: payload.accountId,
                content: {
                    head: {
                        text: "/unsplash " + payload.cmd,
                        sub_head: {
                            text: "Sent by " + payload.userName,
                        },
                    },
                    body: messageBody,
                },
            },
            {
                headers: {
                    "Content-Type": "application/json",
                    Authorization: "Bearer " + accessToken,
                },
            },
        )
        .then((body) => {
            console.log("Successfully sent Team Chat App message to Zoom.");
        })
        .catch((error) => {
            console.log("Error sending Team Chat App message to Zoom.", error);
        });
}
Now let's test our chatbot:
Awesome it worked! Your Chatbot is now setup and running locally on your machine.
You can continue to implement the encrypted database, or skip to the production deployment, or publish to the Zoom App marketplace step.
Section 2. Encrypted database
Now you might be wondering why are we getting a new access_token every time we call our “/unsplash” endpoint? Zoom access_tokens last for one hour. To be more efficient, we could store the access_token in a database and each time “/unsplash” is called we can check if the access_tokens is expired. If the access_token is expired we can refresh it by calling our getAccessToken function, but if it is still valid, we can skip that call and go straight to calling our getPhoto function, passing in our stored Zoom access_token. This makes our app faster, and allows us to make less requests to the Zoom API in order to achieve for our app to work.
If you want to skip adding a database and still publish your app to the marketplace, skip to Section 3.
Download PostgreSQL here or if on a Mac install using Homebrew:
$ brew install postgresql
Once PostgreSQL is installed, follow these commands if you haven't set it up before:
$ brew services start postgresql
$ psql postgres
You should be inside the PostgreSQL terminal now and see a postgres=# prefix. Now let's create a database user called “me” with a password of “password”
postgres=# CREATE ROLE me WITH LOGIN PASSWORD 'password';
postgres=# ALTER ROLE me CREATEDB;
postgres=# \q
You have just added yourself as a user who has the create database permission. Now type this to connect to postgres as your user:
$ psql -d postgres -U me
Now that PostgreSQL is configured, let's create a database:
postgres=> CREATE DATABASE unsplash_for_zoom_team_chat;
Now that our database is setup, let's create a seed file to setup our users table. We will seed our database with a blank access_token and an expires_on date of 1. That way, the first time we call our Zoom Chatbot it will think the access_token is expired. Then it will generate a new one for us, and save it. Install pg, create the seed.js file, and add the seed code:
$ npm install pg --save
$ touch seed.js
require("dotenv").config();
const { Client } = require("pg");
const pg = new Client({
    connectionString: process.env.DATABASE_URL,
    ssl:
        process.env.NODE_ENV === "production"
            ? {
                  require: process.env.NODE_ENV === "production" ? true : false,
                  rejectUnauthorized: false,
              }
            : false,
});
pg.connect().catch((error) => {
    console.log("Error connecting to database", error);
});
pg.query(
    `CREATE EXTENSION IF NOT EXISTS pgcrypto; CREATE TABLE IF NOT EXISTS users(account_id TEXT PRIMARY KEY, access_token TEXT, expires_on TEXT);`,
    (error, results) => {
        if (error) {
            console.log(error);
        } else {
            console.log(results);
        }
        pg.end();
    },
);
Then update your index.js file to add code to connect to your database and update and add some new helper functions for the database logic:
// database
const crypto = require("crypto");
const { Client } = require("pg");
const pg = new Client({
    connectionString: process.env.DATABASE_URL,
    ssl: process.env.NODE_ENV === "production" ? true : false,
});
pg.connect().catch((error) => {
    console.log("Error connecting to database", error);
});
// helper functions:
// ...
function getUser(payload) {
    pg.query(
        `SELECT PGP_SYM_DECRYPT(access_token::bytea, '${process.env.DATABASE_ENCRYPTION_KEY}') as access_token, PGP_SYM_DECRYPT(expires_on::bytea, '${process.env.DATABASE_ENCRYPTION_KEY}') as expires_on FROM users WHERE PGP_SYM_DECRYPT(account_id::bytea, '${process.env.DATABASE_ENCRYPTION_KEY}') = '${payload.accountId}';`,
        (error, results) => {
            if (error) {
                console.log("Error selecting user from database.", error);
            } else {
                if (results.rows.length) {
                    console.log("User exists.");
                    if (
                        results.rows[0].expires_on >
                        new Date().getTime() / 1000
                    ) {
                        console.log("User access token active.");
                        getPhoto(payload, results.rows[0].access_token);
                    } else {
                        console.log("User access token expired.");
                        getAccessToken(payload, true);
                    }
                } else {
                    console.log("User does not exist.");
                    getAccessToken(payload, false);
                }
            }
        },
    );
}
function getAccessToken(payload, accountExists) {
    axios
        .post(
            "https://api.zoom.us/oauth/token?grant_type=client_credentials",
            {},
            {
                headers: {
                    Authorization:
                        "Basic " +
                        Buffer.from(
                            process.env.ZOOM_CLIENT_ID +
                                ":" +
                                process.env.ZOOM_CLIENT_SECRET,
                        ).toString("base64"),
                },
            },
        )
        .then((body) => {
            console.log("Successfully received Team Chat App token from Zoom.");
            if (accountExists) {
                updateUser(payload, body);
            } else {
                addUser(payload, body);
            }
        })
        .catch((error) => {
            console.log("Error getting Team Chat App token from Zoom.", error);
        });
}
// ...
function addUser(payload, body) {
    pg.query(
        `INSERT INTO users (account_id, access_token, expires_on) VALUES (PGP_SYM_ENCRYPT('${payload.accountId}', '${process.env.DATABASE_ENCRYPTION_KEY}', 'cipher-algo=${process.env.DATABASE_ENCRYPTION_ALGO}'), PGP_SYM_ENCRYPT('${body.data.access_token}', '${process.env.DATABASE_ENCRYPTION_KEY}', 'cipher-algo=${process.env.DATABASE_ENCRYPTION_ALGO}'), PGP_SYM_ENCRYPT('${new Date().getTime() / 1000 + body.data.expires_in}', '${process.env.DATABASE_ENCRYPTION_KEY}', 'cipher-algo=${process.env.DATABASE_ENCRYPTION_ALGO}'));`,
        (error, results) => {
            if (error) {
                console.log("Error inserting user in database.", error);
            } else {
                console.log("Successfully inserted user in database.");
                getPhoto(payload, body.data.access_token);
            }
        },
    );
}
function updateUser(payload, body) {
    pg.query(
        `UPDATE users SET (access_token, expires_on) = (PGP_SYM_ENCRYPT('${body.data.access_token}', '${process.env.DATABASE_ENCRYPTION_KEY}', 'cipher-algo=${process.env.DATABASE_ENCRYPTION_ALGO}'), PGP_SYM_ENCRYPT('${new Date().getTime() / 1000 + body.data.expires_in}', '${process.env.DATABASE_ENCRYPTION_KEY}', 'cipher-algo=${process.env.DATABASE_ENCRYPTION_ALGO}')) WHERE PGP_SYM_DECRYPT(account_id::bytea, '${process.env.DATABASE_ENCRYPTION_KEY}') = '${payload.accountId}';`,
        (error, results) => {
            if (error) {
                console.log("Error updating user in database.", error);
            } else {
                console.log("Successfully updated user in database.");
                getPhoto(payload, body.data.access_token);
            }
        },
    );
}
function deleteUser(payload) {
    pg.query(
        `DELETE FROM users WHERE PGP_SYM_DECRYPT(account_id::bytea,'${process.env.DATABASE_ENCRYPTION_KEY}') = '${payload.account_id}';`,
        (error, results) => {
            if (error) {
                console.log("Error removing user from database.", error);
            } else {
                console.log("Successfully removed user from database.");
            }
        },
    );
}
Here is the completed index.js file for reference.
Now go to your .env file to add your DATABASE_ENCRYPTION_KEY, DATABASE_ENCRYPTION_ALGO, and DATABASE_URL. If you followed my instructions on setting up PostgreSQL the DATABASE_URL should be this:
DATABASE_ENCRYPTION_KEY=Required
DATABASE_ENCRYPTION_ALGO=aes256
DATABASE_URL=postgres://me:password@localhost:5432/unsplash_for_zoom_team_chat
If you have setup PostgreSQL before or set it up differently than me reference this image.
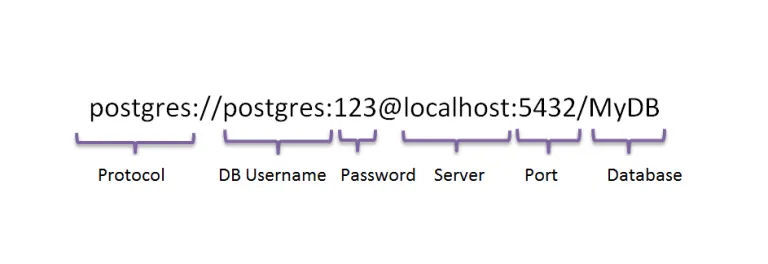
Image Source: https://www.javascriptpoint.com/nodejs-postgresql-tutorial-example/
Now let's seed our database with a new access_token and expires_on date.
$ node seed.js
Finally, let's test our chatbot:
Awesome it worked!
And if we check our database, we now have a user with an account_id, access_token, and expires_on date, all encrypted via aes256 with our DATABASE_ENCRYPTION_KEY:
unsplash_for_zoom_team_chat=> SELECT * FROM users;
account_id  | access_token | expires_on
------------+--------------+--------------
xc30d04090..|asdfjkhqwesi..|1559690220.871
Section 3. Production deployment
Now that our Chatbot code is complete, it's time to create our Heroku server and database! If you haven't setup the Heroku CLI yet, you can do that here. If you chose to not setup the database in the previous section, ignore the database steps.
$ heroku create
$ heroku addons:create heroku-postgresql:hobby-dev
Let's push our code up:
$ git add -A
$ git commit -m "deploying to heroku"
$ git push heroku master
Now our code should be deployed to heroku! To open our landing page, type:
$ heroku open
You should see “Welcome to the Unsplash for Zoom Team Chat!”
Now seed the database:
$ heroku run node seed.js
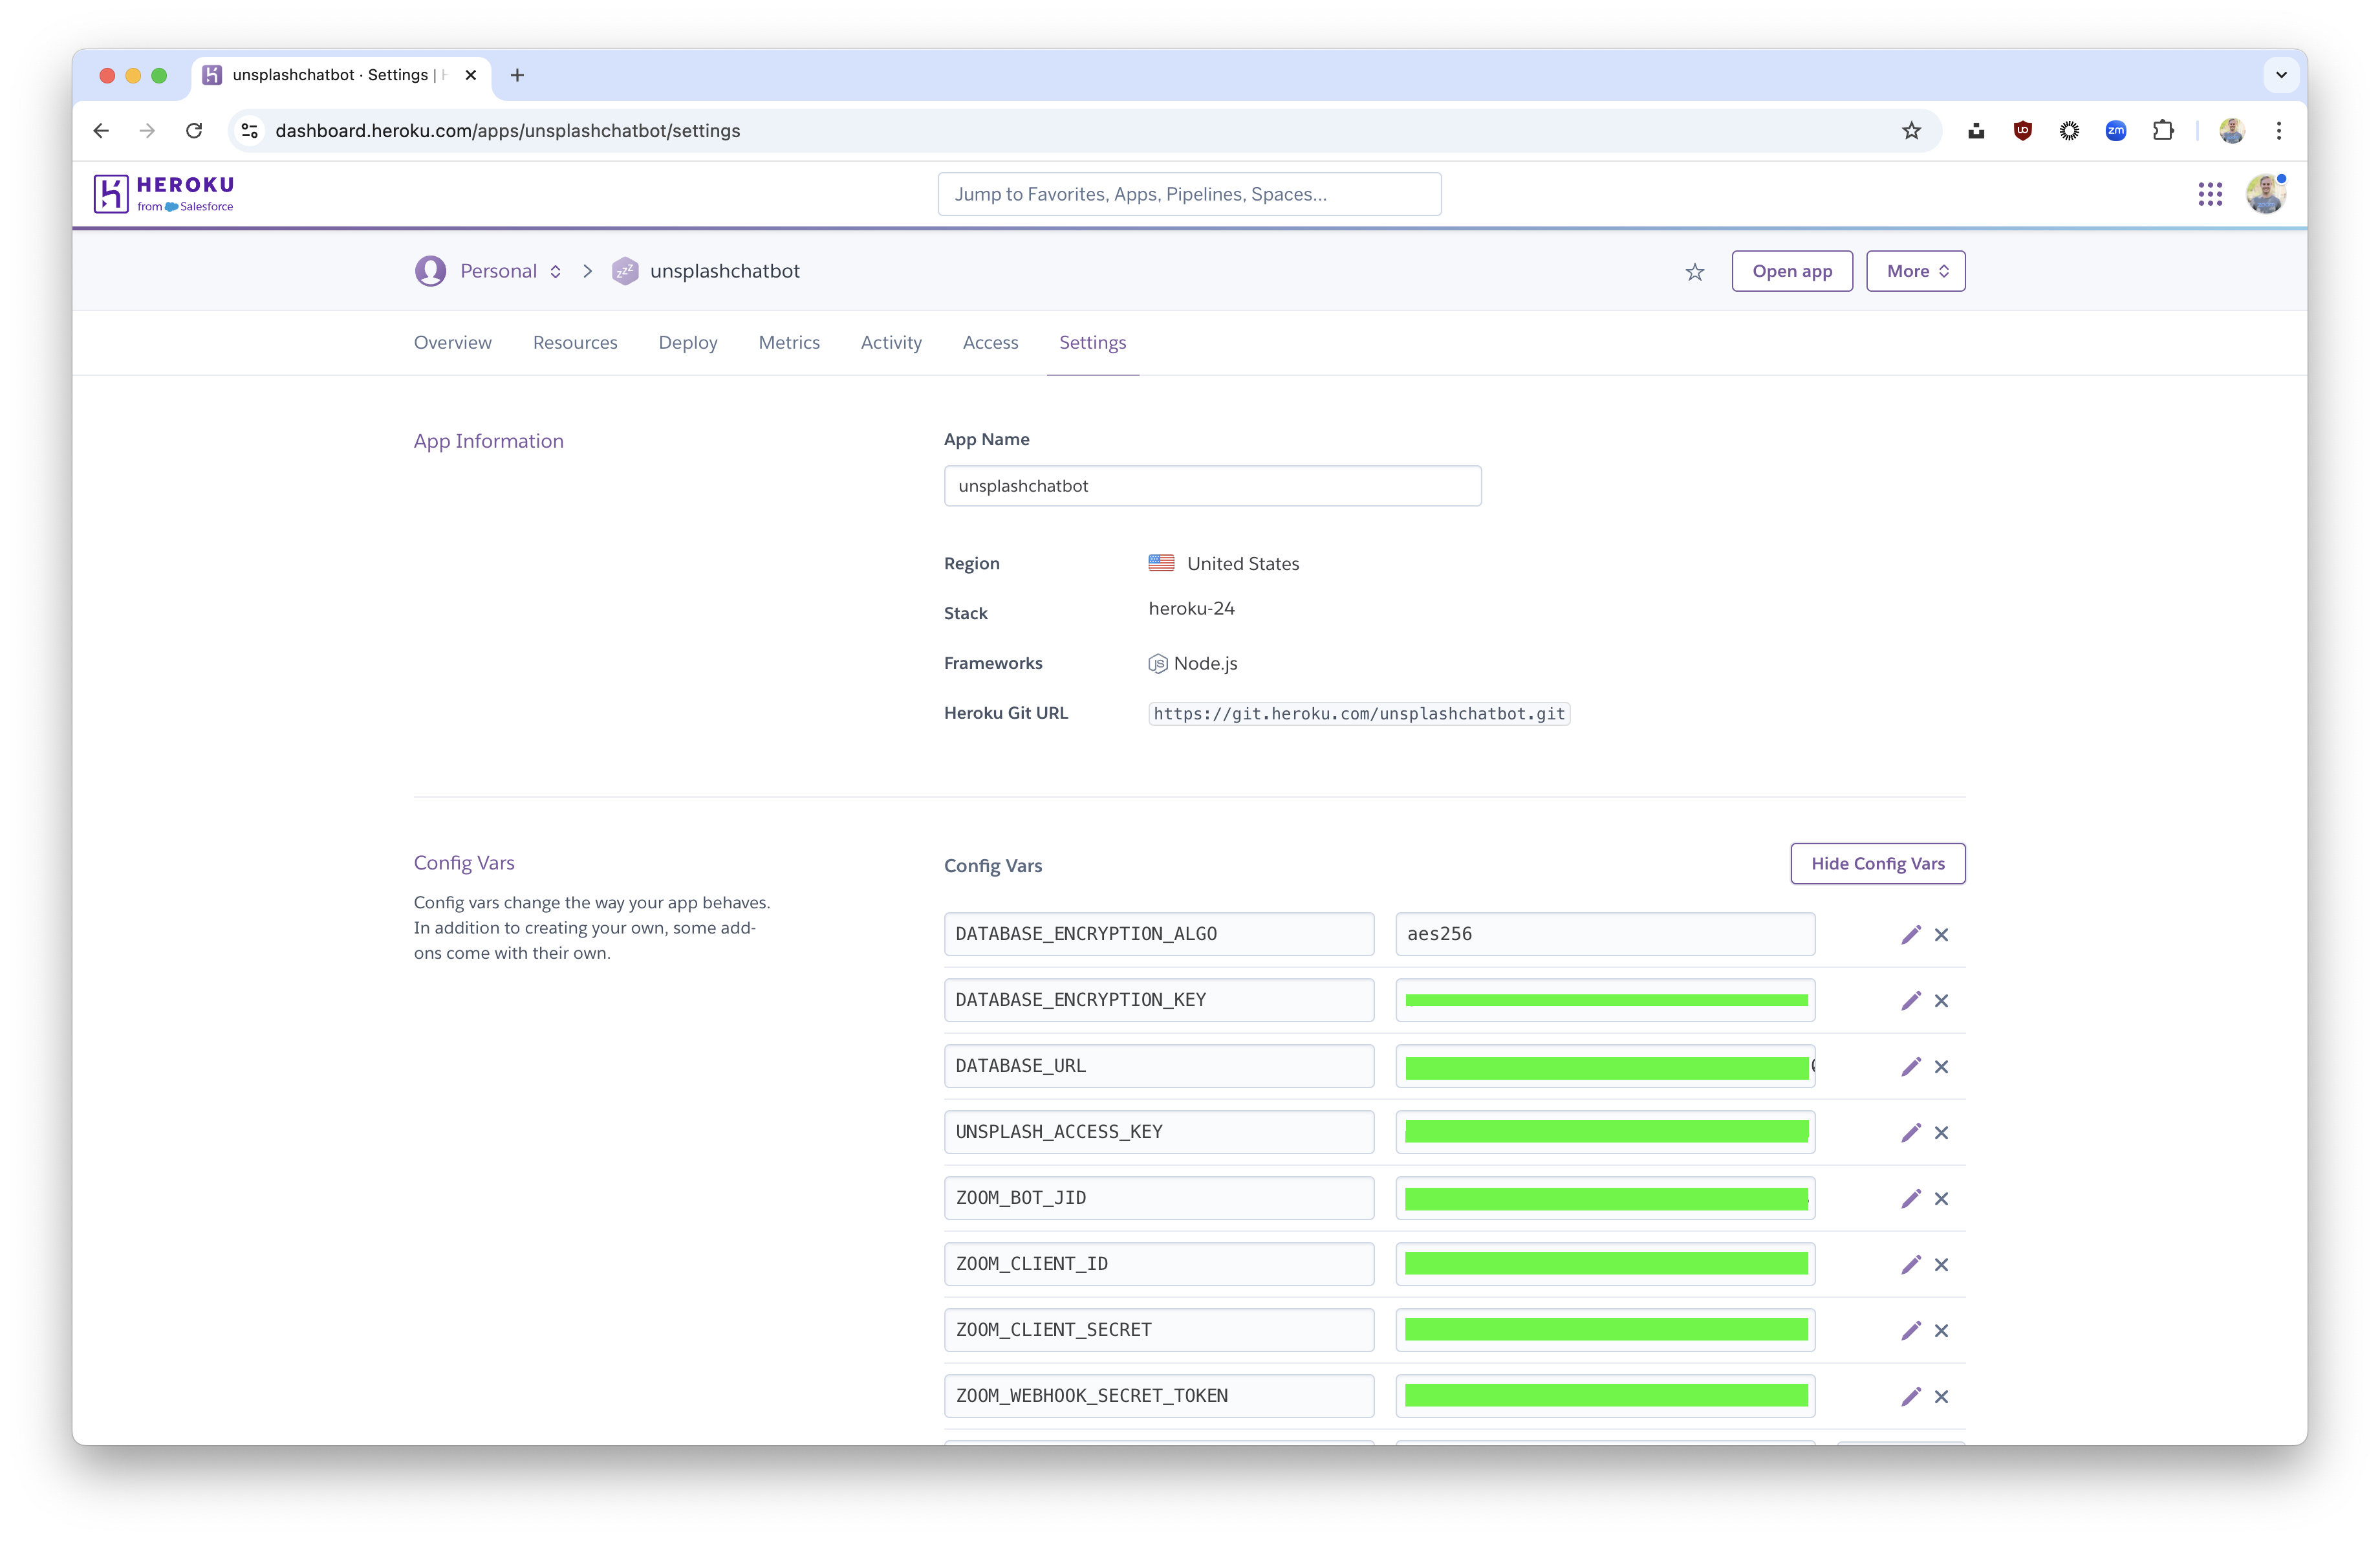
Navigate to your Heroku dashboard so we can insert our production keys and credentials into the Config Vars section on the Settings page. Copy these keys into your Heroku KEY inputs:
UNSPLASH_ACCESS_KEY(Your Unsplash Access Key, it's the same for production and development, found on your Unsplash App Page)ZOOM_CLIENT_ID(Your Production Zoom Client ID, found on your Zoom App Basic Information page)ZOOM_CLIENT_SECRET(Your Production Zoom Client Secret Found on your Zoom App Basic Information page)ZOOM_BOT_JID(Your Production Zoom Bot JID Found on your Zoom App Features -> Surface page)ZOOM_WEBHOOK_SECRET_TOKEN(Your Production Zoom Webhook Secret Token, found on your Zoom App Features -> Access page)DATABASE_ENCRYPTION_KEY(An encryption key used to encrypt the data in your database. Treat this key secret, like a password)DATABASE_ENCRYPTION_ALGO(An encryption algorithm used to encrypt your the data in your database)
NOTE: Do not add or change the DATABASE_URL field. It is populated automatically.
The final step is to insert your Heroku url into the Zoom production inputs. Make sure you include the “/authorize” path param at the end of the base url because that will match the path in our code. For the Whitelist, URL, just add the base Heroku url:
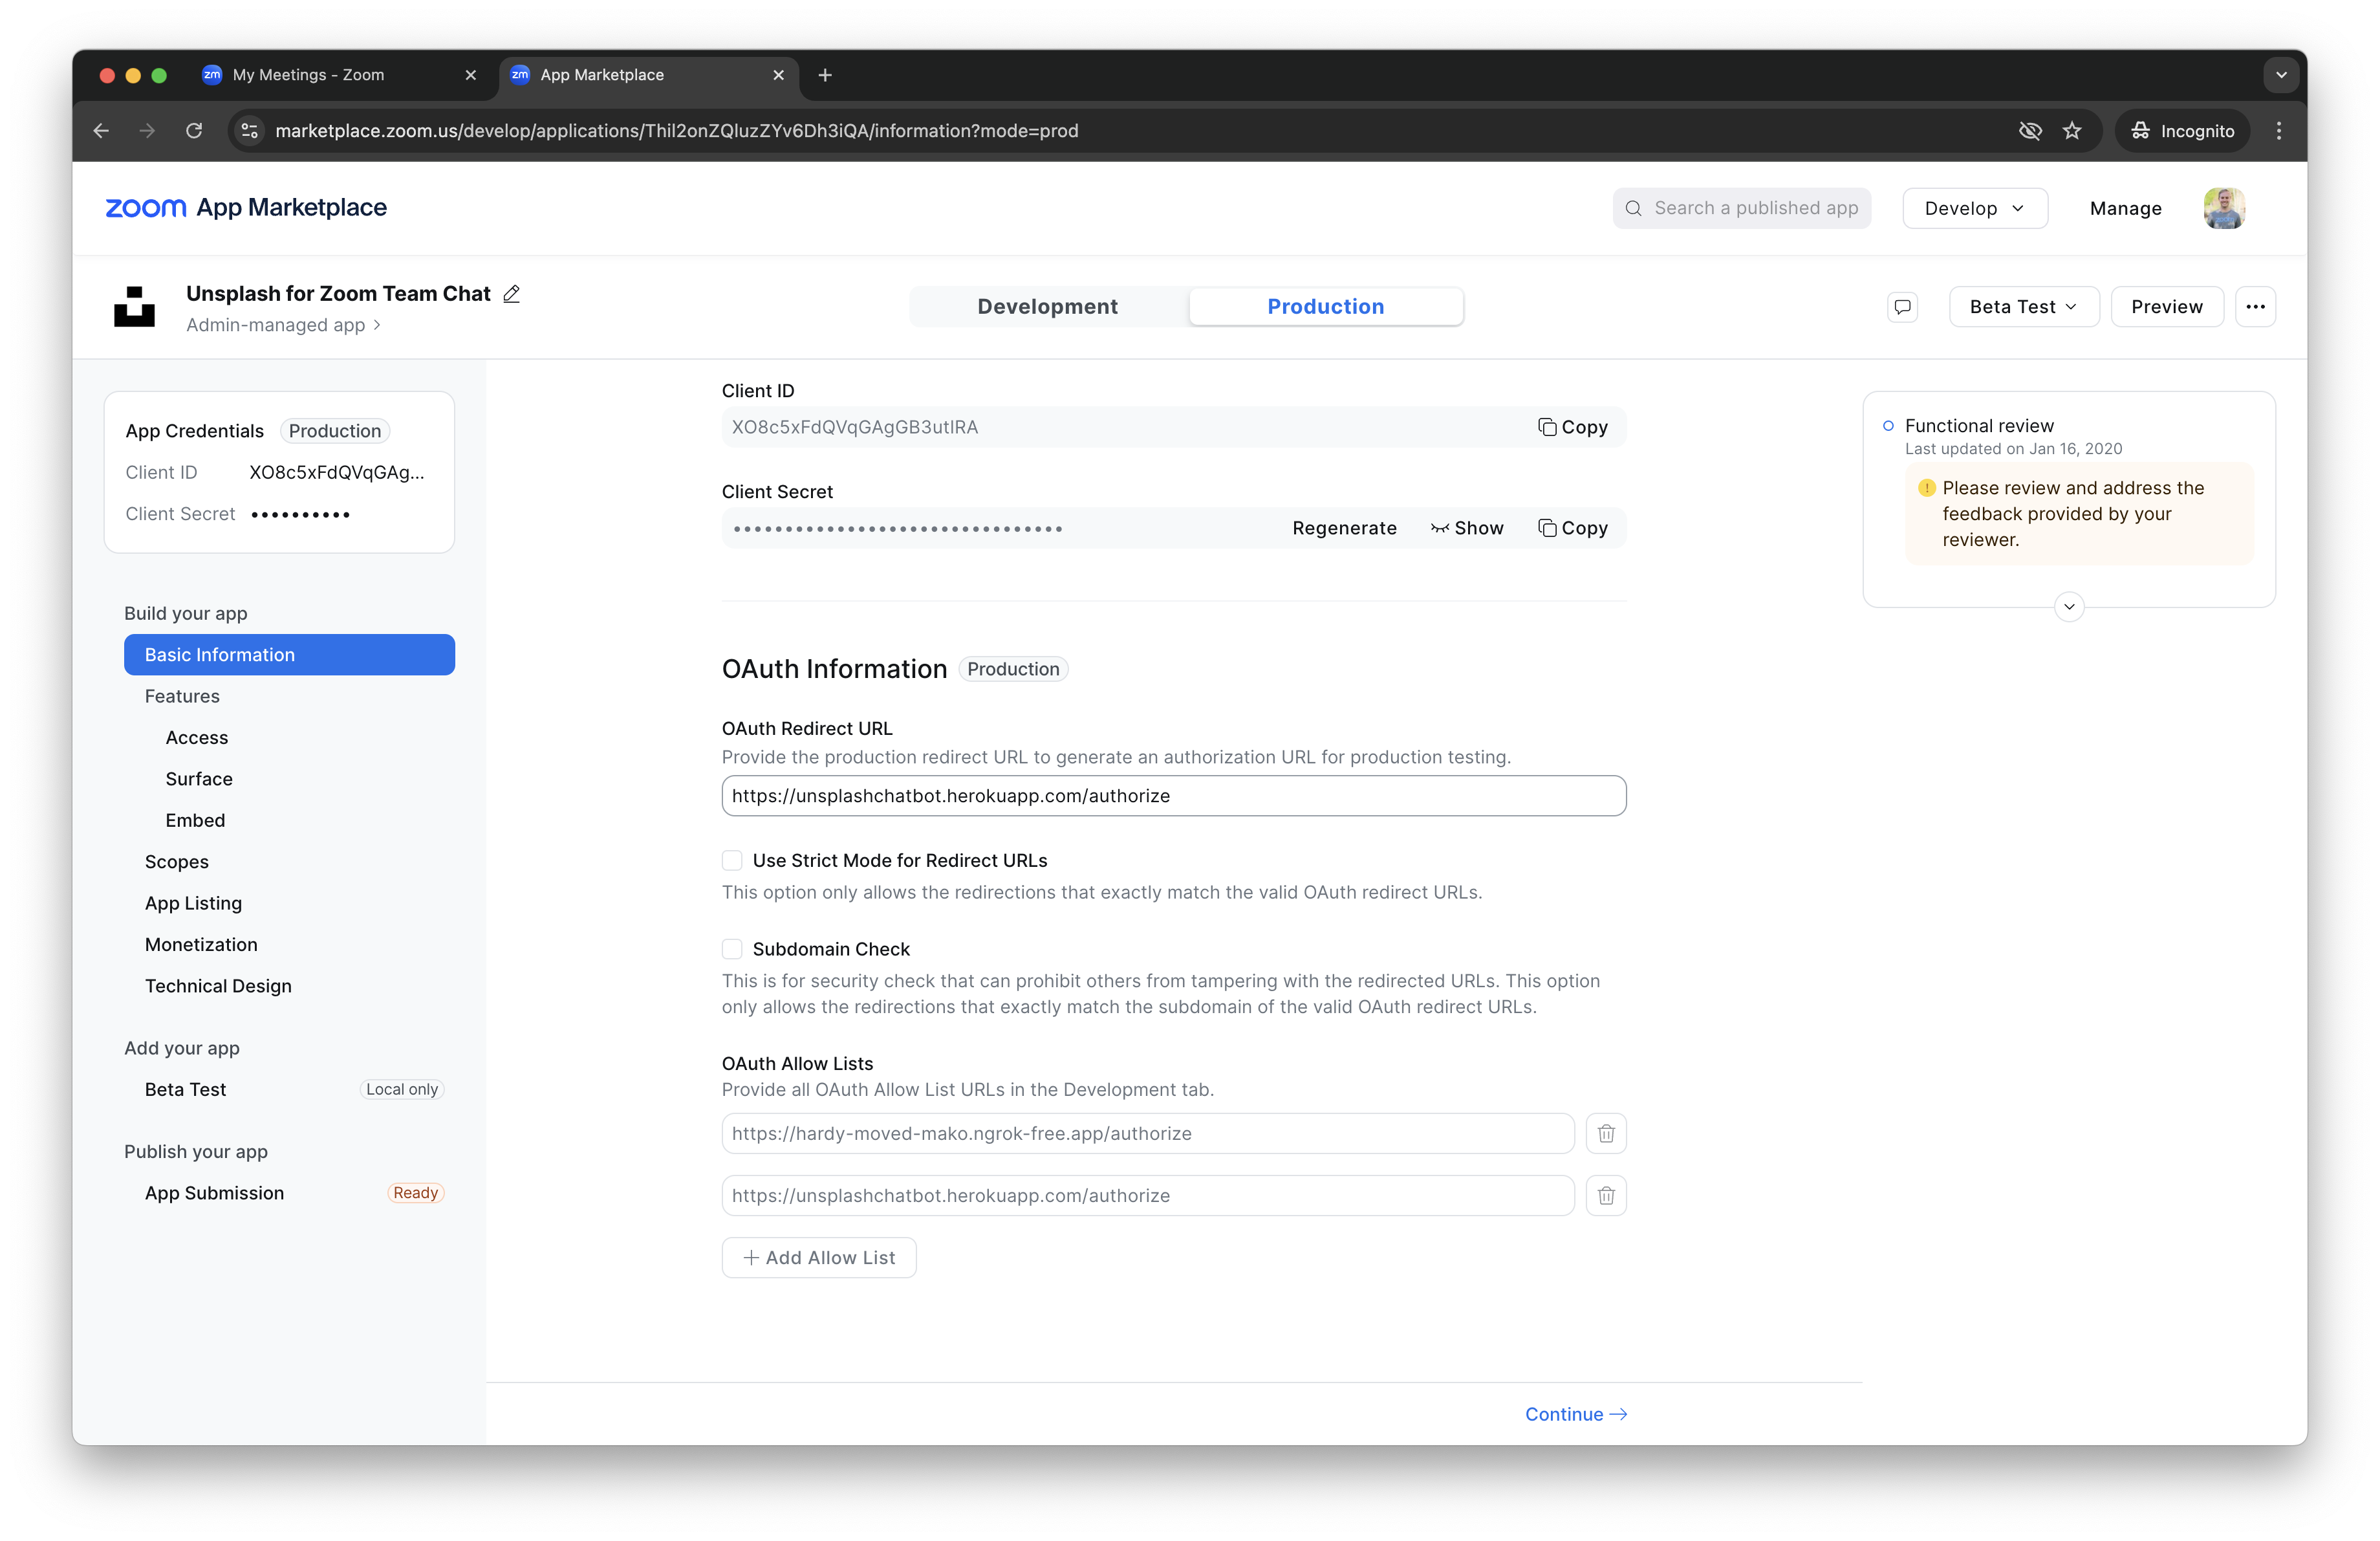
NOTE: For this section stay on the Production tab.
Finally, add the Heroku url and make sure to include the “/unsplash” path param so that it matches the path in our code.
Click the blue Save button.
Now go to the Submit page, click Add to Zoom, then click the blue Authorize button to install the production version of your chatbot to the Zoom Client!


Clicking Allow installs the app to your Zoom account only. People outside your account will not be able to install it using this link, unless you submit it to the Zoom App Marketplace, covered in the next section.
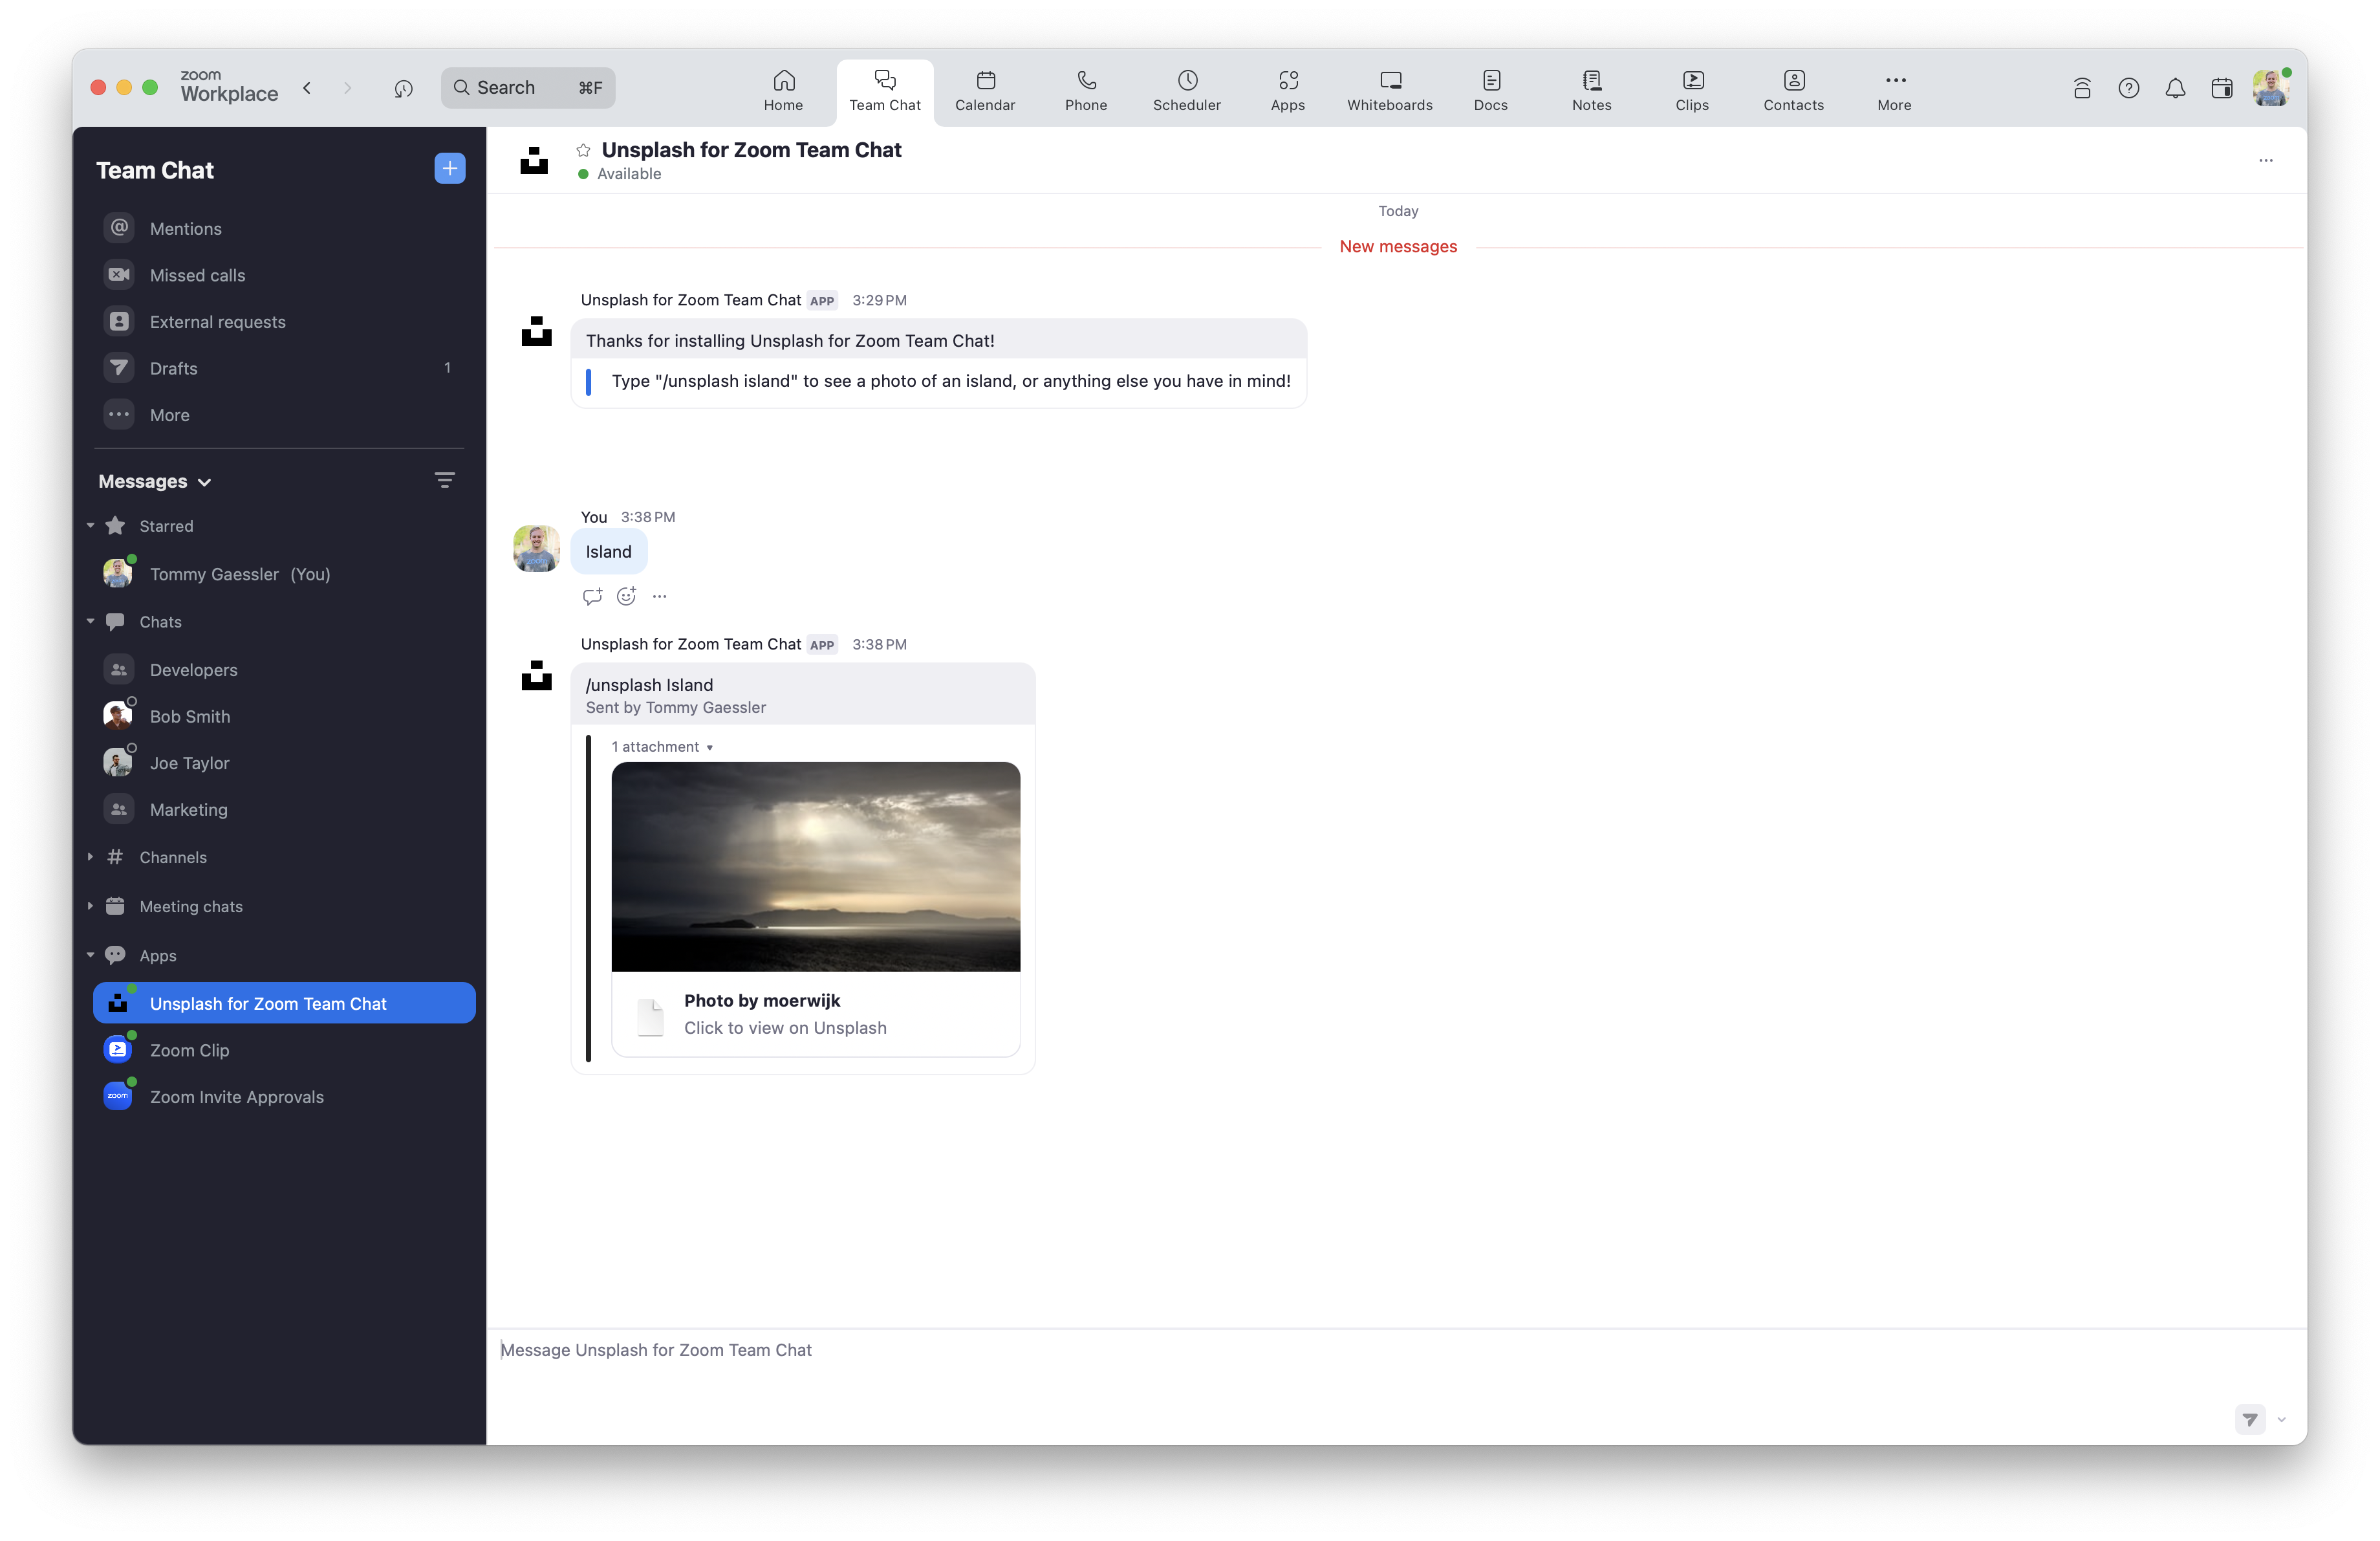
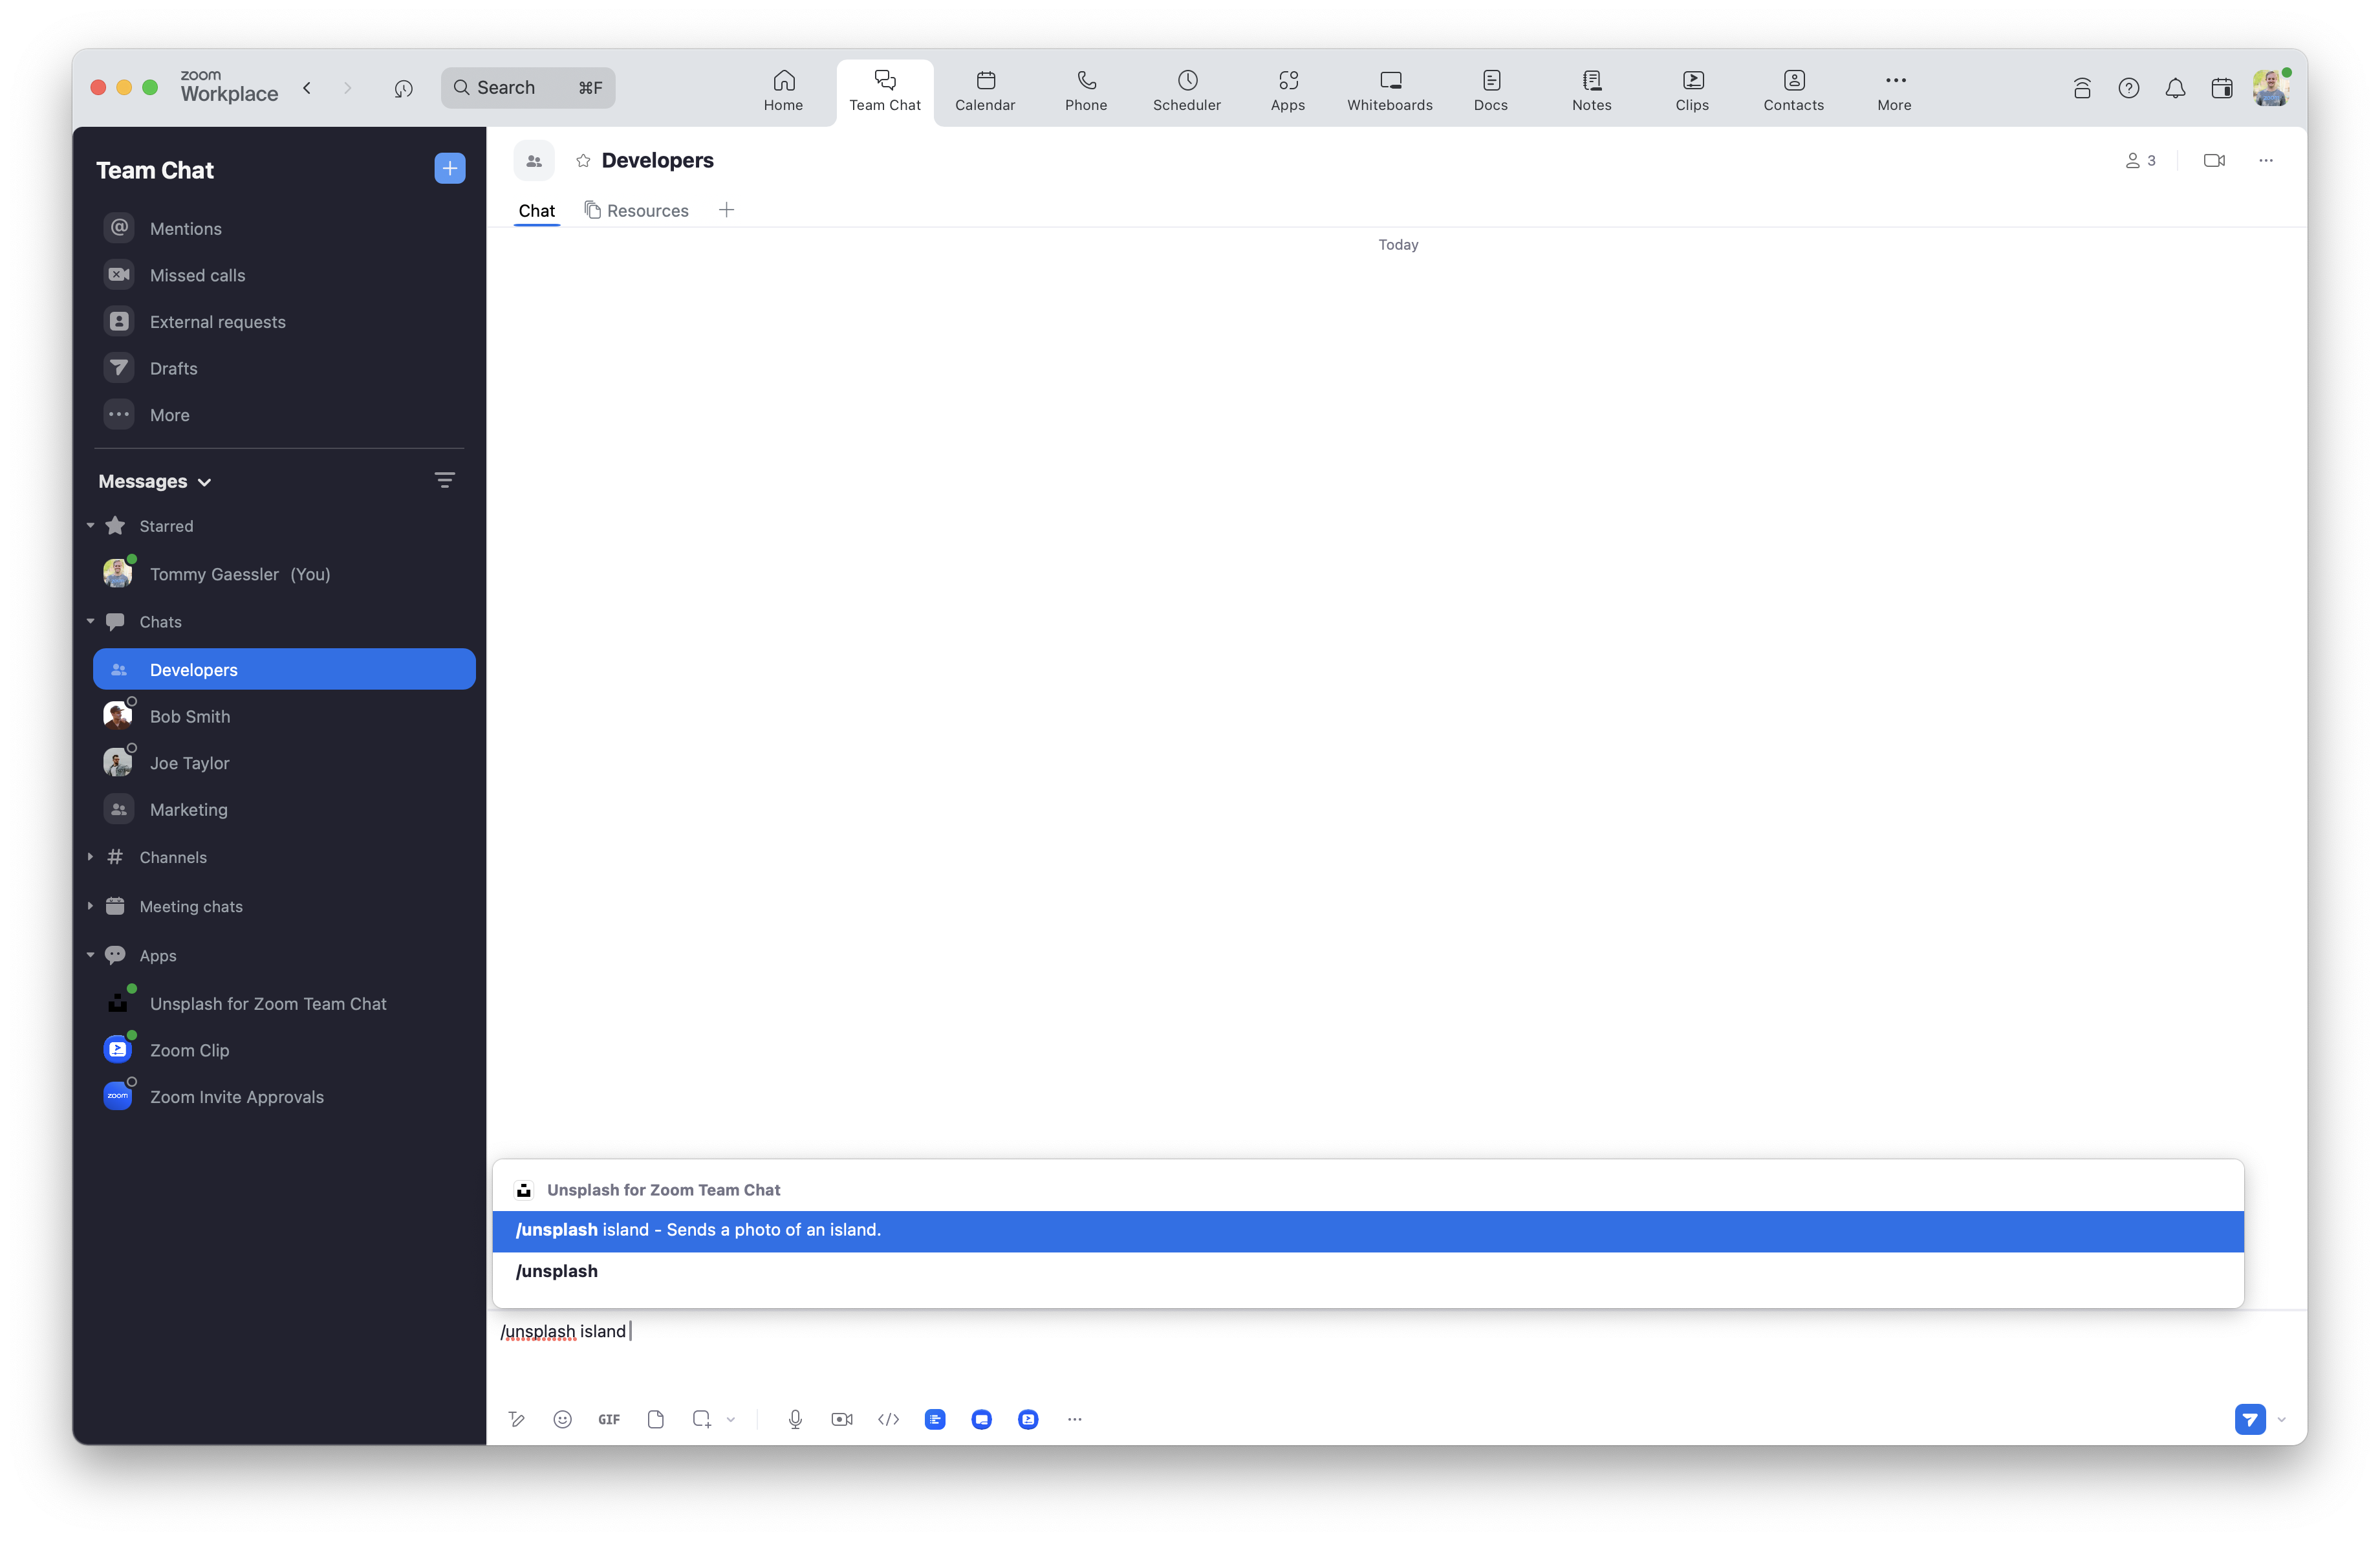
Now that our production Chatbot is finished and installed, let's try it out! Open a Chat Channel and type: /unsplash island
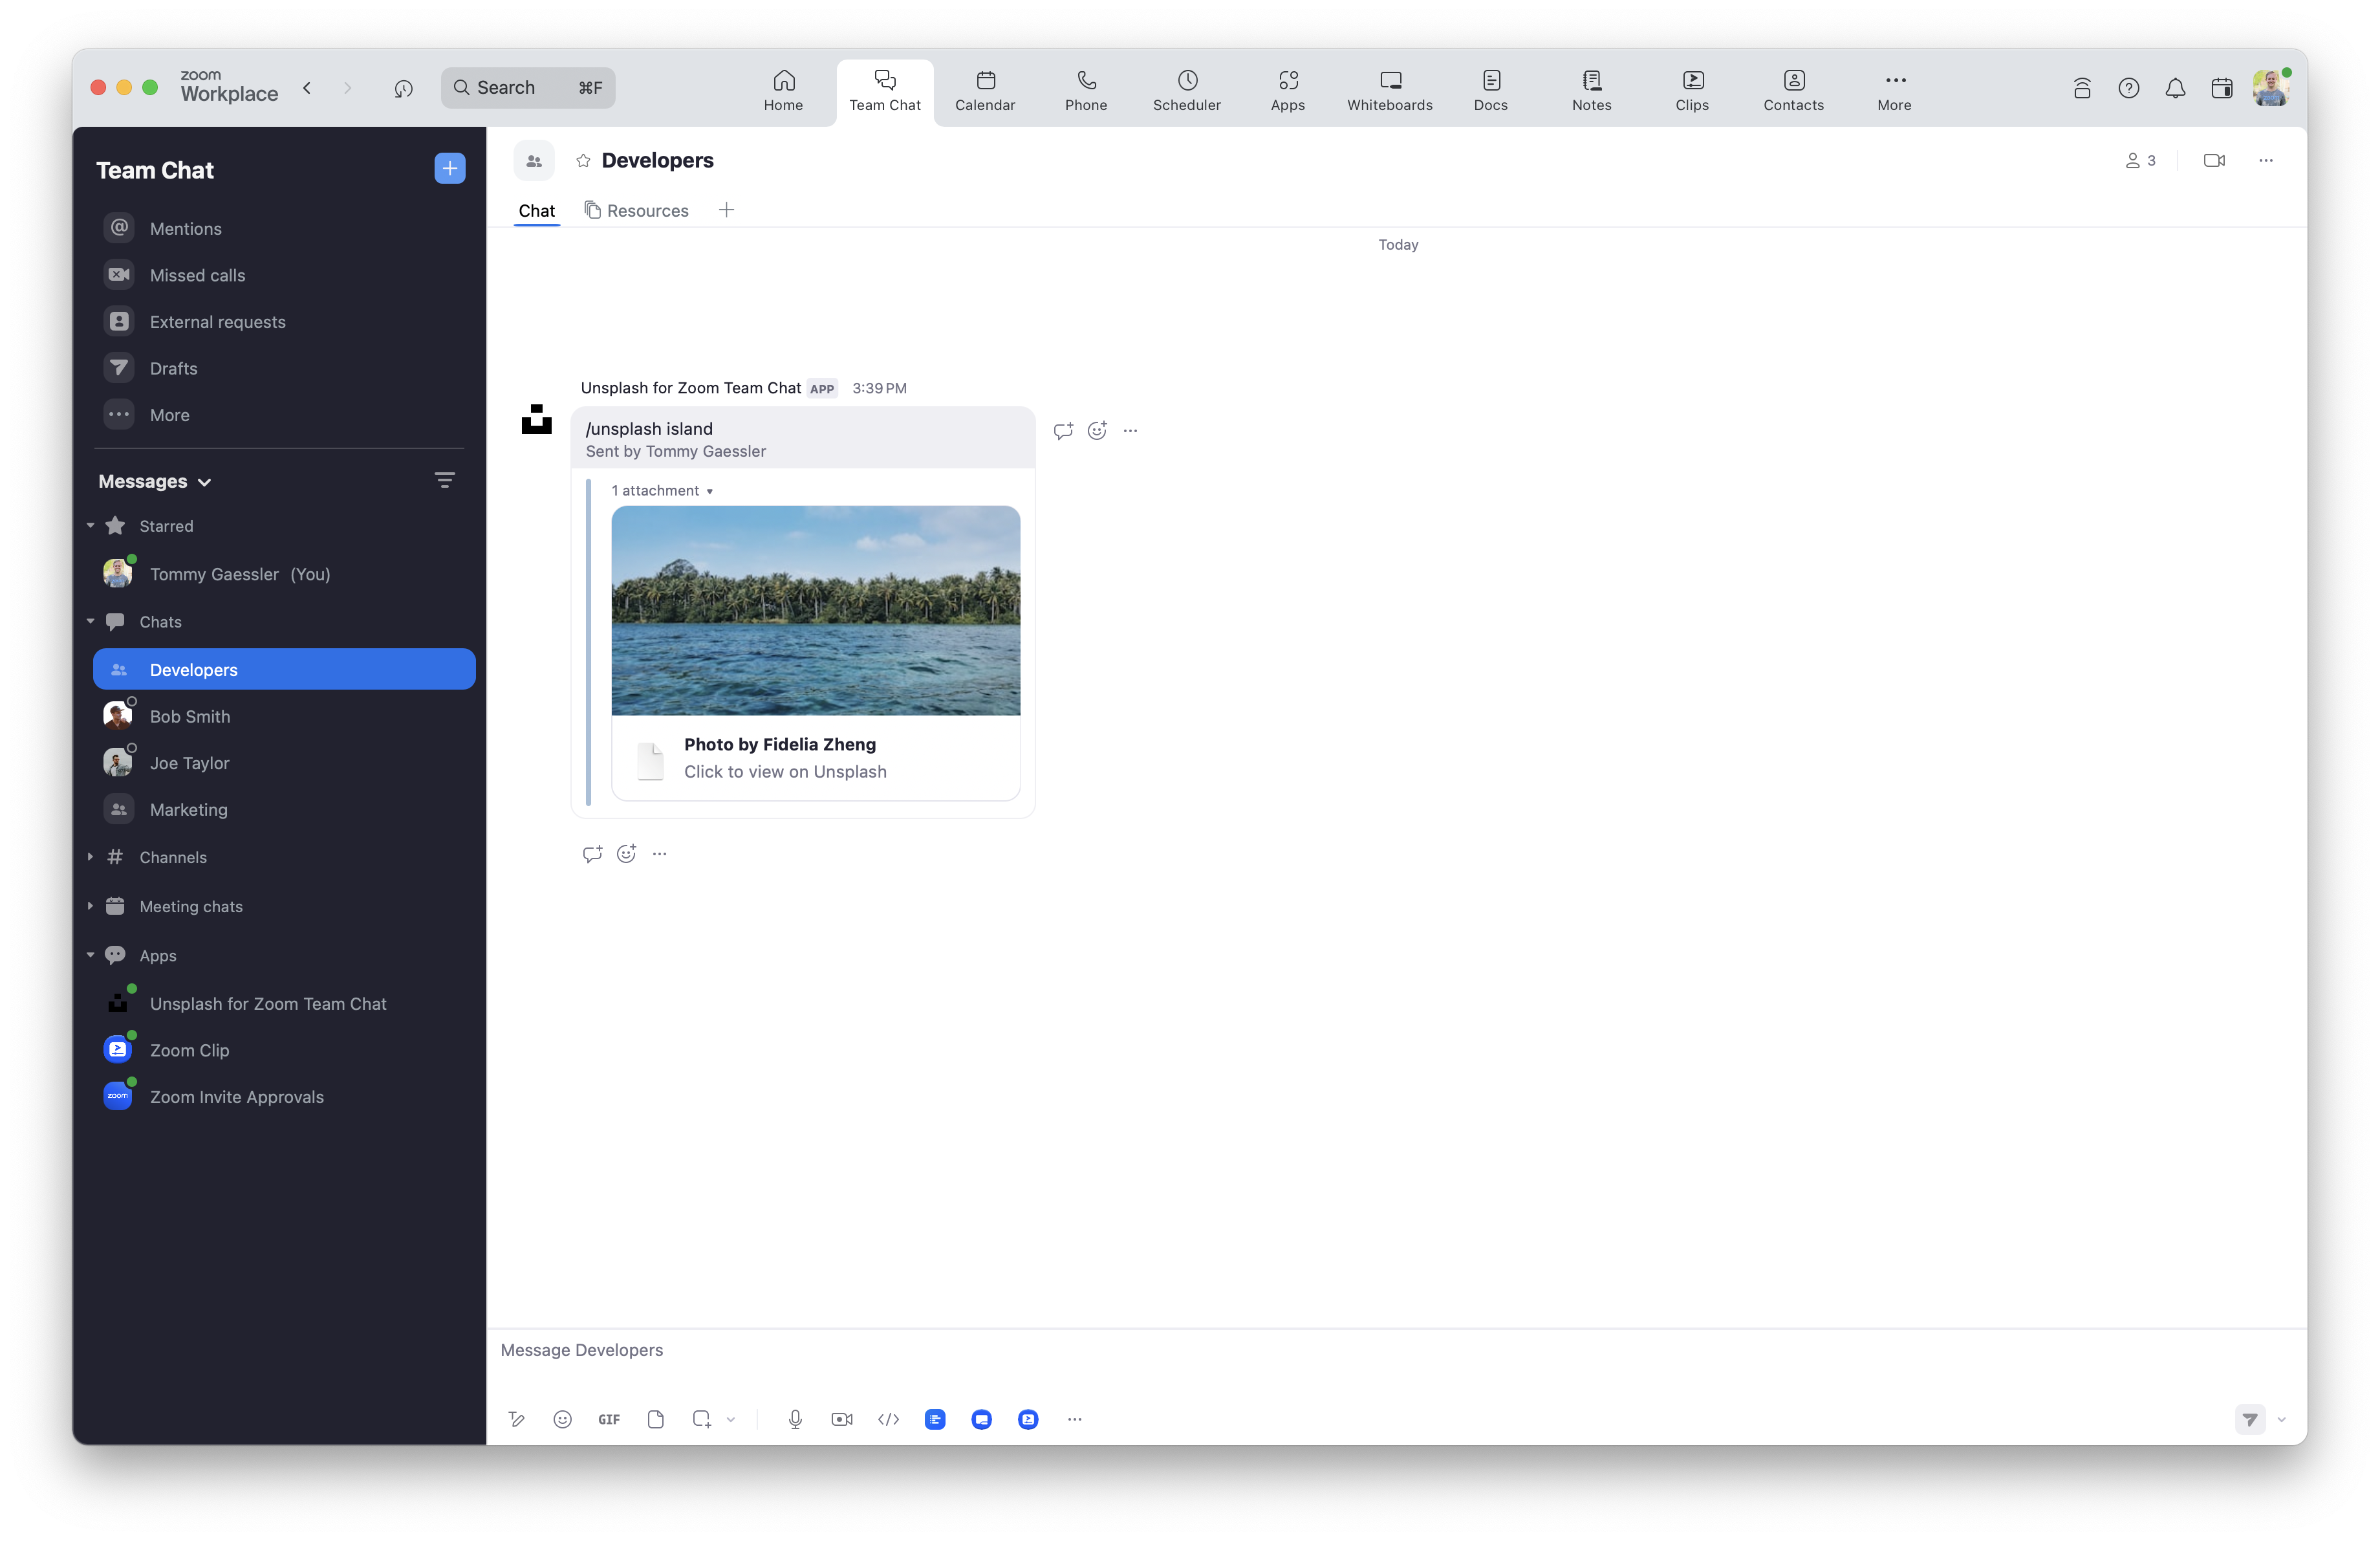
Give yourself a high five, you made a Zoom Chatbot! You can talk to it directly without the your slash command, or use it in channels and direct messages with the your slash command.
Section 4. Publish to the Zoom App Marketplace
To publish your app to the Zoom App Marketplace, we have to add a few more routes so we have all the links we need for the submission and app review.
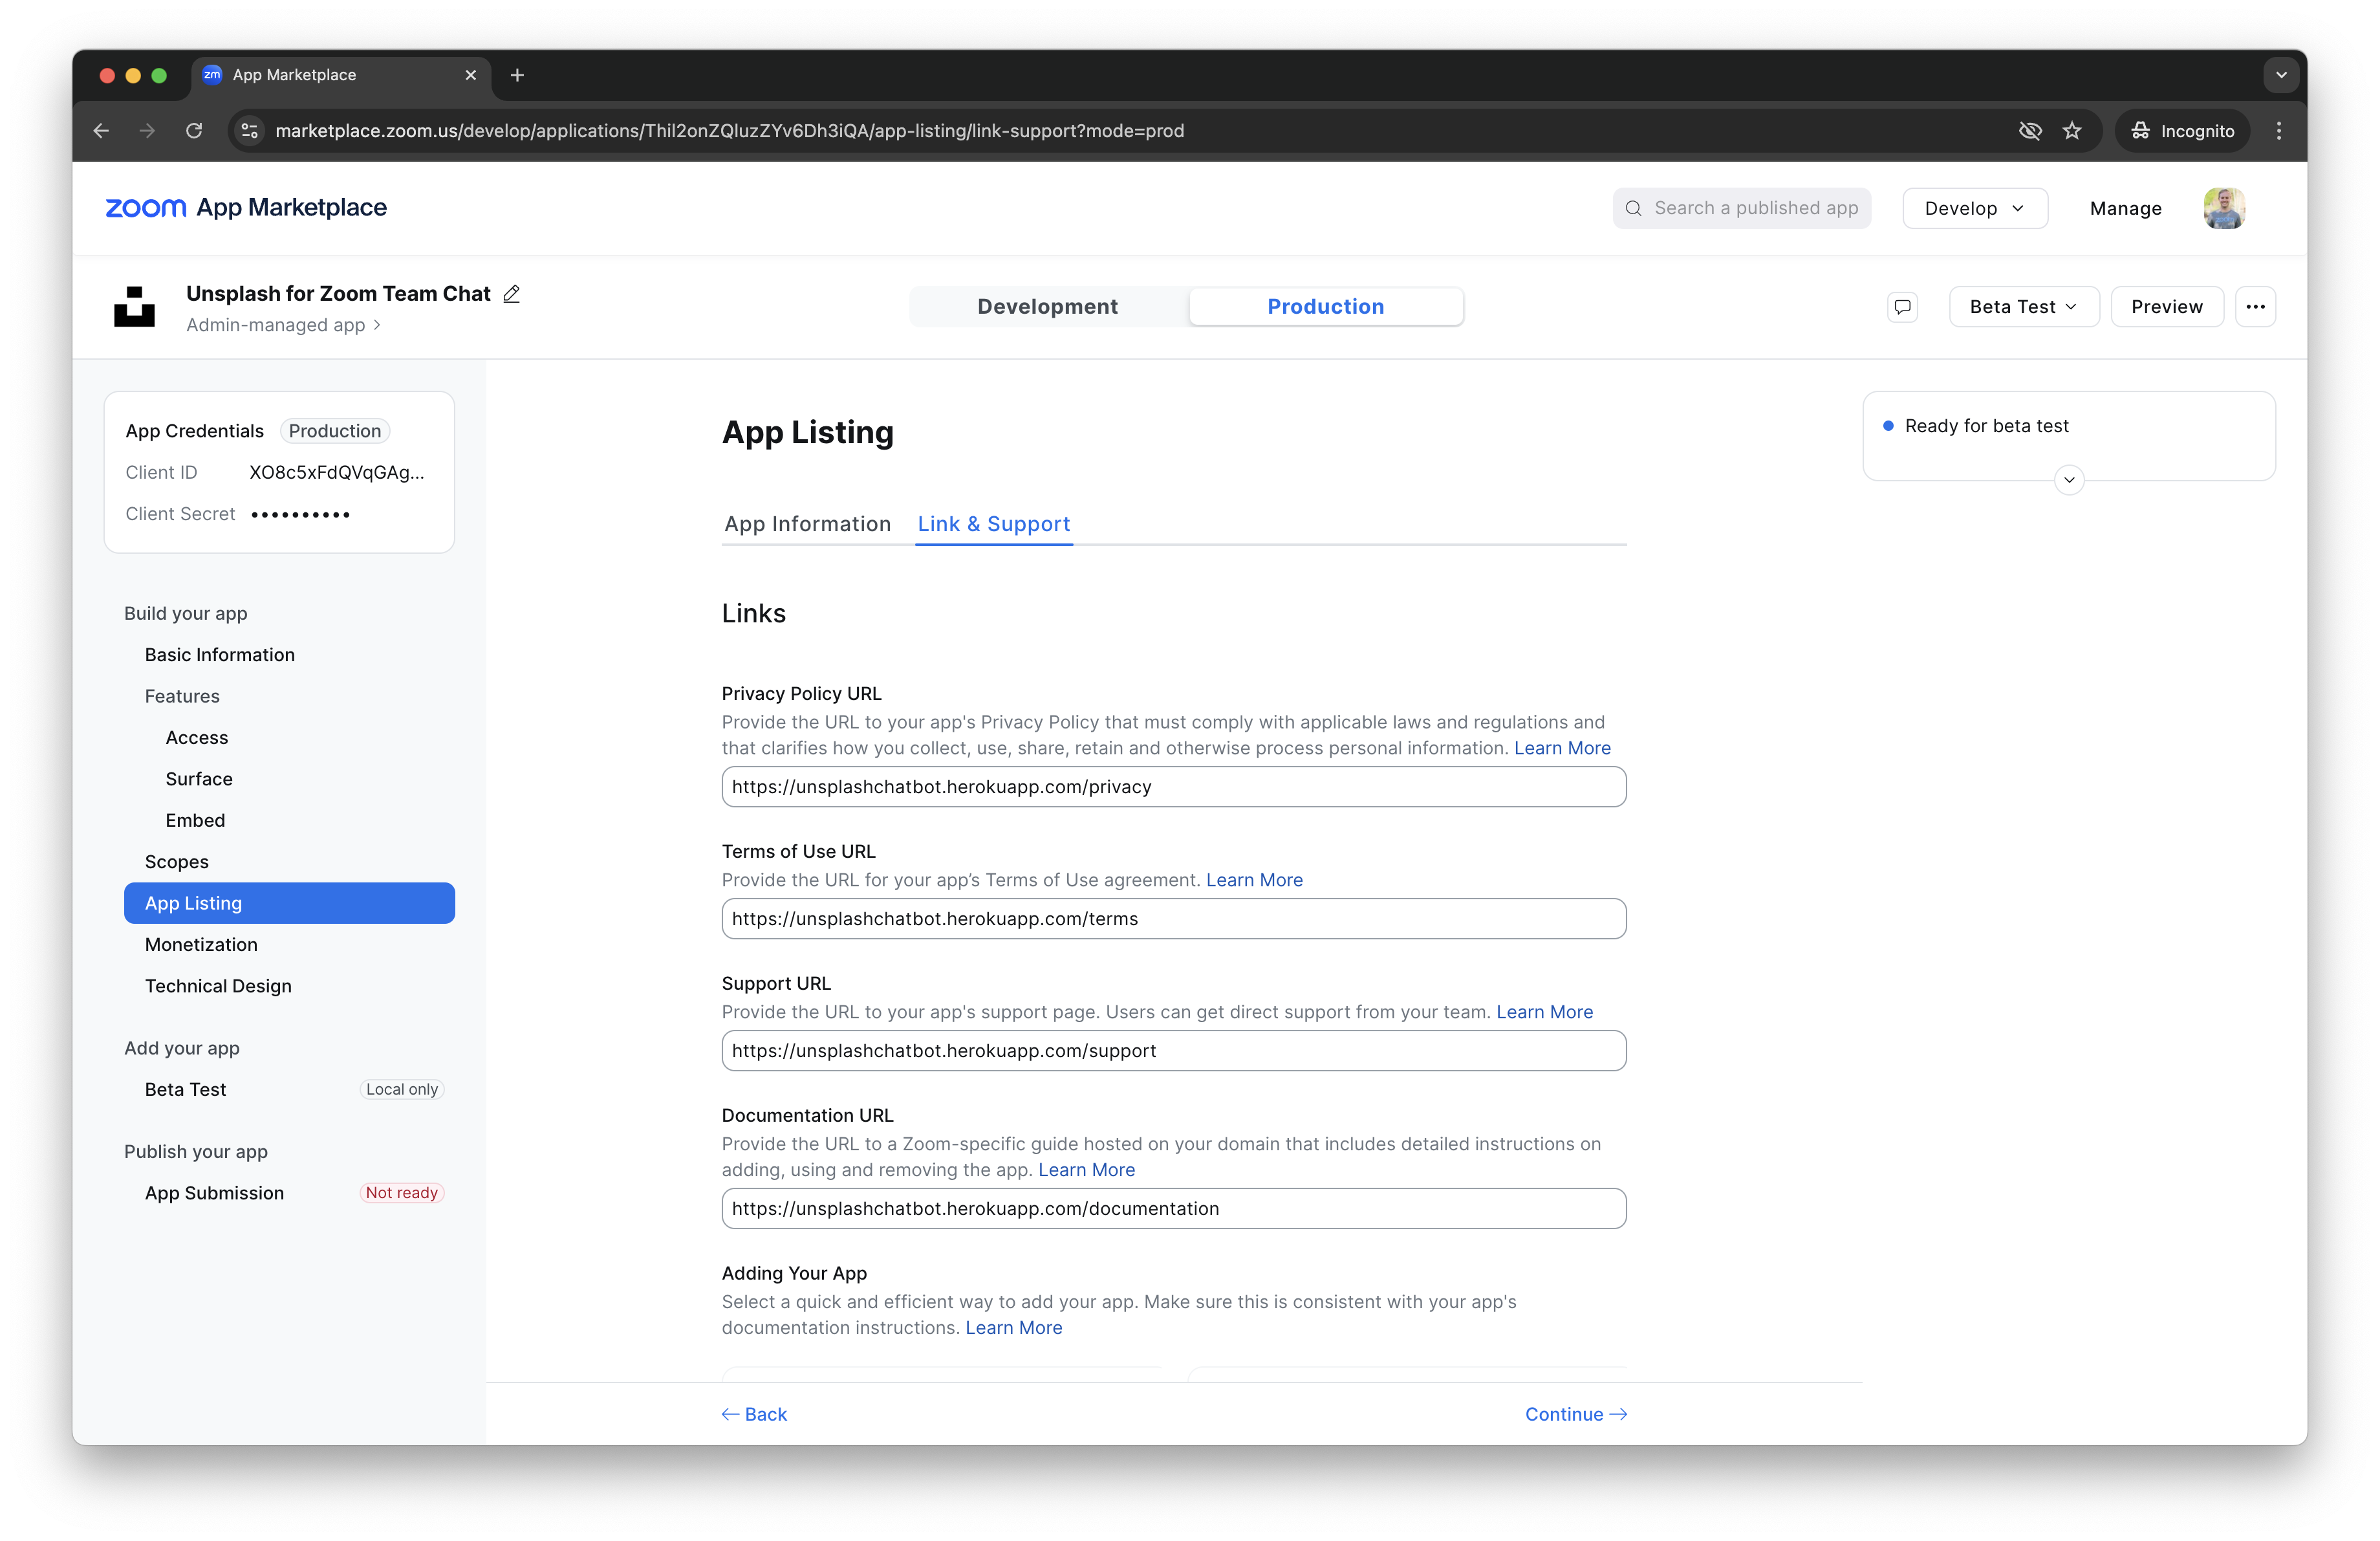
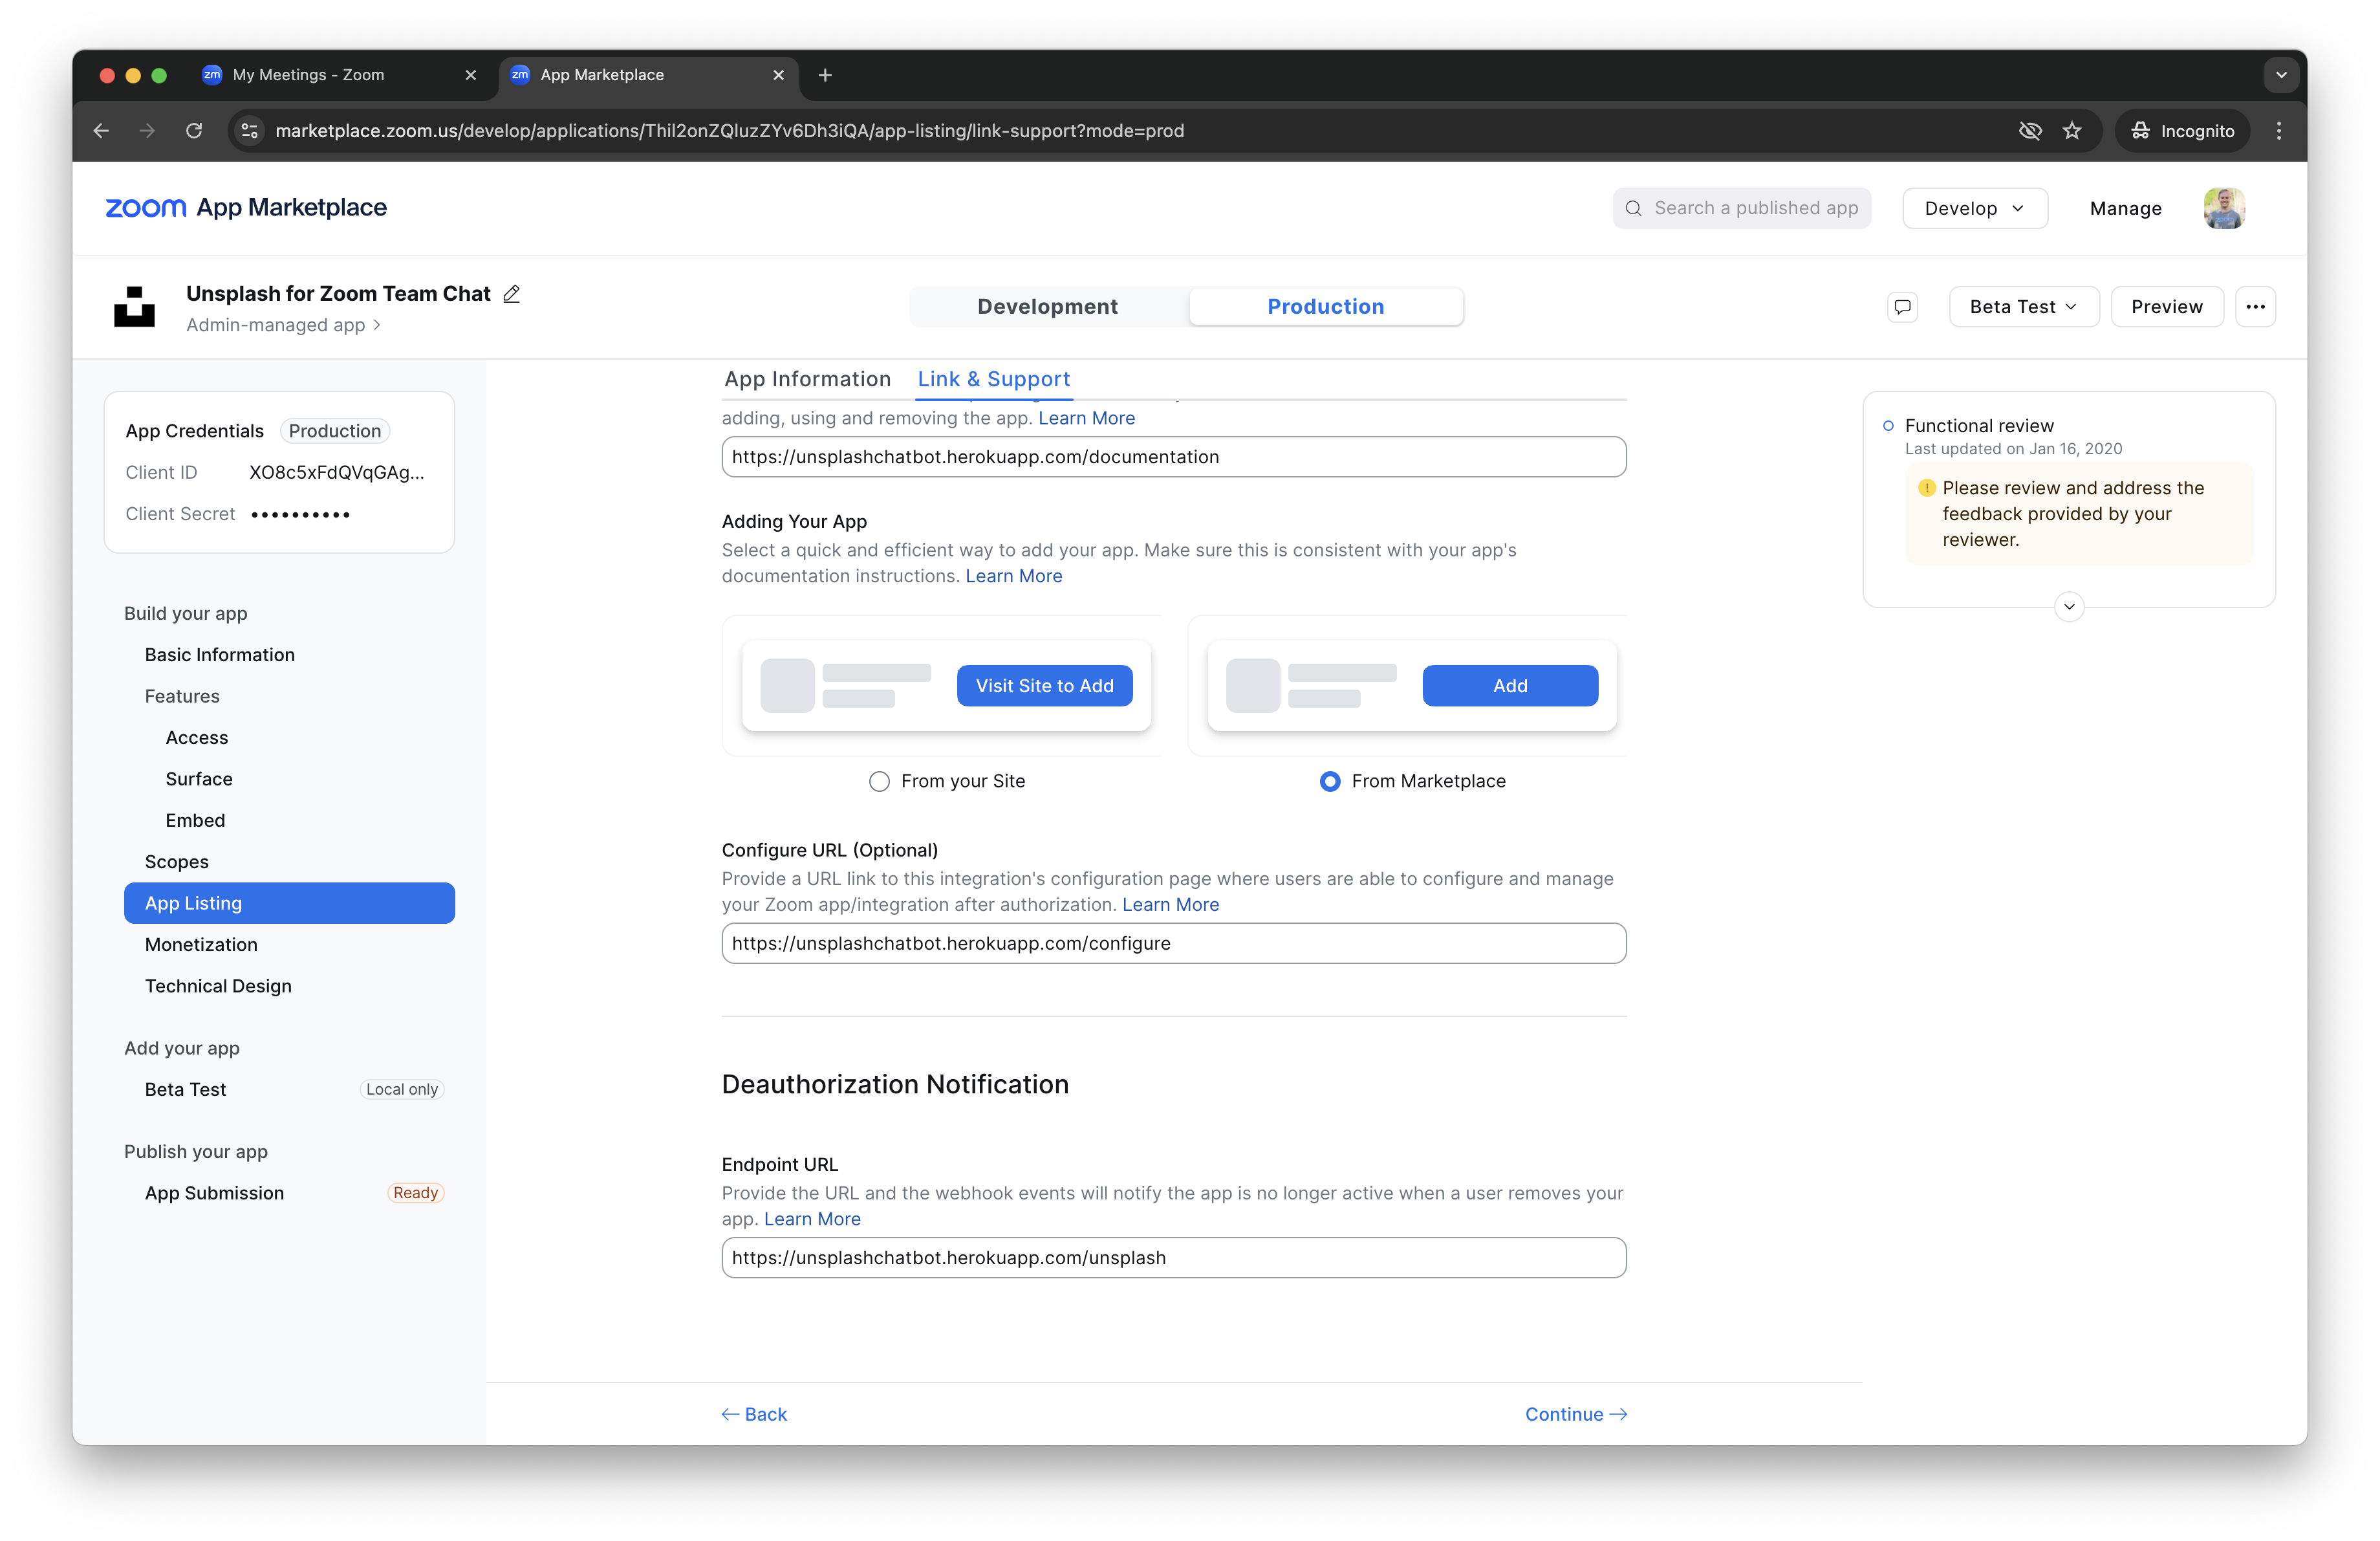
Add the following routes which includes a support, privacy, terms, and documentation page:
// routes:
// ...
app.get("/support", (req, res) => {
    res.send(
        "Reach out via devsupport.zoom.us or devforum.zoom.us for support.",
    );
});
app.get("/privacy", (req, res) => {
    res.send(
        "Unsplash for Zoom Team Chat stores the account_id, and access_token in an encrypted database for users who have installed the app. User data is deleted when the app is uninstalled by the user. User data is not shared, period.",
    );
});
app.get("/terms", (req, res) => {
    res.send(
        "Use of this sample app is subject to our [Terms of Use](https://explore.zoom.us/en/legal/zoom-api-license-and-tou/).",
    );
});
app.get("/documentation", (req, res) => {
    res.send(
        'Type "/unsplash island" to see a photo of an island, or anything else you have in mind!',
    );
});
Remember to deploy these route addition changes to production.
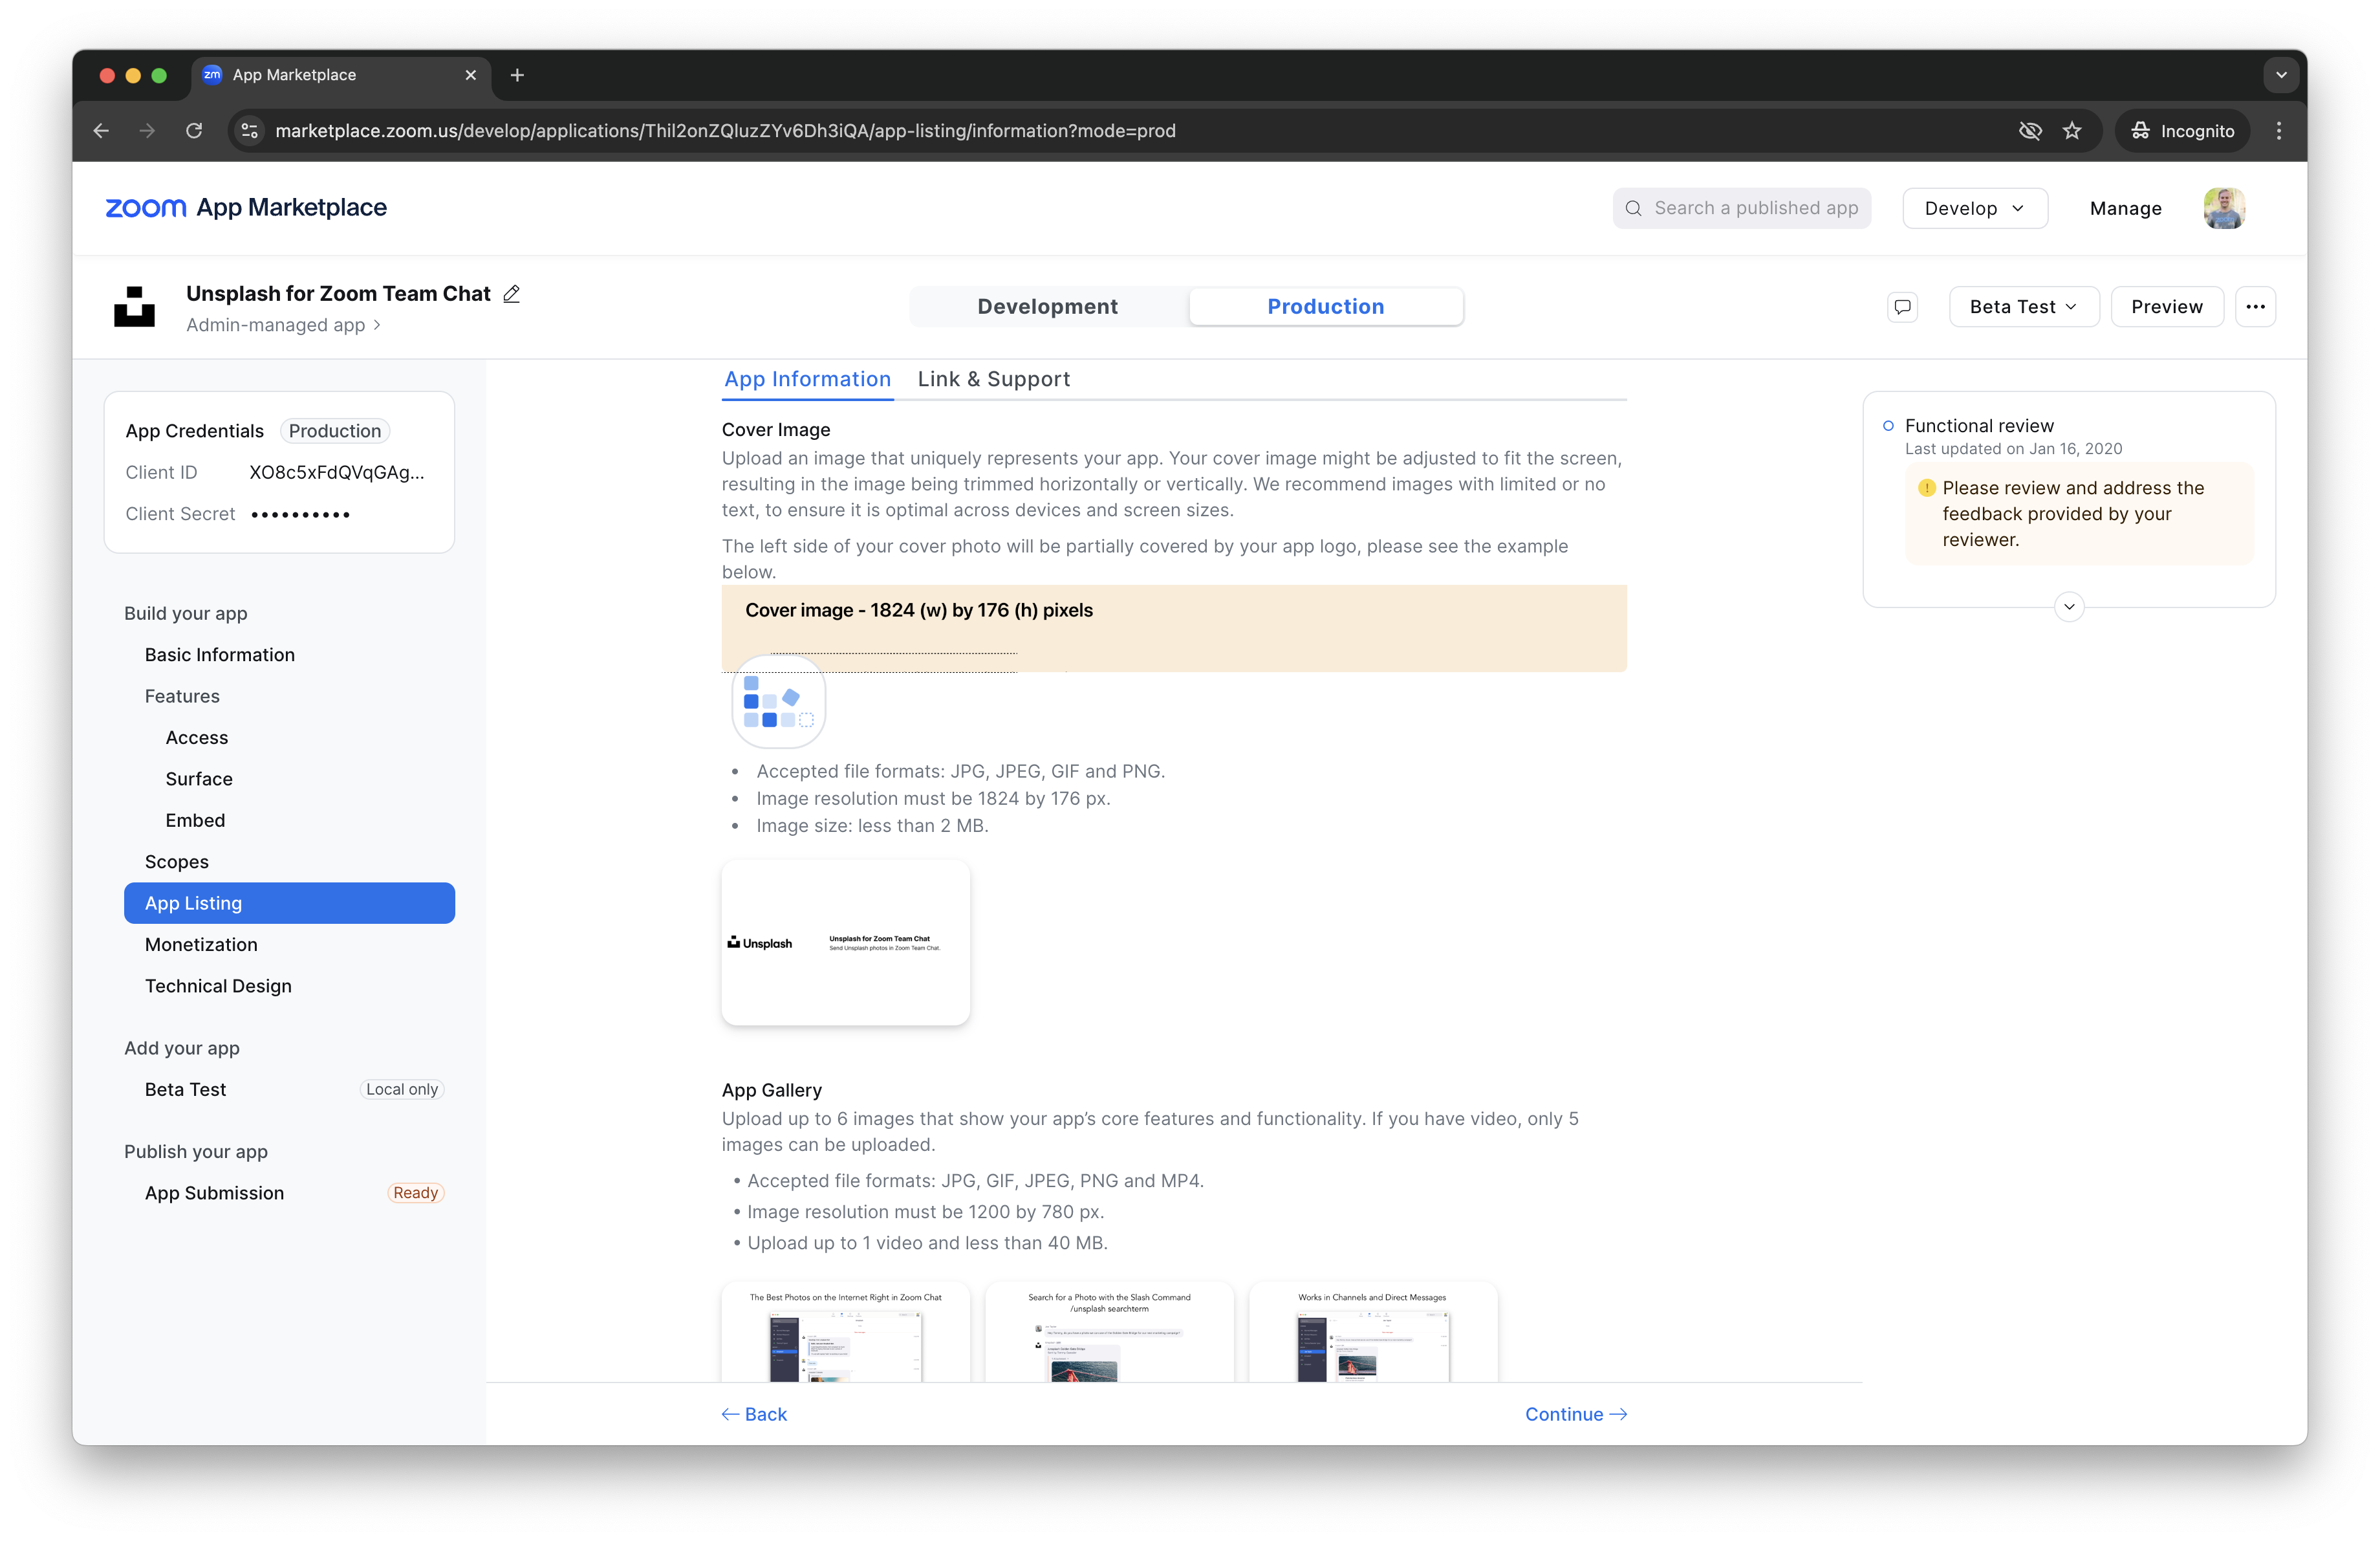
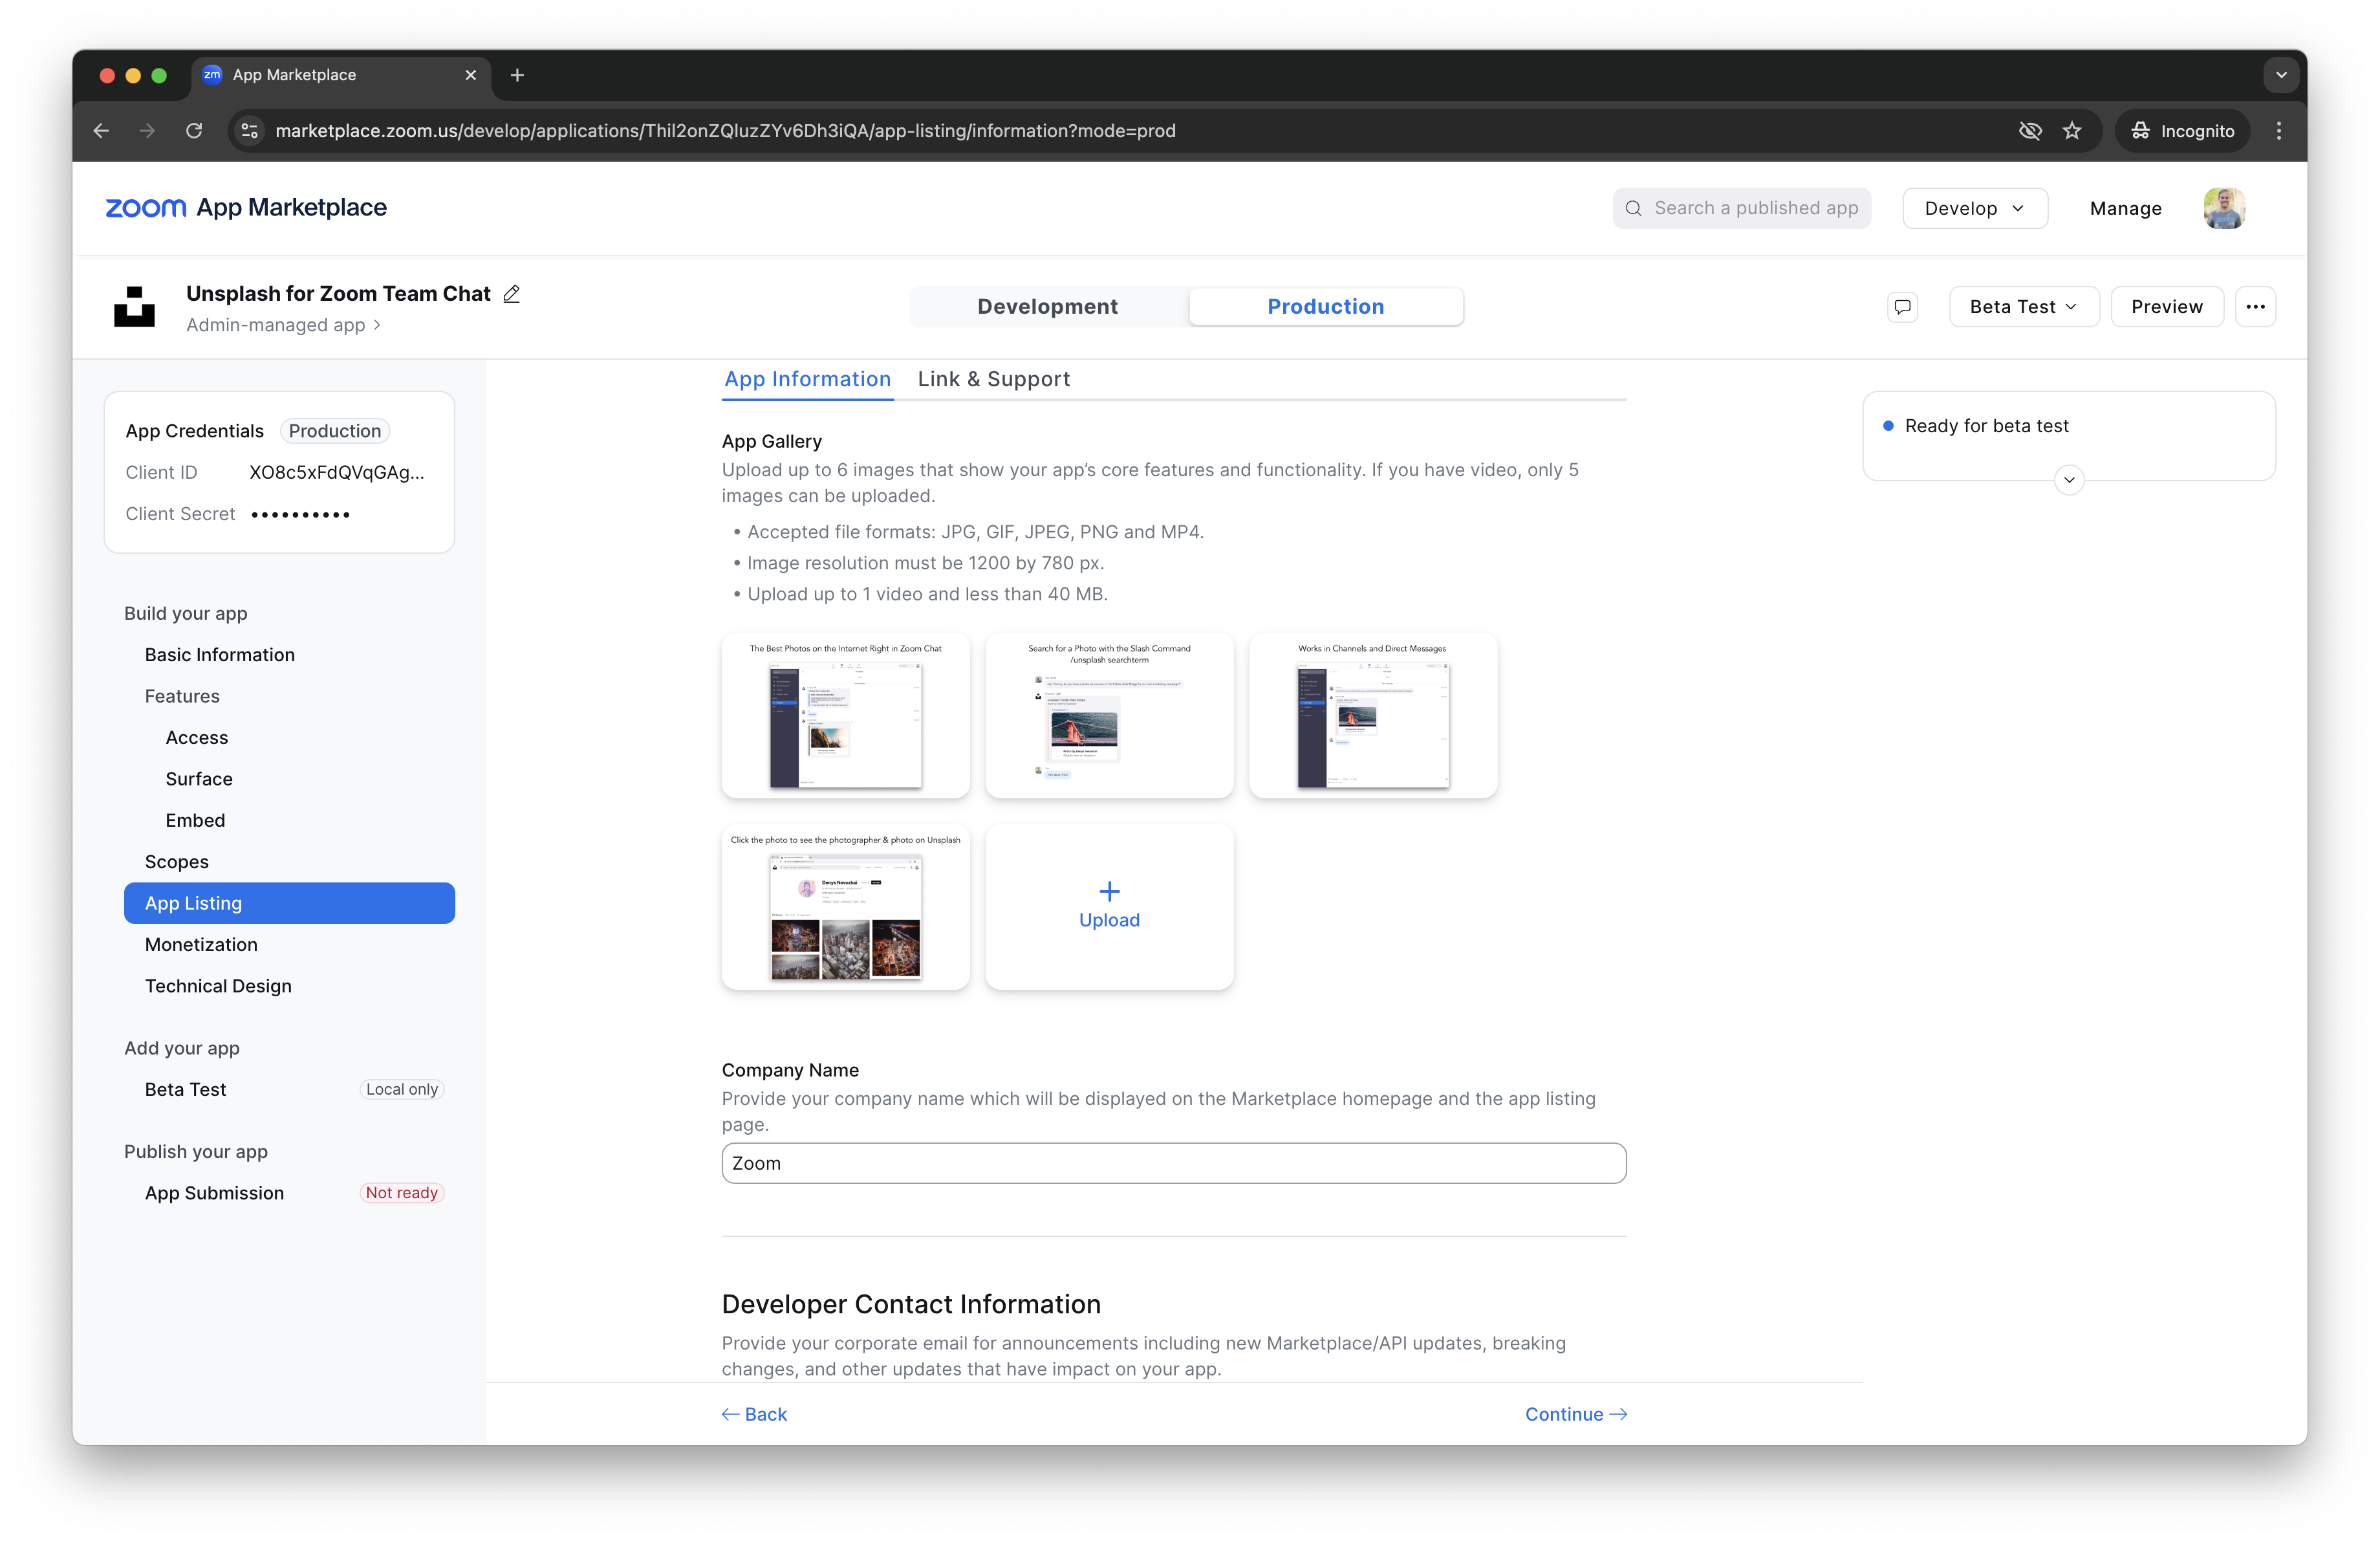
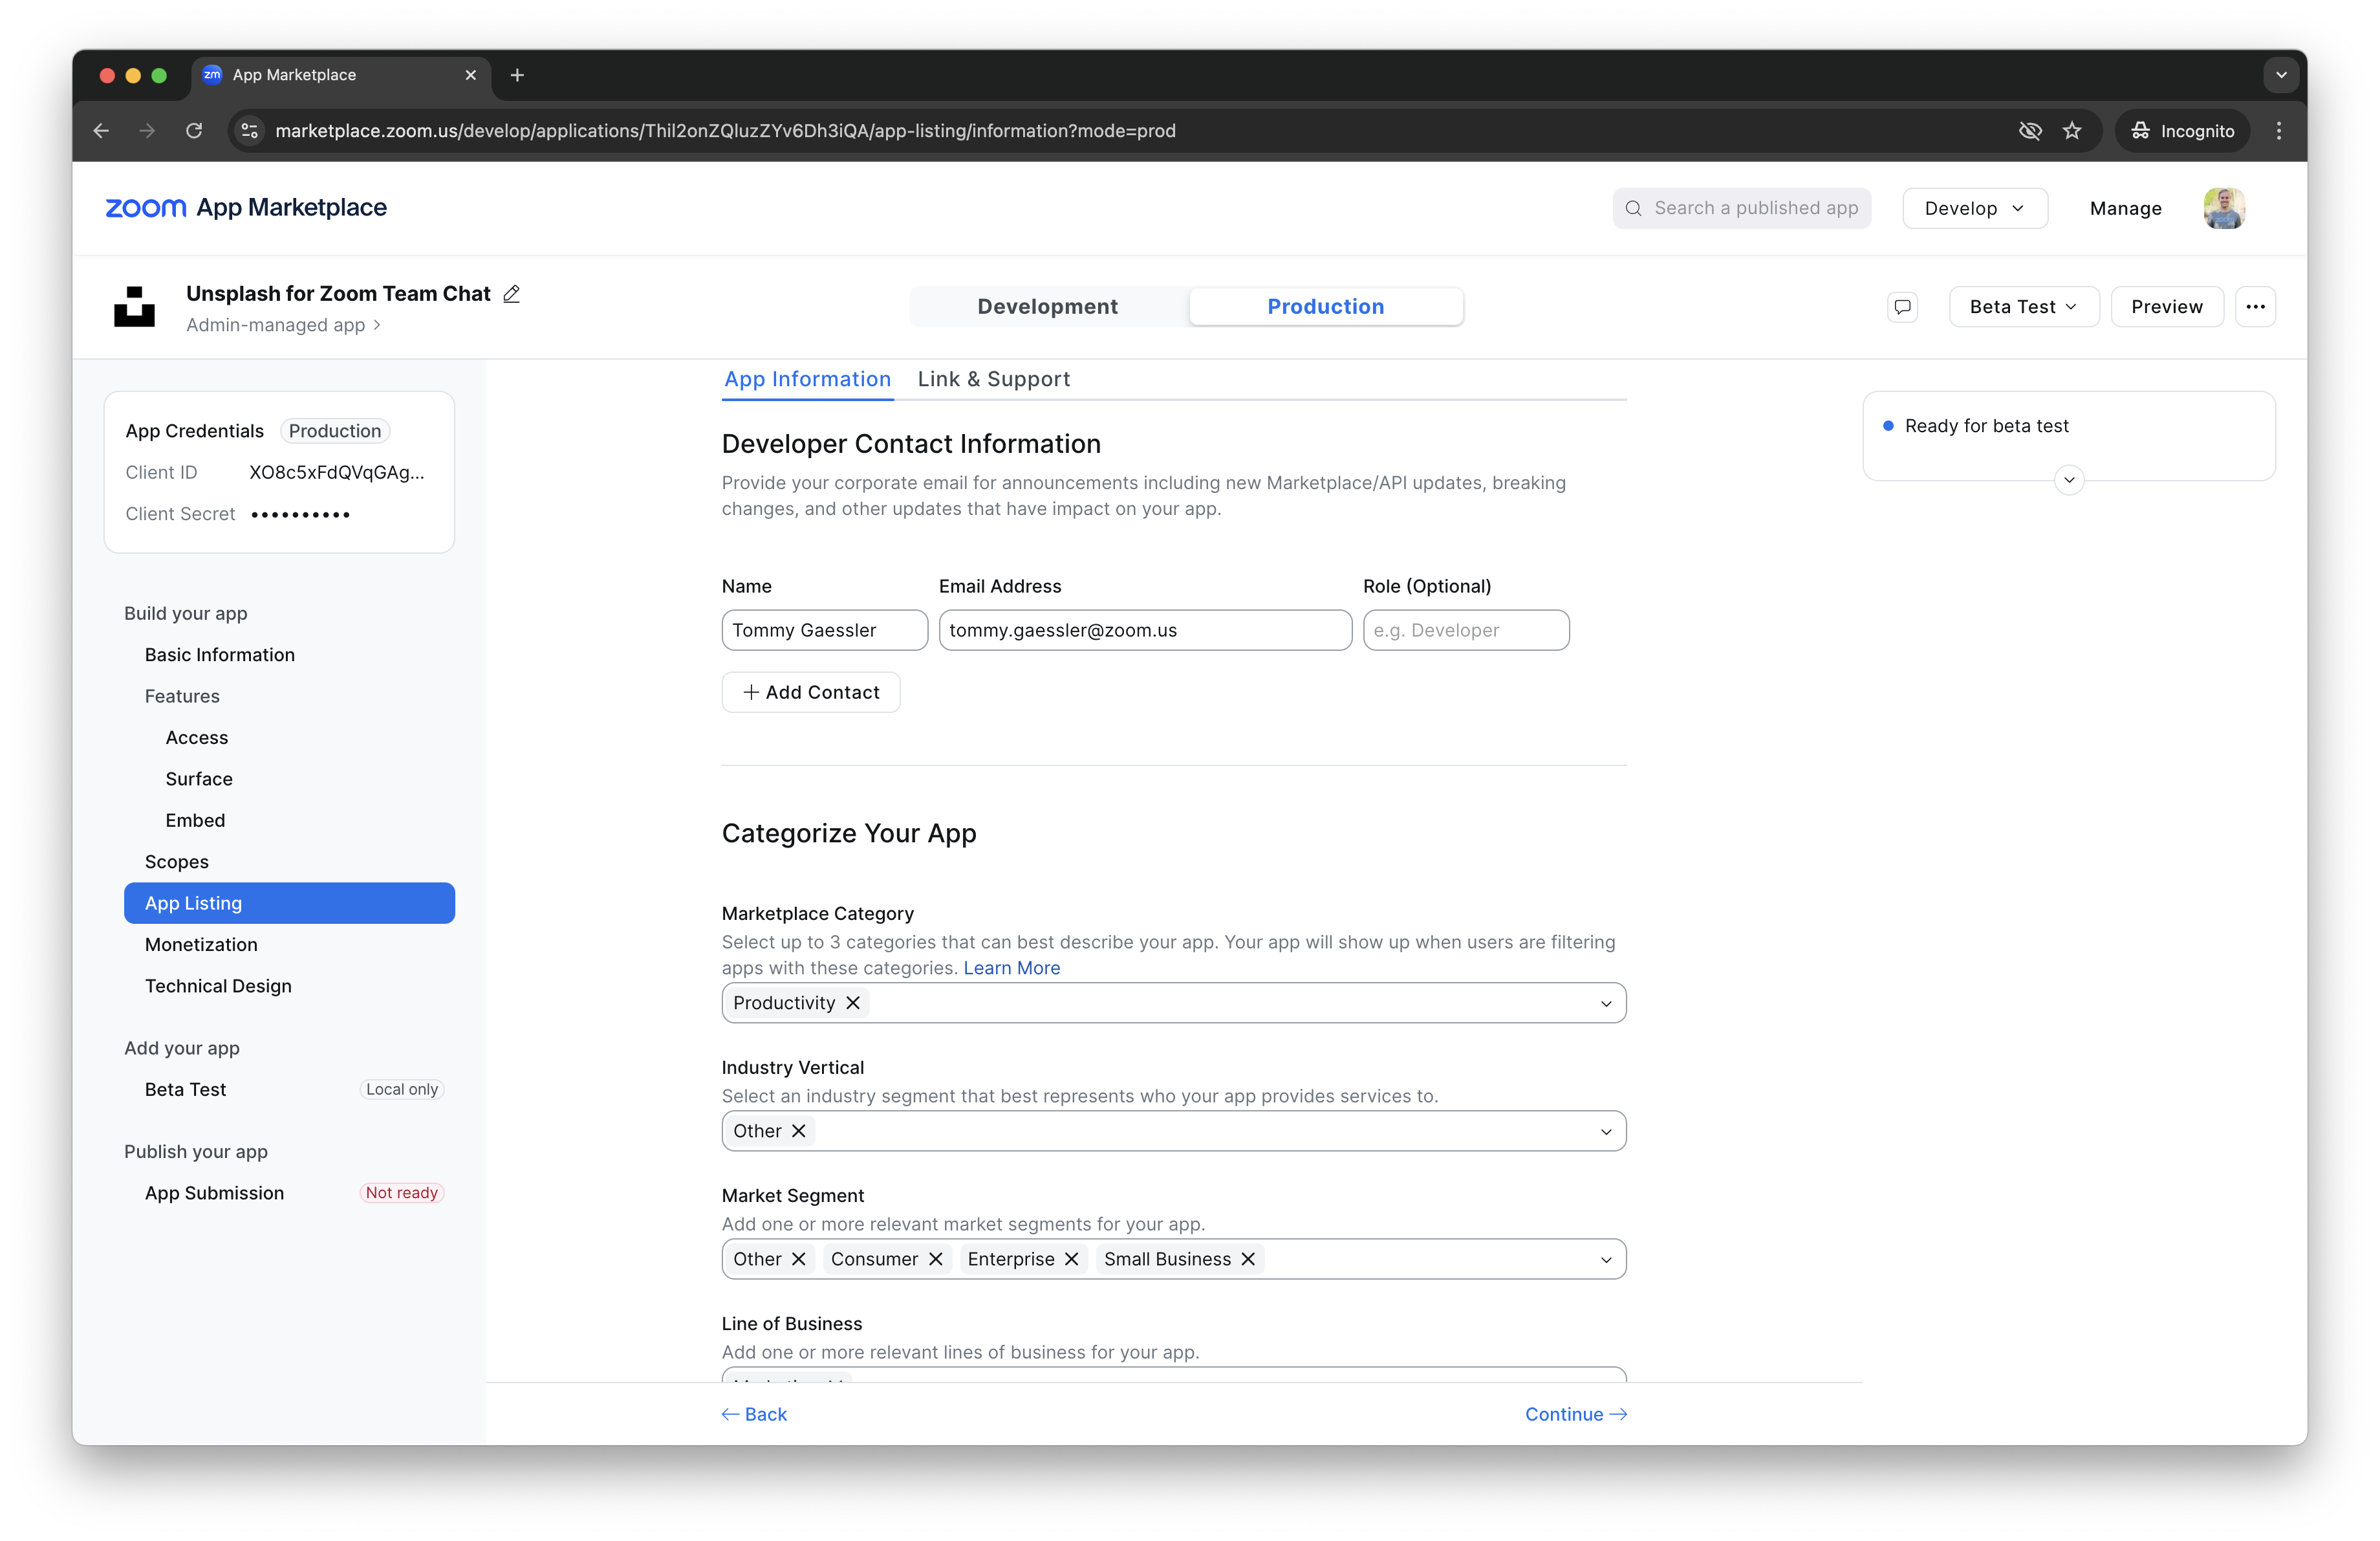
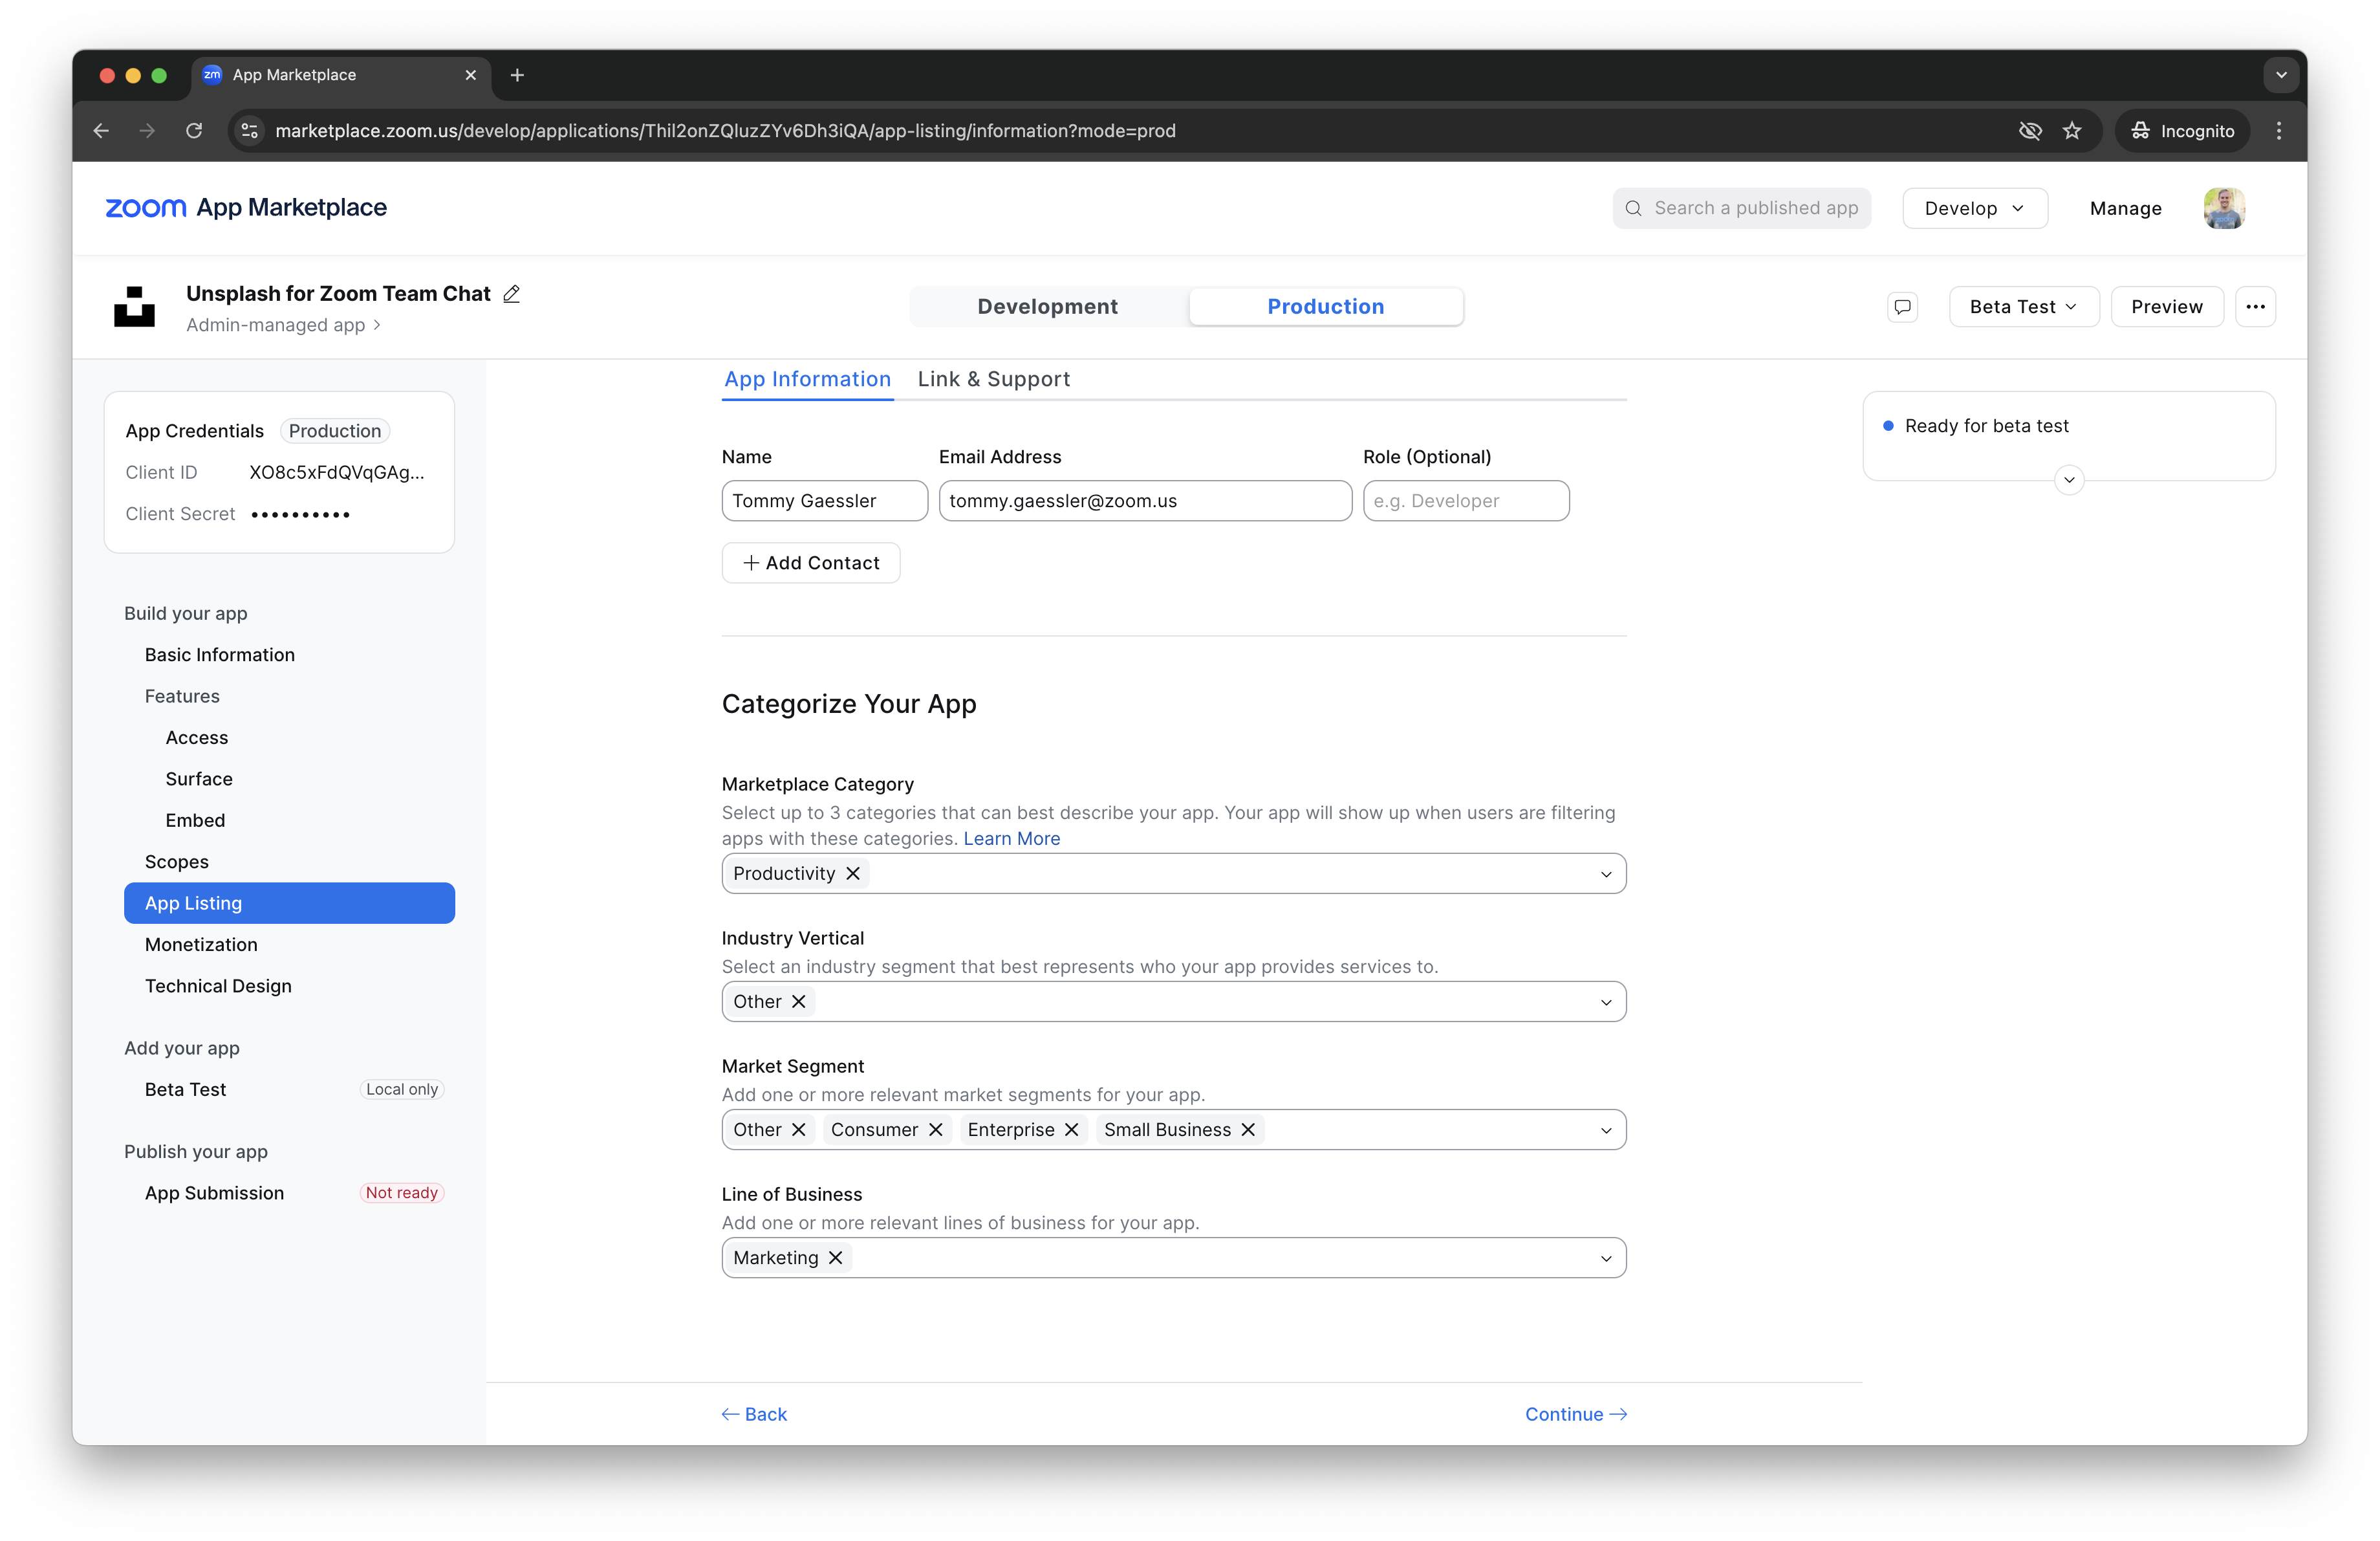
Then, in the app marketplace, add the respective links, descriptions, photos, and questionnaires. Make sure to fill out the Technical Design Document. You can also optionally monetize your app through the Zoom App Marketplace.
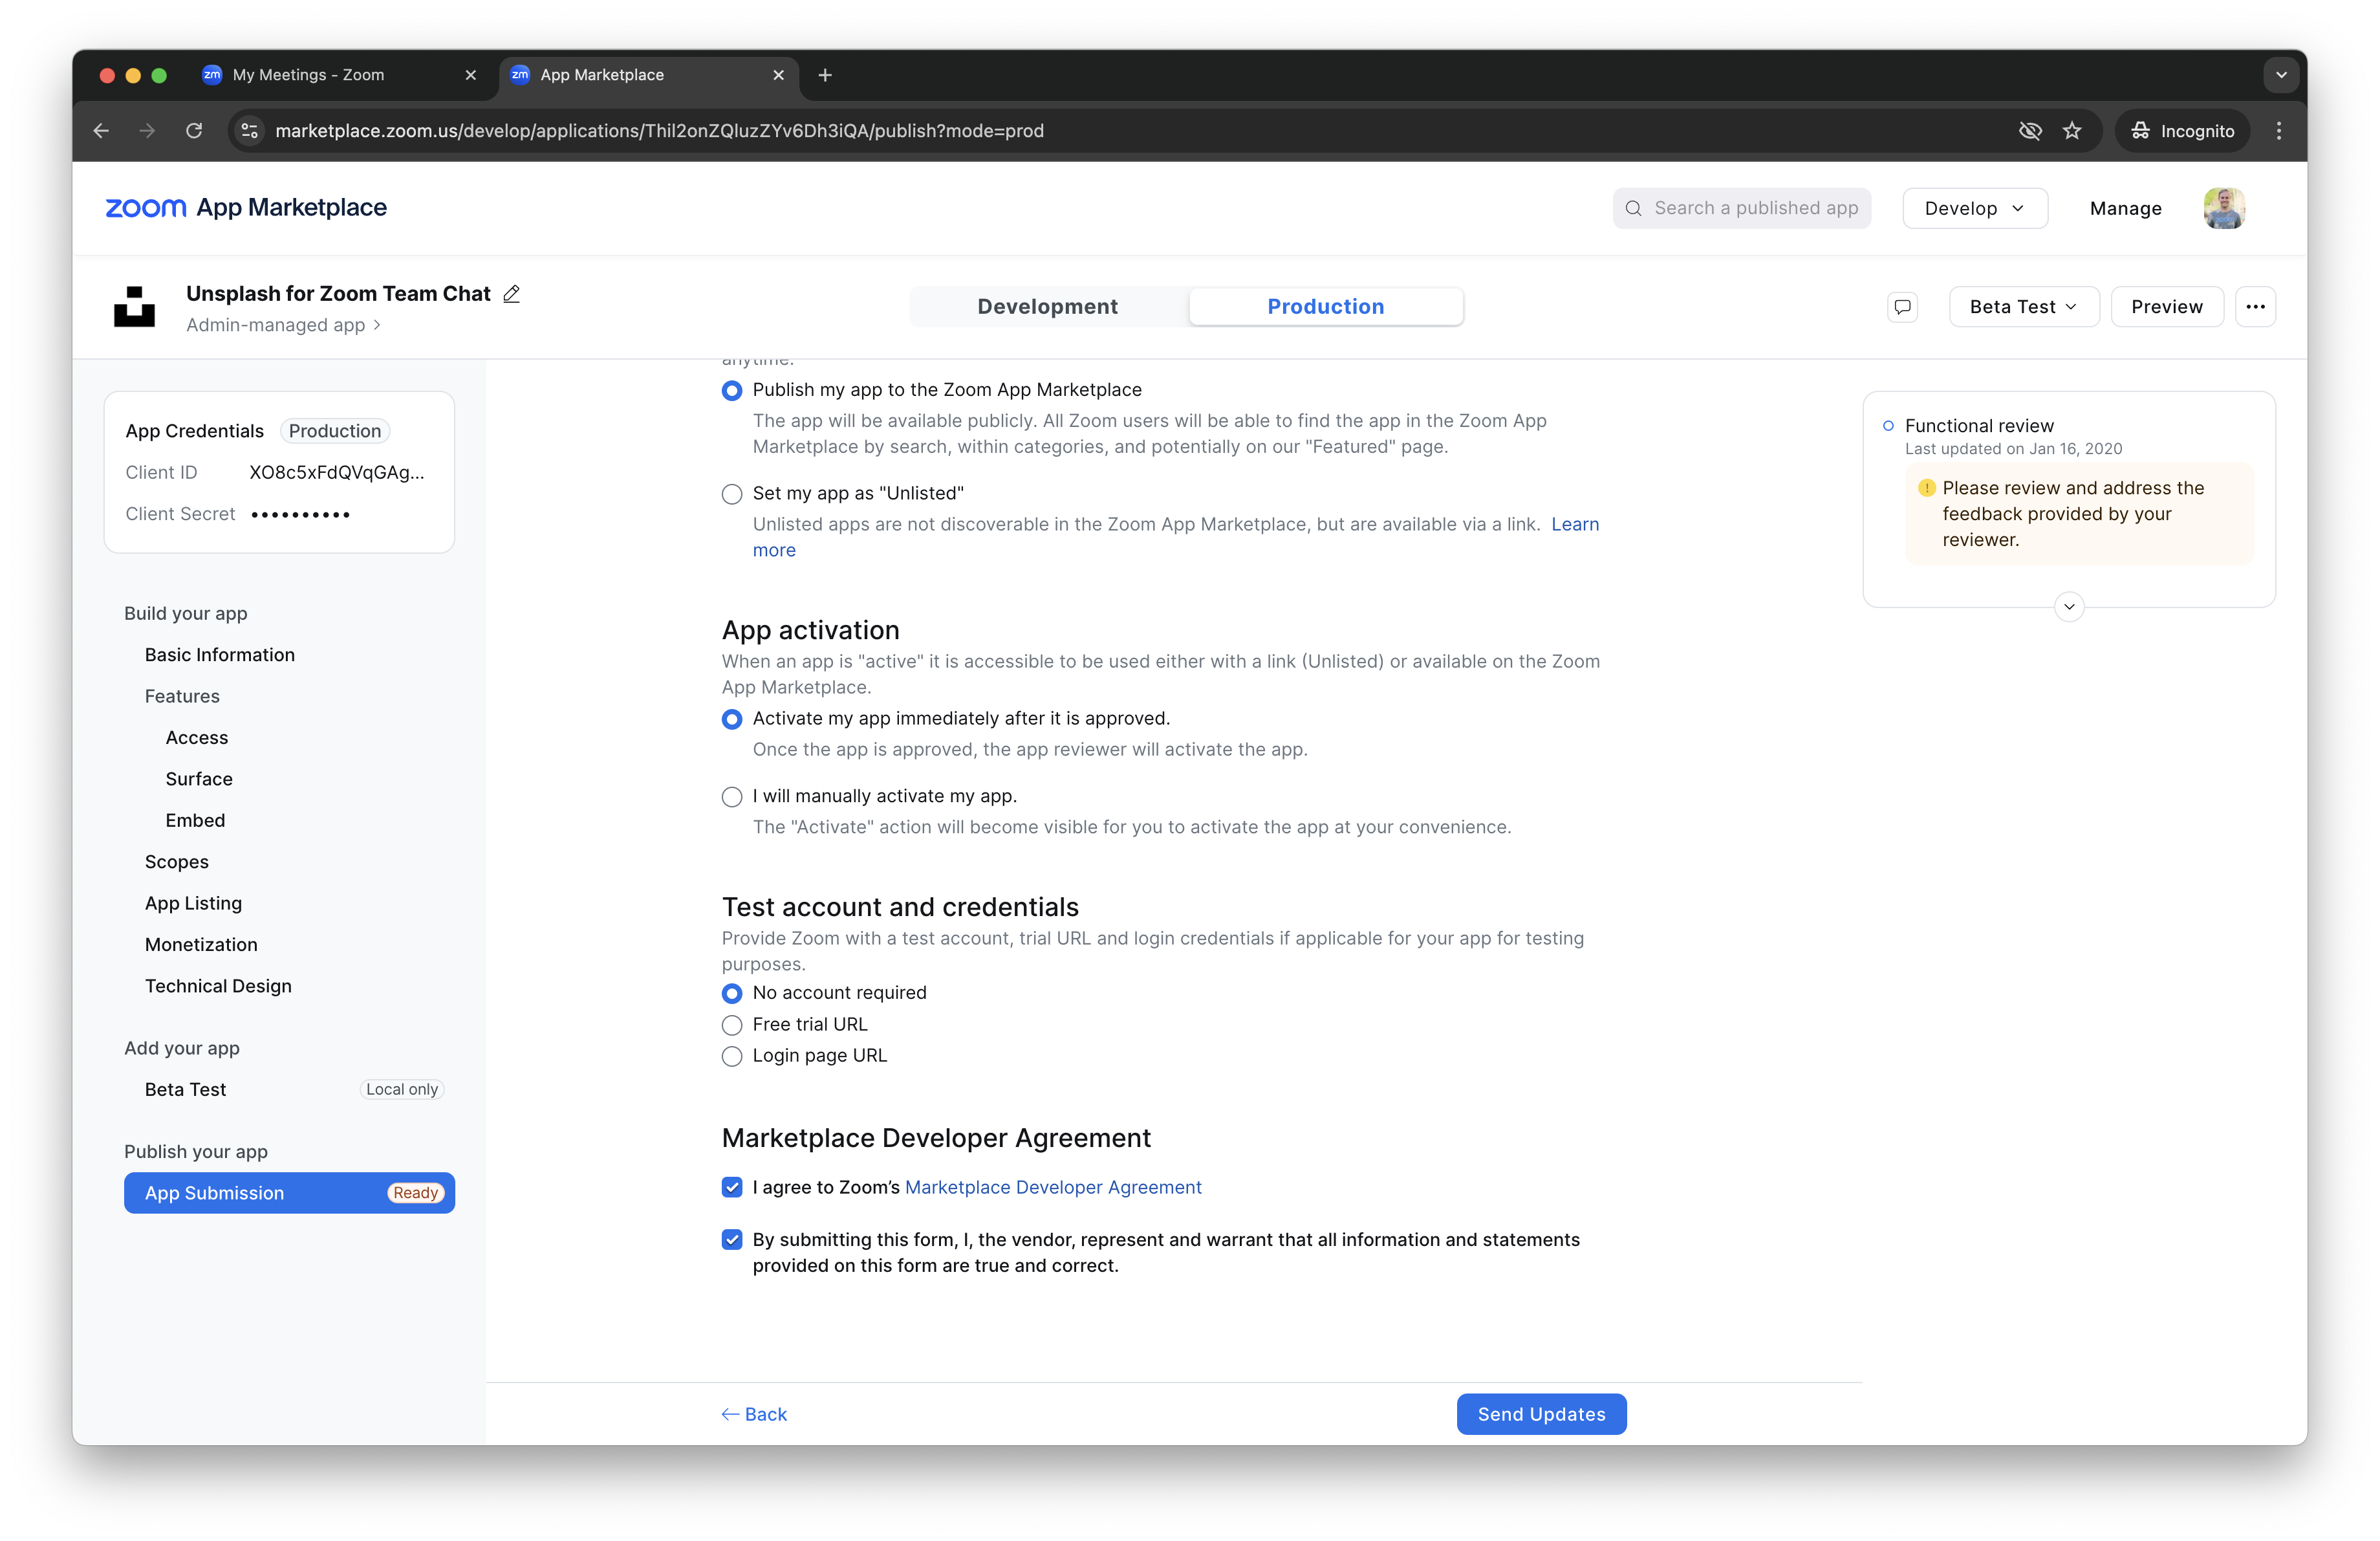
NOTE: For this section stay on the Production tab.
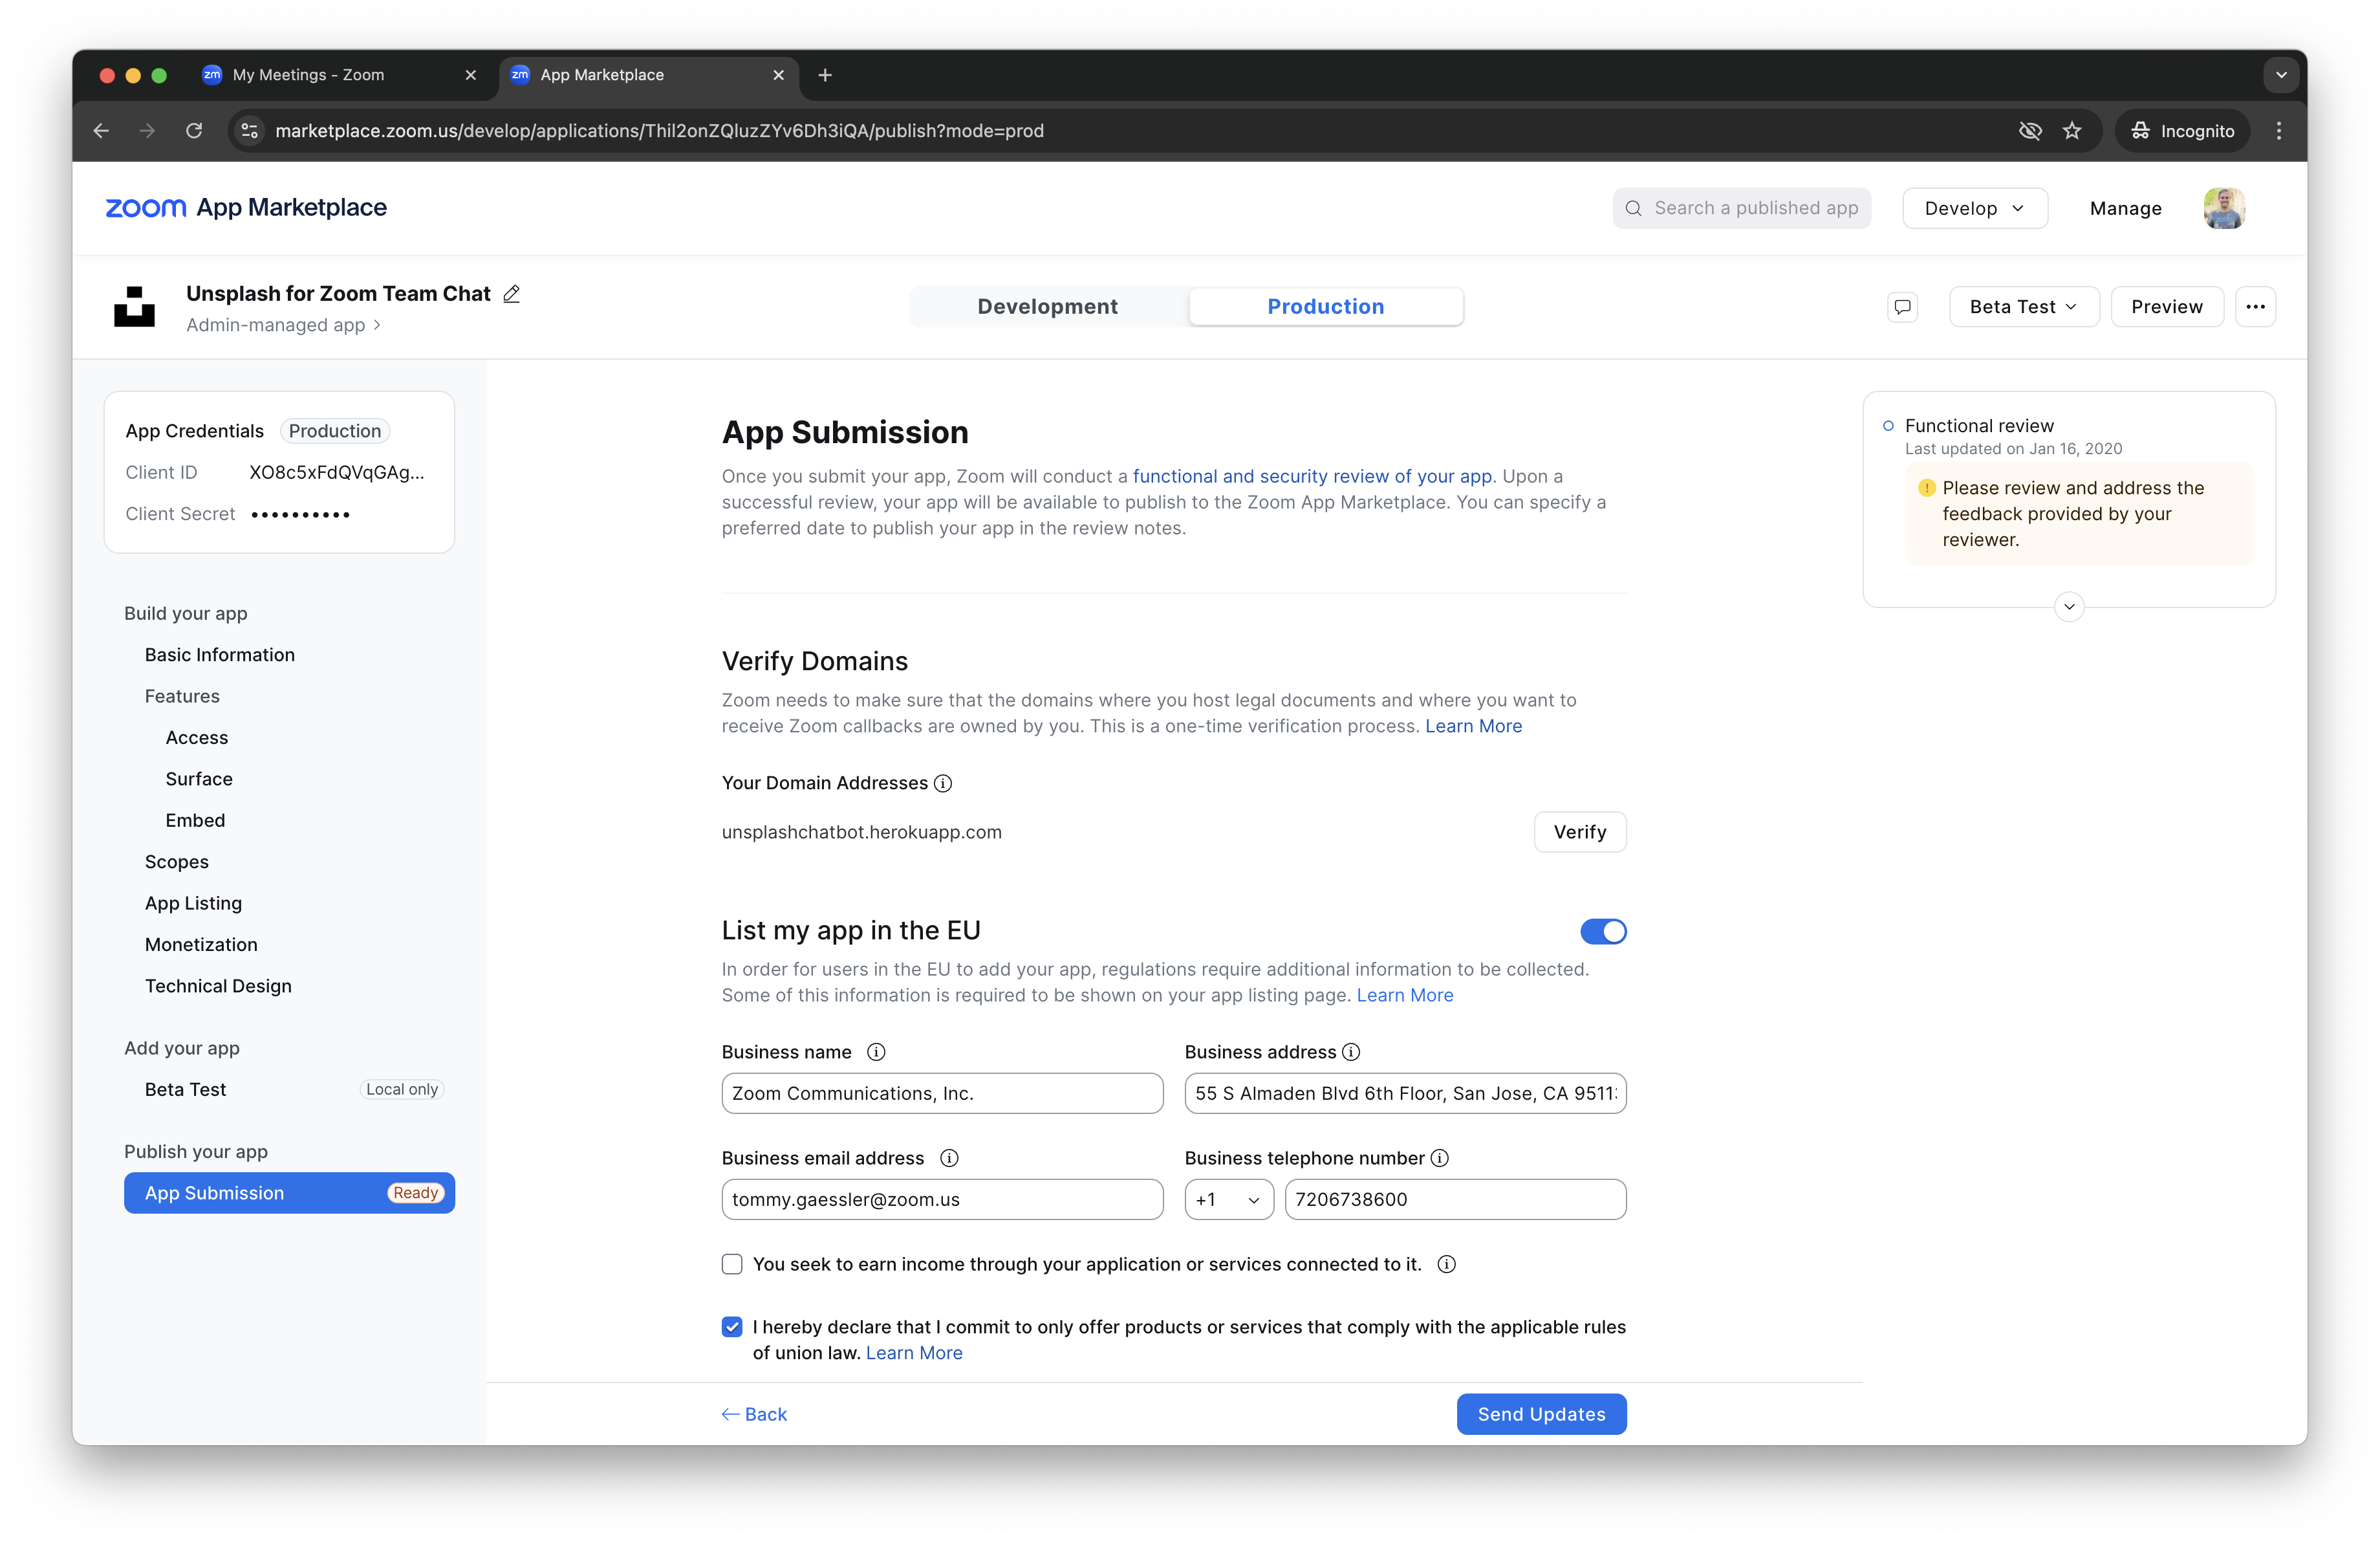
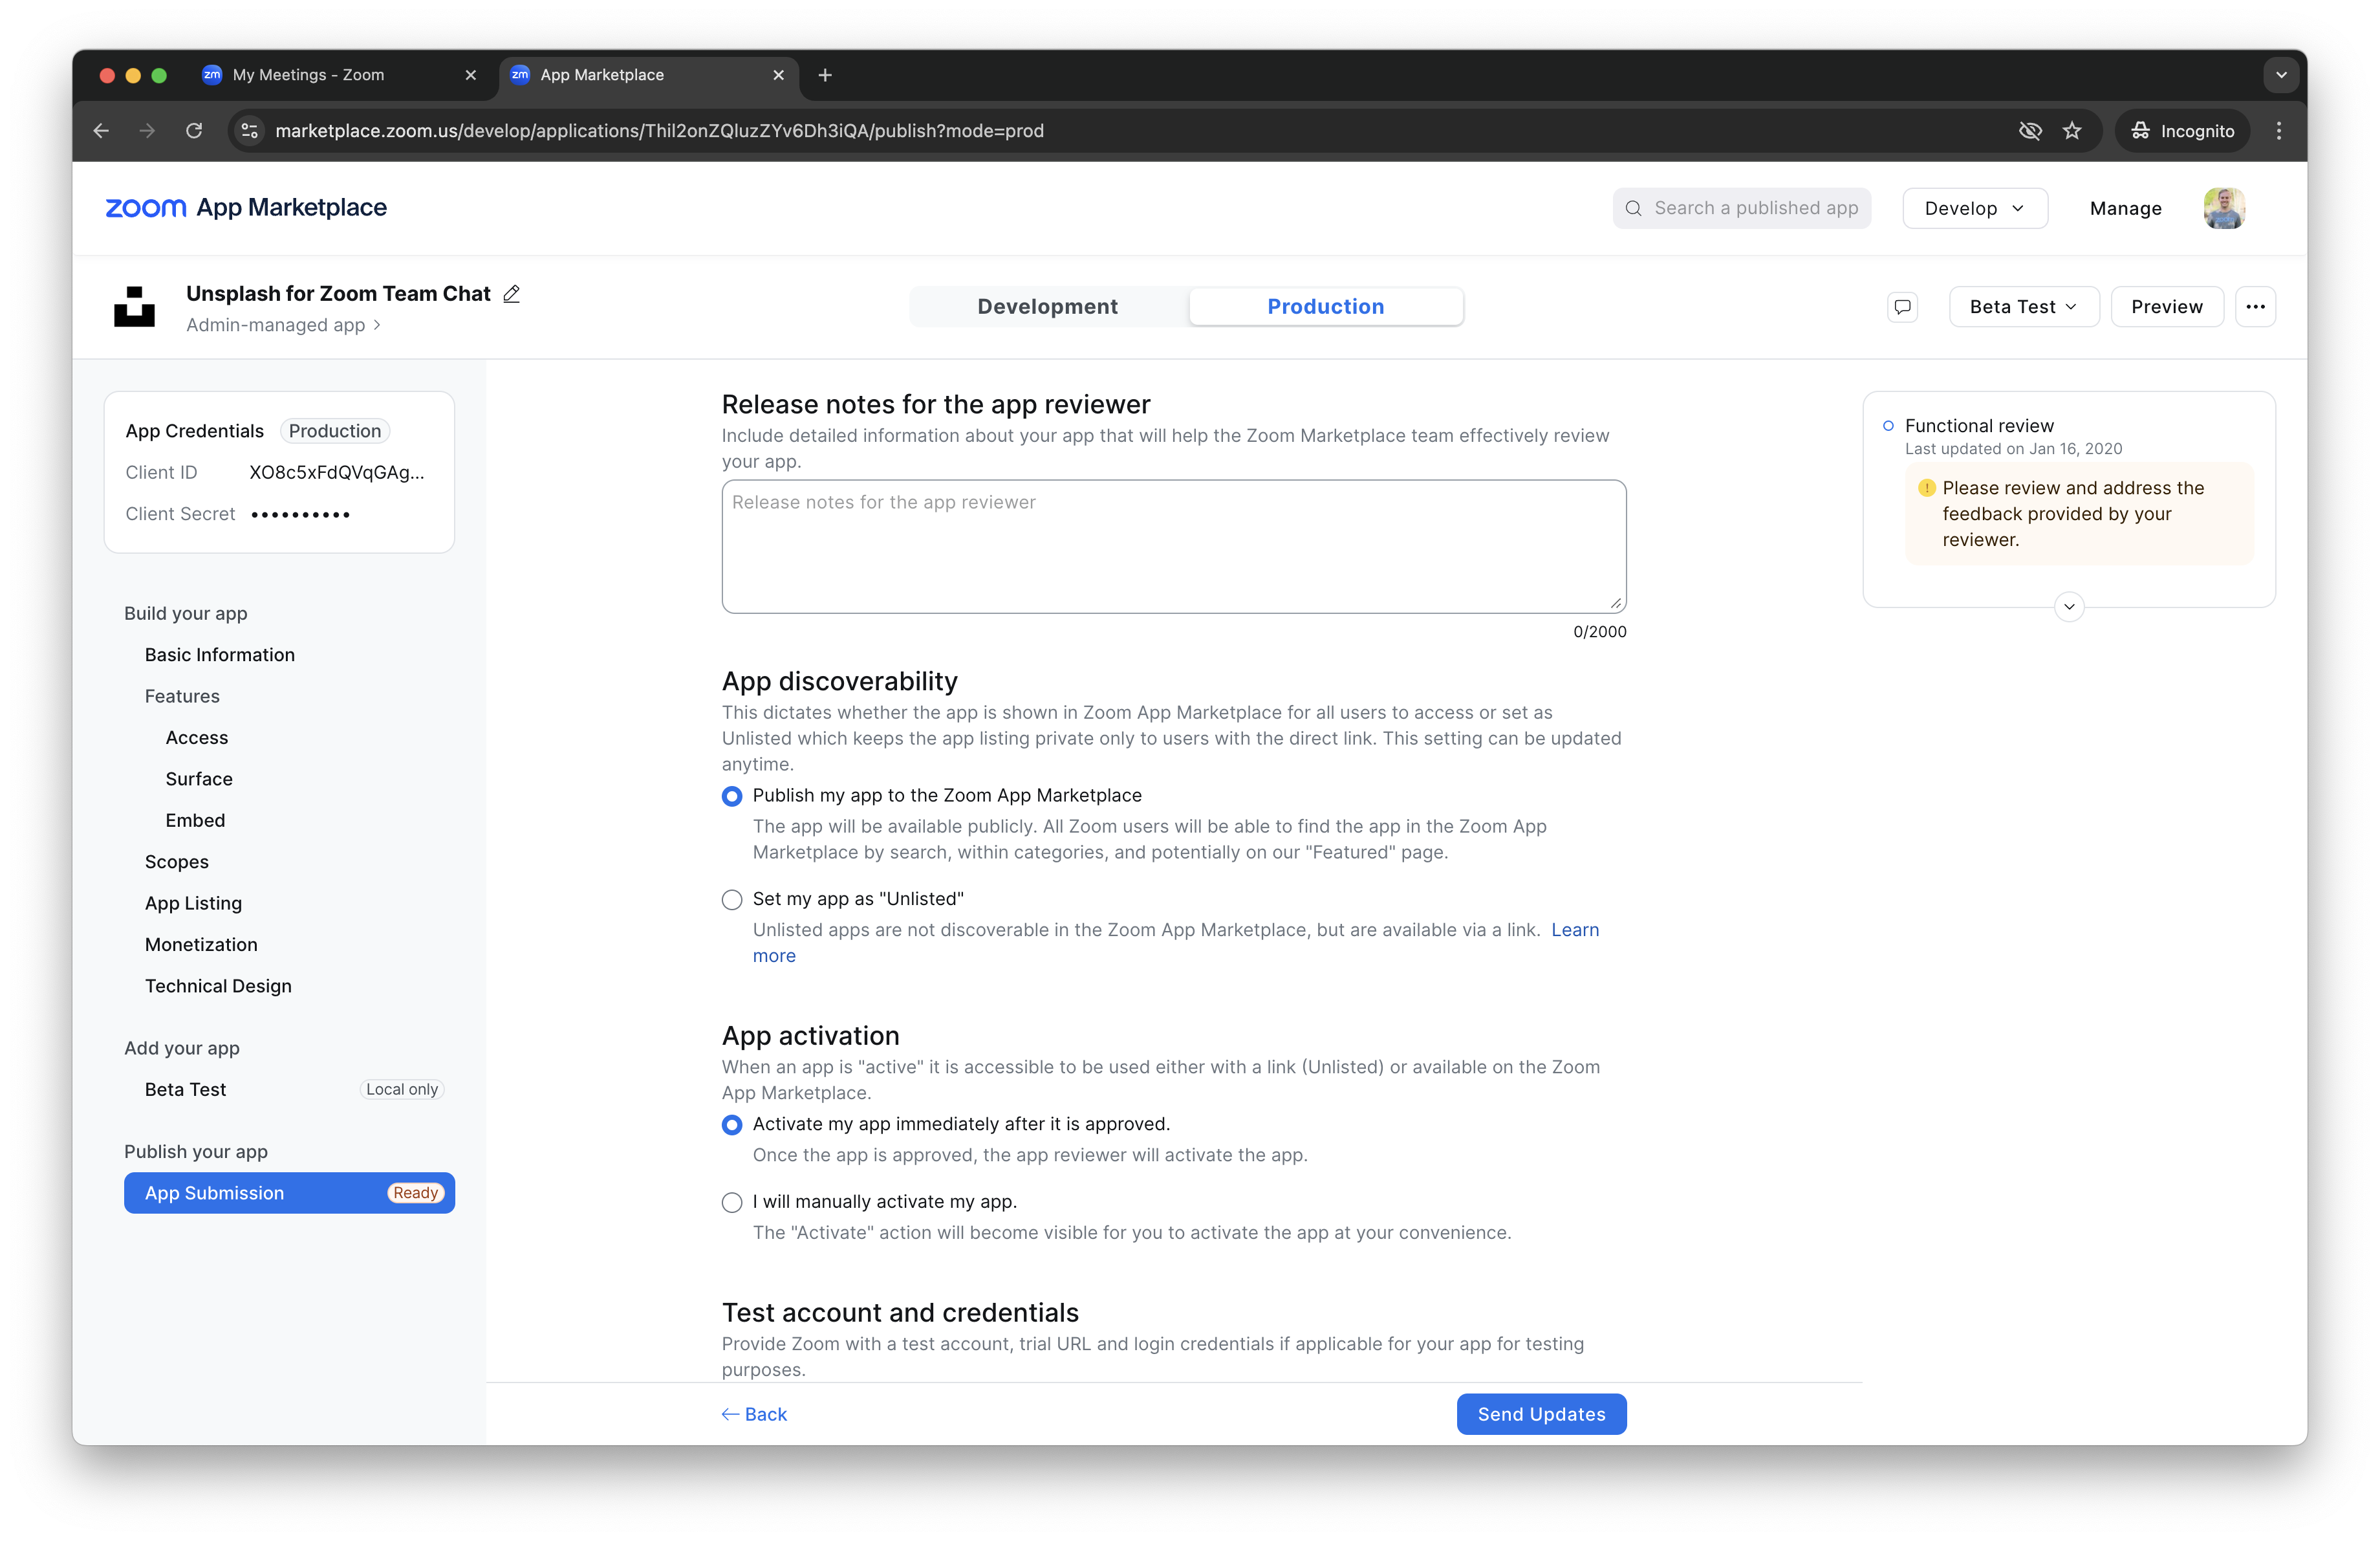
Finally, on the app submission page, add the testing instructions and click Submit (or Send Updates if you are updating an existing submission)!
Congrats, you've built a Zoom Chatbot from 0 to production and published!