Implementing sentiment analysis with Zoom Video SDK
Sentiment analysis can gauge the emotional tone from text, helping you classify and score conversations between users. This can be useful for various use cases including quality metrics for customer support cases, student feedback in online learning sessions, and even real-time feedback from patients in health-related conversations.
In this blog, we'll showcase how to use the Zoom Video SDK to implement real-time sentiment analysis for users. You can do this in two different ways:
- Client-side using the Live transcription API: This is useful for running small models on user devices and sharing insights in real-time. It doesn't require spinning up extra infrastructure, but you're limited by the performance of user devices.
- Server-side using Real Time Media Streams: This is useful for running larger models on your own server that can derive insights from the conversations. You'll need to host your own backend server to run the model.
You can find the full source code for both apps on GitHub: client-side and server-side repo.
Prerequisites
- Node.js & npm LTS
- Zoom Video SDK Account
- Client-side
- Live transcription and translation license
- Server-side
- RTMS enabled on the account
- A service to tunnel your local server to a public URL (like ngrok)
Client side
In this section, we will implement a client-side sentiment analysis use case using a custom model powered by TensorFlow. We can pass the transcripts generated by the live transcription feature of the Video SDK to the TensorFlow model for processing.
The completed code for this app can be found on GitHub. You can clone that repo and follow along with this command:
git clone https://github.com/zoom/videosdk-sentiment-analysis-sample
Setup TensorFlow in the web worker
We'll start by implementing TensorFlow.js in a Web Worker. Using a web worker offloads the processing from the main thread to keep the UI performant. We'll use the importScripts function to import the TensorFlow library: we'll use it to download, train, and run our AI model:
importScripts(
    "https://cdn.jsdelivr.net/npm/@tensorflow/tfjs@2.0.0/dist/tf.min.js",
);
We can access the global tf value to call the TensorFlow methods. TensorFlow uses the window object for certain methods. Inside a web worker, we'll have to create a reference to this object. We can assign the self object to the window key to mimic the presence of the window object that TensorFlow needs:
self.window = self;
Implement, train, and download the model
For this simple demo, we'll use a small dataset in the emotions.tsv file to train our model. This file contains tweets with ratings corresponding to a list of emotions applicable to them. We can pull the tweets from this file and create a vocabulary array that we can use to create equally sized vector arrays only containing 1's and 0's, values representing the occurrence of each word in the vocabulary. This works by taking the vocabulary array, which contains every word that occurs in the dataset, mapping each word to an index in that array, and for every word found in the transcript input that also occurs in the vocabulary, set the corresponding index of that word in the new vector to 1, else set it to 0.
After creating vectors for each sentence in our training dataset, I set up the TensorFlow hidden layers and training parameters, then pass in those vectors and their expected outputs, which I retrieve from emotions.tsv. Finally, this model is trained within the given epochs and saved in the browser storage for quick, repeated use.
You can read through the code for this in the transcript-sentiment.js file.
Implement live transcription
Implementing live transcription requires a few lines of code using the Video SDK. We simply need to join a session, use the client object to retrieve the getLiveTranscriptionClient, and start the transcription service by calling startLiveTranscription().
Here's what the browser implementation would look like:
const client = ZoomVideo.createClient();
await client.init("en-US", "Global", { patchJsMedia: false });
const startCall = async () => {
    const token = generateSignature(sessionName, role, sdkKey, sdkSecret);
    await client.join(sessionName, token, username);
    const mediaStream = client.getMediaStream();
    await mediaStream.startAudio();
    client.on("caption-message", async (payload) => {
        if (payload.done) {
            runSentiment(payload.text);
        }
    });
    const liveTranscriptionTranslation = client.getLiveTranscriptionClient();
    await liveTranscriptionTranslation.startLiveTranscription();
    liveTranscriptionTranslation.setSpeakingLanguage(
        LiveTranscriptionLanguage.English,
    );
};
await startCall();
We can use the caption-message event to access the conversation text in real-time. We'll pass the text to the runSentiment function for processing, let's define that next.
Send transcripts to the model
Now that we have live transcription set up, we can simply feed these transcriptions to the AI web worker using postMessage like so:
// In main.ts
const runSentiment = (transcript: any) => {
    if (!sentimentWorker) {
        alert("click 'Launch AI' to initialize Model first");
        return;
    }
    const allWords = localStorage.getItem("allWords");
    const wordReference = localStorage.getItem("wordReference");
    if (!allWords || !wordReference) {
        console.log("Vocabulary list not found in local storage. Retraining model...");
        sentimentWorker.postMessage({
            event: 'train-model',
            payload: { sampleSize: 250, epochs: 50 }
        });
        return;
    }
    sentimentWorker.postMessage({
            event: 'run-detection',
            payload: { allWords, wordReference, transcript }
    });
};
The runSentiment function first checks for the existence of the AI model and vocabulary arrays in the browser IndexedDB and LocalStorage, respectively. If any of these assets are missing, the AI model is retrained, generating these required assets and storing them in memory. If all assets are present, we send wordReference, allWords, and transcript to our worker to run the detection and produce a sentiment.
// In the Web Worker
self.onmessage = async (e) => {
    const { event, payload } = e.data;
    switch (event) {
        case "run-detection":
            runDetection(
                JSON.parse(payload.allWords),
                JSON.parse(payload.wordReference),
                payload.transcript,
            );
            break;
        case "train-model":
            trainModel(payload.sampleSize, payload.epochs);
            break;
    }
};
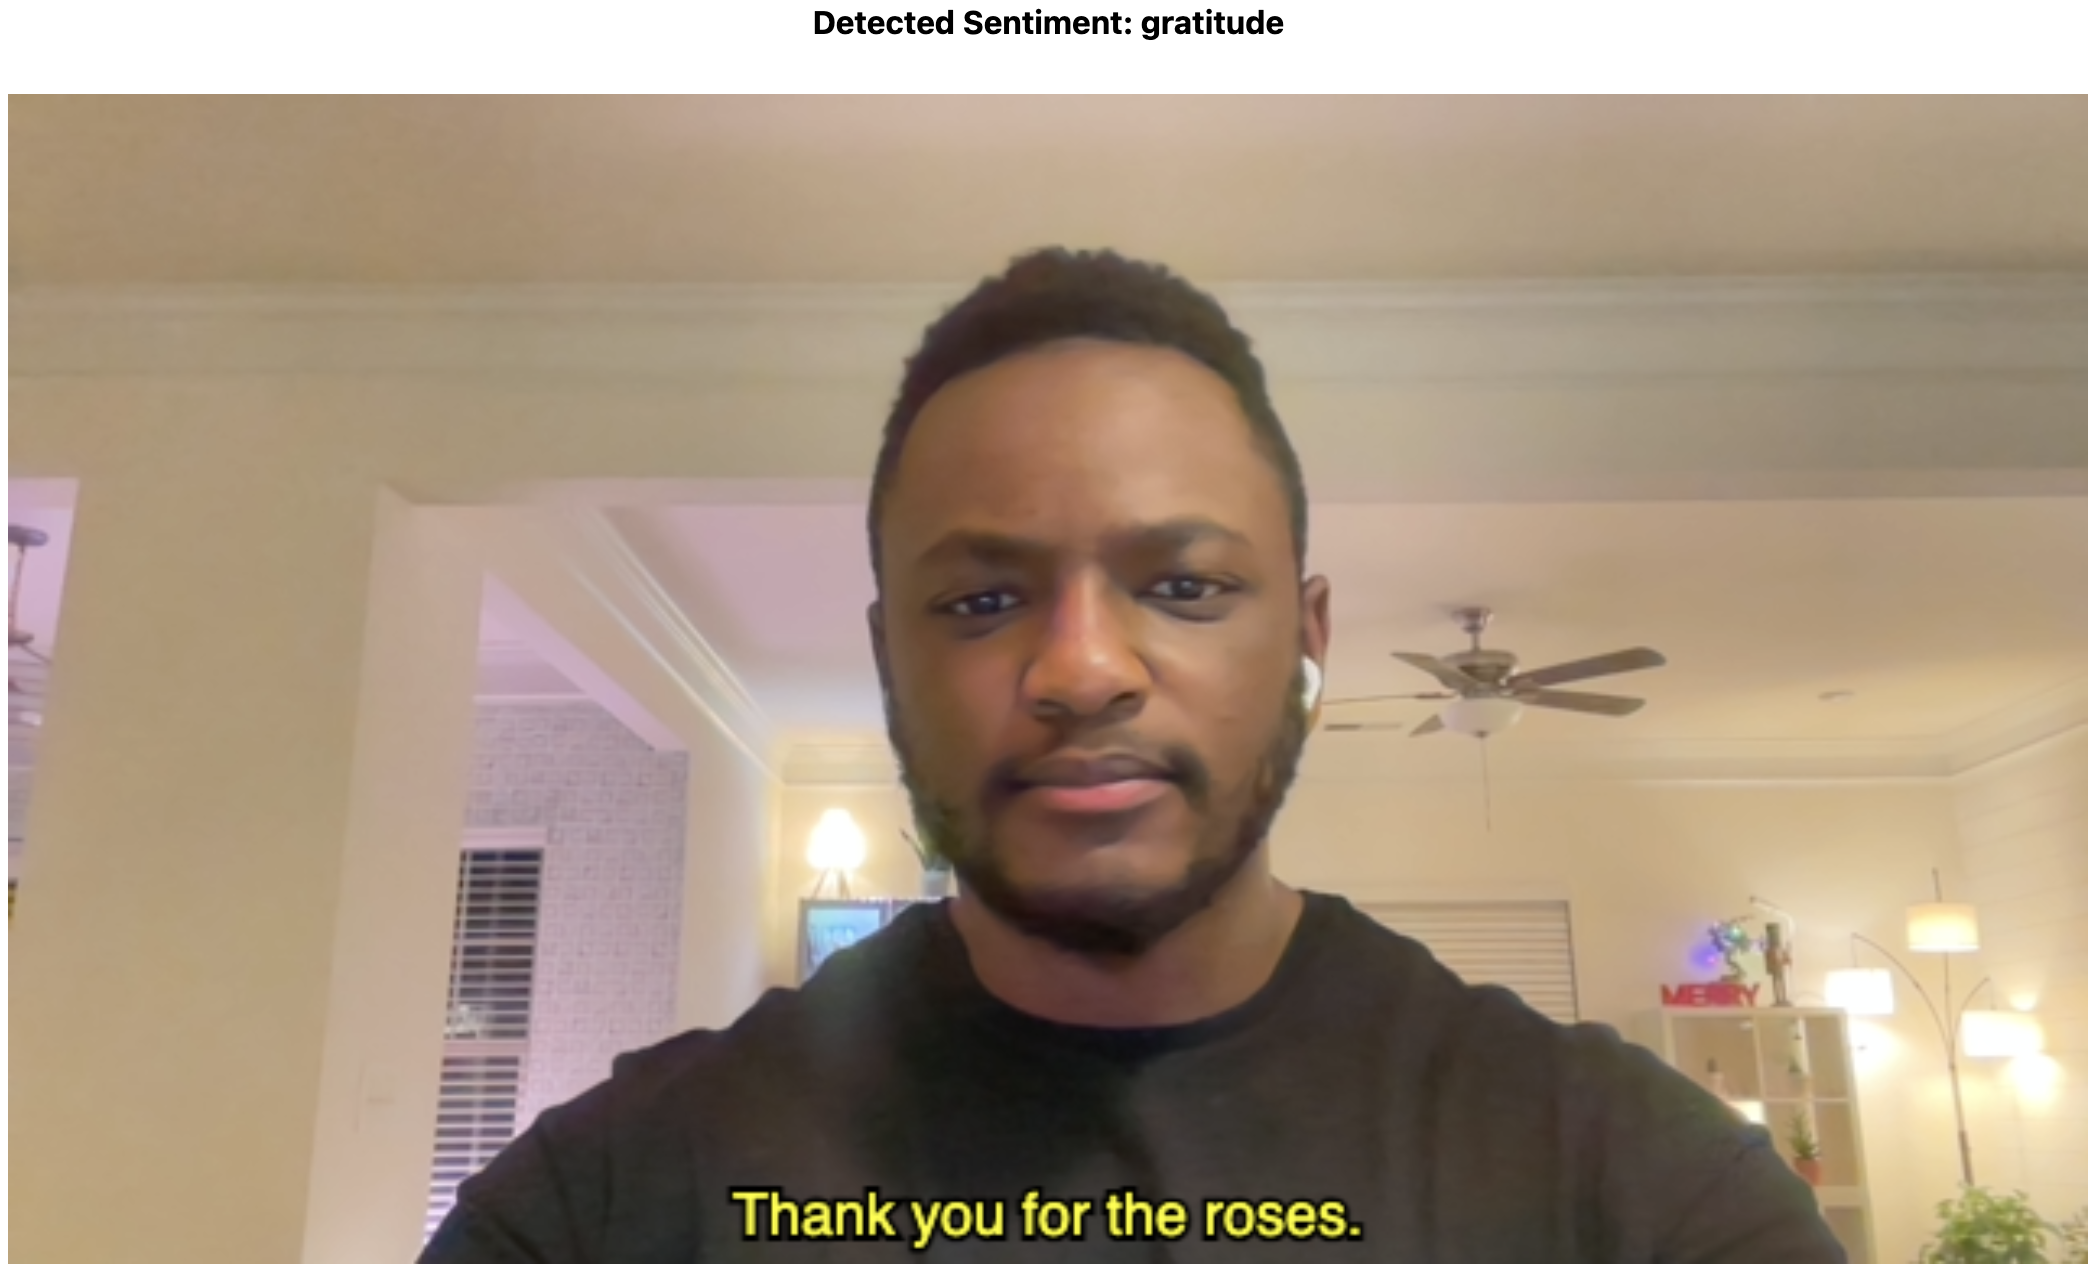
You can read our previous blog to learn how to render the user transcript as closed captions directly on the video stream.
Server side
If you want to use a larger model, it's more reliable to run it on your own infrastructure. You can also access the Video SDK transcripts on your backend using real-time media streams. For this demo, we'll use the same model from the previous section and run it on a Node.js server. We will utilize RTMS WebSockets to access the meeting transcripts in real-time and pass them to our TF model for processing.
Enable RTMS for your Video SDK app
Before building, you need to configure event subscriptions in the Zoom App Marketplace to receive RTMS lifecycle events.
- Sign into the Zoom App Marketplace with your Video SDK credentials
- Navigate to Develop → Build Video SDK
- Under Add feature, enable Event Subscriptions
- Configure your subscription:
- Add a descriptive name for your subscription
- Add the RTMS Started and RTMS Stopped events
- Set your Event notification endpoint URL - this is where Zoom will send webhook events when RTMS sessions start and stop
- Save your configuration
You can use a service like ngrok to tunnel your local server to a public URL. Once installed, you can run ngrok http 3000. You can use the URL from ngrok appended with /webhook at the end for the Event notification endpoint field like https://your-server-url.ngrok-free.app/webhook.
TensorFlowJS and model implementation
To configure TensorFlow and train our model, we will need to install the Node.js TensorFlow library. The code for the server-side transcript-sentiment.js can be found here.
The model training logic is the same as the one discussed on the client-side. The only difference is when we start the server, this model will automatically train itself and be ready for transcript detection sent from Zoom RTMS streams.
Setup the server
To simplify the implementation of Realtime Media Streams on the server, you can use the RTMS SDK. Here we import and configure the RTMS SDK to recieve RTMS webhooks on the /zoom/webhook path.
// For brevity, some server code is omitted
const app = express();
app.use(cors());
// Create a webhook handler that can be mounted on your existing server
const webhookHandler = rtms.createWebhookHandler((payload) => {
    console.log(
        `Received webhook: ${util.inspect(payload, { depth: null, colors: true })}`,
    );
    if (payload.event === "session.rtms_started") {
        const client = new rtms.Client();
        const { session_id, rtms_stream_id, server_urls } = payload.payload;
        client.onTranscriptData((buffer, size, timestamp, metadata) => {
            const text = buffer.toString("utf8");
            console.log(`Transcript from ${metadata.userName}: ${text}`);
            if (text.length > WordThreshold) {
                runDetection(text);
            }
        });
        client.join({
            client: ZoomClientId,
            secret: ZoomClientSecret,
            session_id,
            rtms_stream_id,
            server_urls,
        });
    }
}, "/zoom/webhook");
app.post("/zoom/webhook", webhookHandler);
app.use(express.json());
const server = http.createServer(app);
server.listen(PORT, () => {
    console.log(`Server running at http://localhost:${PORT}`);
});
The full server.js code also includes the generateSignature function used to authenticate and join into a Zoom Session.
Now we can test the application and view the resulting logs from RTMS and our model in the server console.
Conclusion
That concludes the walkthrough of implementing a simple sentiment analysis tool with the Video SDK. You can view more info regarding the trained AI model here. There are many ways to enhance the accuracy of the model, such as using different datasets and sample sizes, running the training for longer periods, or using a different model altogether.
To dive deeper on the discussed feature, check out our live transcription and Realtime Media Streams documentation. You can also view our Github for more projects showcasing these features.