Get Zoom transcripts in 5 lines of code
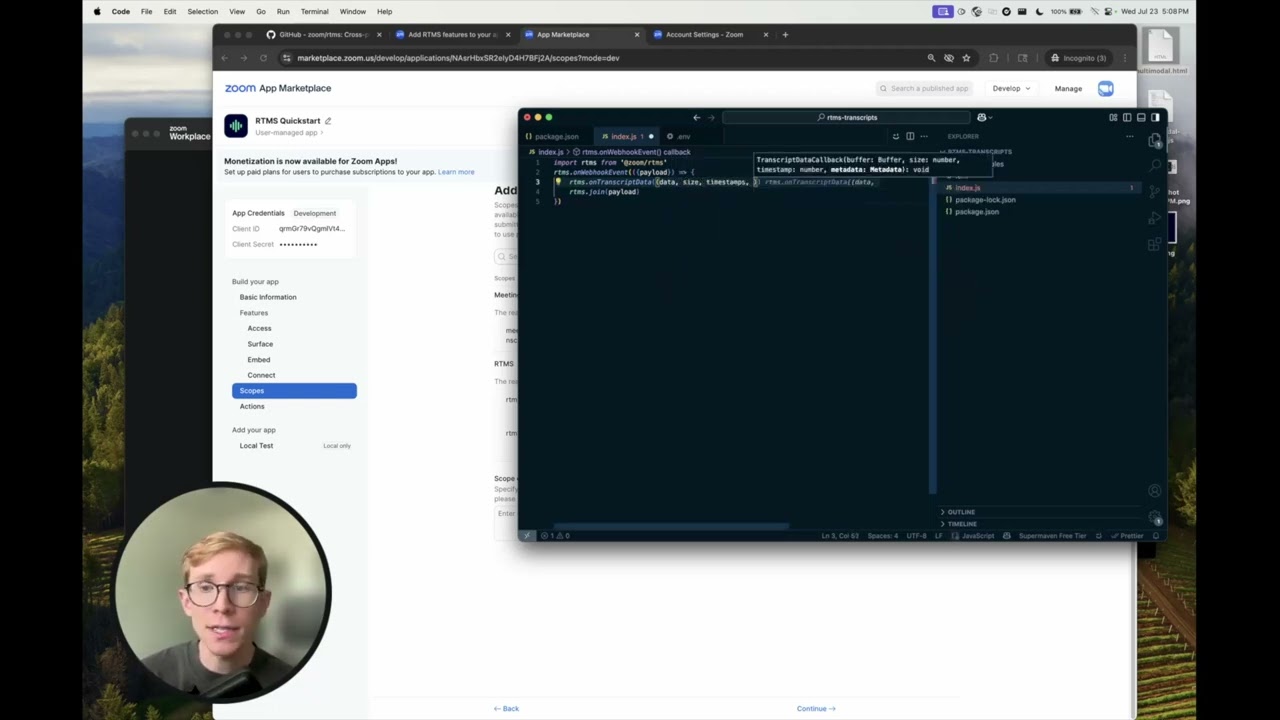
Pardon the simple headline, but it's true: getting Zoom transcripts is as simple as 5 lines of code. It's so easy, I fit it in the image up there. ☝️
This used to be a lot more complicated. For many years, our best option was run automated clients (bots) to join meetings and listen to unstructured data. This added complexity and cost that shouldn't be required. Users don't particularly love them either; they want apps, not bots in their meetings.
To make it easy for developers to get meeting context, we've built Realtime Media Streams, a data pipeline that makes accessing meeting data like audio, video, and transcripts easy and powerful. RTMS dramatically simplifies accessing Zoom data without the need for bots or intermediary services.
Let's see just how simple it now is. In this quick tutorial, we'll use the RTMS SDK to access meeting transcripts (along with audio, video, screen share & chat).
Follow along with this video if you'd rather me narrate this:
Setting up
Before you start, go through the docs to Add RTMS features to your app or watch the video Add Realtime Media Streams (RTMS) features to a Zoom app.
From your Zoom app, you'll need a client ID and secret of an app subscribed to meeting.rtms_started & meeting.rtms_stopped and the scope meeting:read:meeting_transcripts.
This code is in Node.js, so for this guide, you'll need to have it installed. RTMS works with any language that can open a WebSocket.
The simplest possible way to get meeting transcripts
Create a new Node.js app and install the RTMS SDK:
undefined sample
npm init -y
npm i @zoom/rtms
Here's the SDK on GitHub and npm along with a few dozen sample apps that use it including to send meeting recordings to AWS S3, run object detection with TensorFlow, and send audio to Deepgram if you want to create your own transcripts.
Keeping it simple
Create a new file named index.js and add the following 5 lines of code:
index.js sample
import rtms from "@zoom/rtms";
rtms.onWebhookEvent(({ payload }) => {
    rtms.onTranscriptData((data, size, timestamp, metadata) =>
        console.log(`${metadata.userName}: ${data}`),
    );
    rtms.join(payload);
});
I've decided the .env and package.json files don't count in the 5 lines. If you write the blog post you get to make up the rules!
Create a new file named .env and add the following:
.env sample
ZM_RTMS_CLIENT=your_client_id
ZM_RTMS_SECRET=your_client_secret
In your package.json file, add a start script and set the project to use ESM with "type": "module":
package.json sample
{
    "type": "module",
    "scripts": {
        "start": "node --env-file=.env index.js"
    }
}
Run the app with this start script:
undefined sample
npm run start
You'll now need to open a tunnel to your server over HTTPS so the WebSocket can connect to it. I use ngrok for this.
undefined sample
ngrok http 8080
When you run ngrok http 8080, you'll get a public URL to use in production. Copy this. Go back to your Zoom app's settings page and add this URL as your webhook notification endpoint (Under "Access", where you registered your webhook subscriptions).
Install the Zoom app and set the app to auto-start in your meetings. Open a new meeting. You'll see the event meeting.rtms_started logged to the console.
Production doesn't need to be much more complex!
The RTMS Quickstart app shows available SDK methods including for audio, video, screen share & chat. It's more thorough than this purposefully simple blog post.
If you're putting this into production, check out the Advanced Zoom App's RTMS server, or the Advanced storage sample app, you'll write something more full featured and production scale.
But let's go the other way. If you're not worrying about reading it, you can get meeting transcripts in just one line:
index.js sample
import r from "@zoom/rtms";
r.onWebhookEvent(({ payload: p }) => {
    r.onTranscriptData((d, s, t, m) => console.log(`${m.userName}: ${d}`));
    r.join(p);
});
Run it, it works!