Smarter support with Zoom Contact Center: no-code set up using flows
Zoom Contact Center (ZCC) helps businesses provide personalized, efficient support, all while scaling effortlessly to meet demand. This no-code guide walks you through the process of setting up ZCC and the customer experience using flows.
To get started using ZCC, you'll need a Zoom account with a contact center license. Once you have this, navigate to your account homepage. On the left menu, scroll down to 'contact center management' which is where you'll configure the necessary settings for product use.
Managing agent experience
In contact center, users are those within the business engaging with consumers (customers). They are referred to as agents, admins, or supervisors.
- Admin: Admins have a wide range of permissions for accessing and managing Zoom Contact Center
- Supervisor: Supervisors have some permissions for accessing and managing Zoom Contact Center
- Agent: Agents can access Zoom Contact Center engagement functions, but do not have permissions for managing Zoom Contact Center
Adding users as agents
To assign associated Zoom accounts to roles within Contact Center, you need to first assign them as users (this includes your own account, as well). Under 'Users', select 'add users' where you'll choose their role, assign them to queues, and assign appropriate skills (you may have not created the last two features yet, but we'll get to those in coming sections. For now, know that you can assign them in the 'users' tab). Once a user is added, they can now be managed throughout Contact Center as agents.
Creating the consumer experience
Before consumers are routed to an agent, ZCC allows you to create the path they take to get connected. To do this, ZCC uses a flow: a connected series of actions that make up the inbound participant experience.
Creating flows
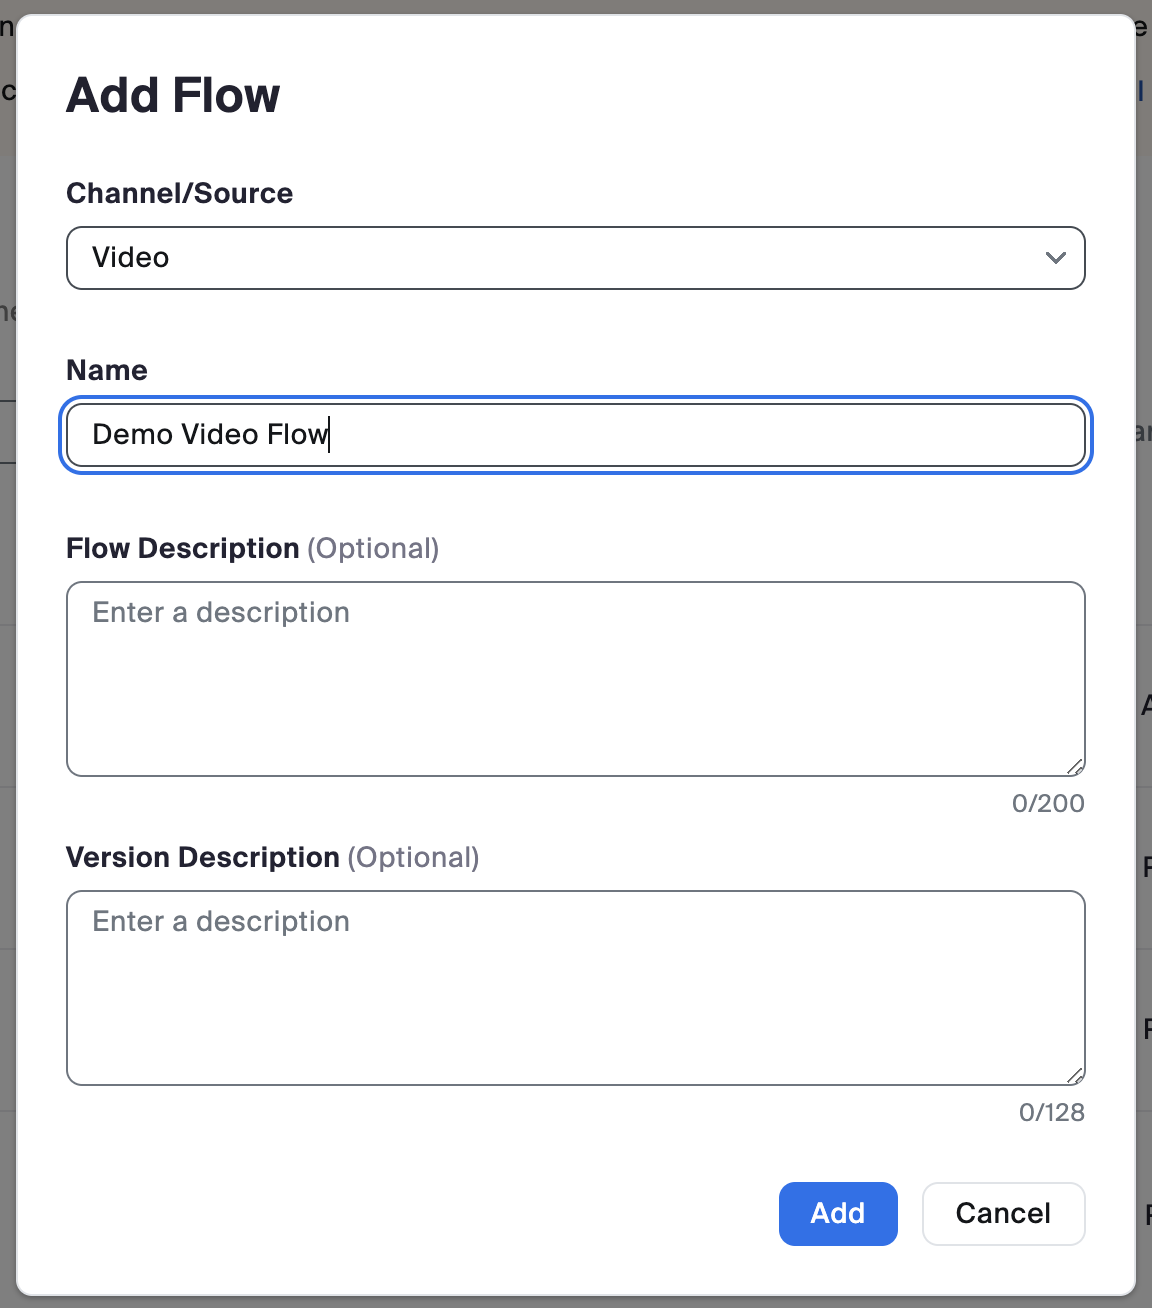
On the left side of our menu bar, still within the 'Contact Center Management' tab, select Flows to get started. Select 'Add Flow' and choose the channel/source to determine what type of experience this flow is catering to:
- Voice: cloud-based phone call
- Video: live interaction
- Messaging: a variety of options for chat-based support
- Email: standard email support
Once your channel/source is selected, name the flow and add in optional descriptions.
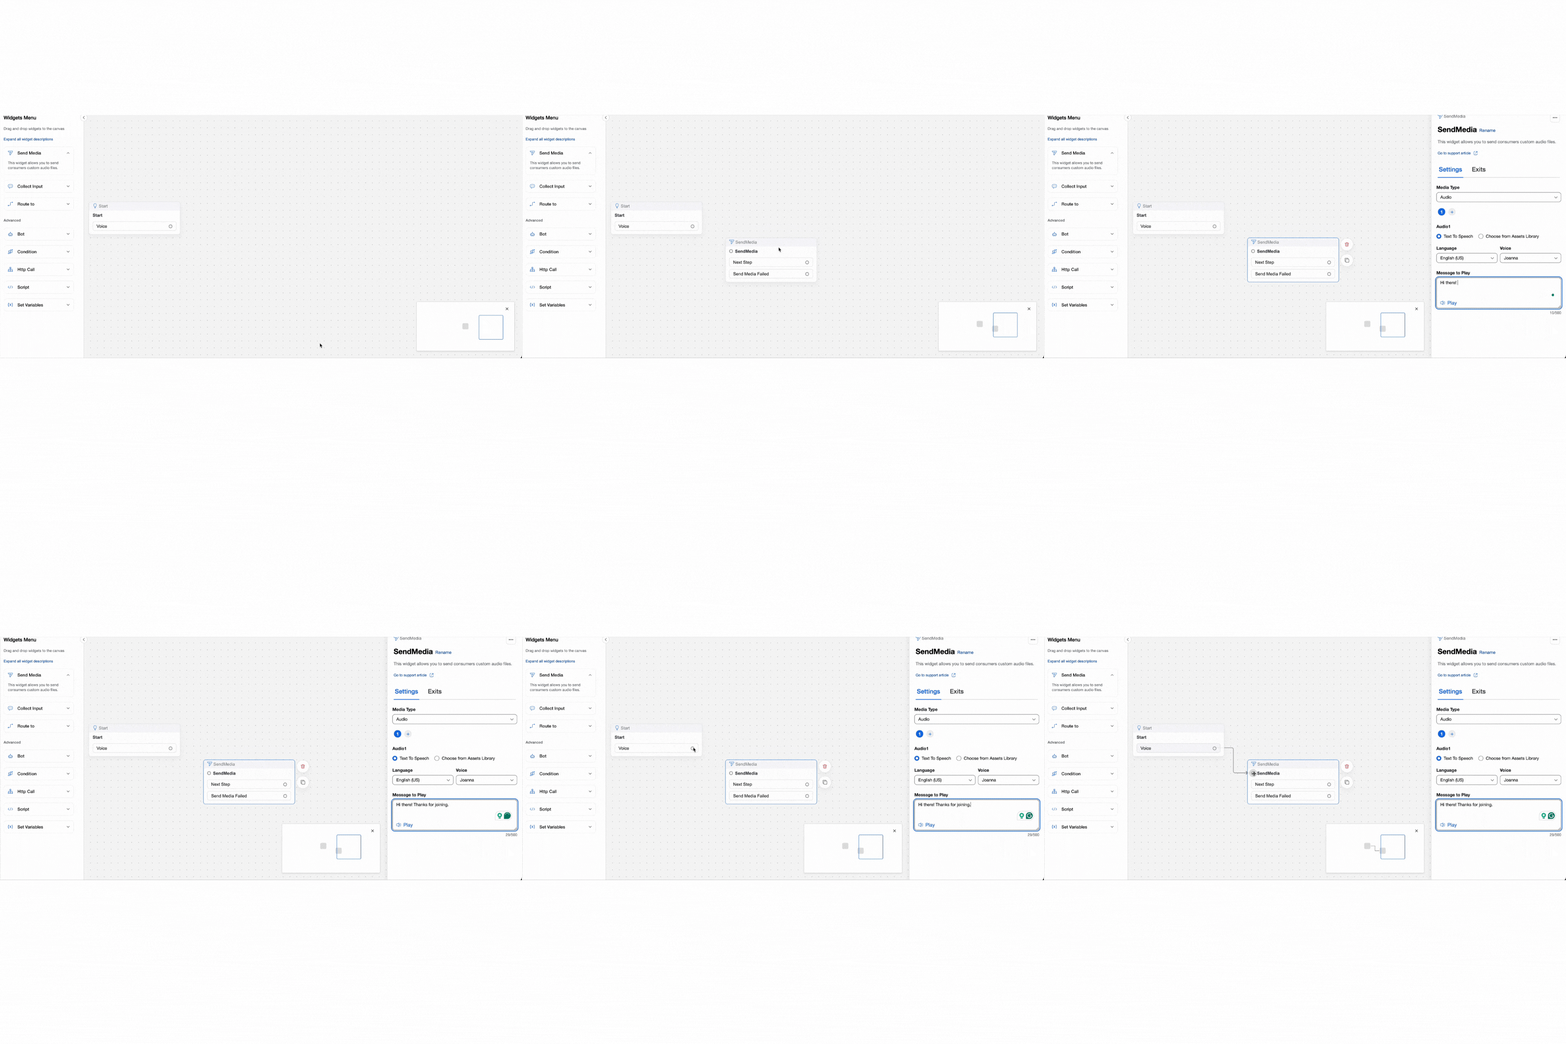
Once added, you'll be brought to your flow editor, where you'll create the path for this experience. Your left-hand menu gives widget options for each step. In the example shown below, we start with 'Video', as that was the channel/source selected. Our 'start' step is routed to the next stage, 'SendMedia' (send custom audio, text, video, or slide assets, based on flow type). To add this to your path, follow the steps shown below:
- Drag and drop the widget onto your flow board
- Type in a message to play for consumers once they reach this step
- You can select the media type, change the language, and select the voice you'd like to use
- Connect your previous step to this step by clicking on the circle in the bottom right corner of the previous step, and dragging your clicked mouse to the circle in the top left corner of this created next-step.
An added next step is shown in the image below, with 'Route_to' selected as the third step. 'Route_to' allows you to send engagements to another queue, flow, or agent. Additionally, you could collect consumer data in a step prior to this, using the 'Collect input' widget, or explore your other options with advanced widgets. The flow editor allows you to create a highly tailored and efficient consumer experience.

Once you finish editing your flow, you'll need to click 'publish' in the top right corner. Once done, you'll be brought back to the 'flows' tab, where you can use the menu to the right of your flow name to add and manage entry points.

Creating entry points
Entry points are the way consumers access and reach a contact center system.
Entry points depend on the type of flow:
- Voice or SMS flows: Phone number
- Video or chat flows: Entry ID
- Facebook Messenger: Facebook business page
- WhatsApp: WhatsApp number
- Email flows: Connected email account
For example, you can add a phone number as the entry point for a voice flow. When customers call this phone number, they will be routed through the contact center system.
To create an entry ID for video or chat flows, navigate to the 'Preferences' tab underneath 'Contact Center Management' and select 'Entry ID' from the top-bar menu.
Campaigns as entry points
You can also create a campaign to use as an entry point. Campaigns make it easy for Zoom Contact Center admins to customize entry points for flows by allowing customized invitation button design and displaying the default engagement window. For example, you can change the color of the invitation button to match your organization's branding and display a welcome screen, for engagement, with your brand's logo.
Note: You must have a web chat or video flow created to set as the primary channel for a campaign. You can't create a campaign with only a voice or SMS flow.
To add a campaign select the 'Campaign Management' tab under 'Contact Center Management', and click 'add campaign'. After selecting the type you want to add, you can customize your campaign settings.
To create your custom invitation button, scroll down to the 'targeting section' and select 'create invitation'. Use this space to customize your invite button with relevant text and on-brand design.

This campaign will now serve as the entry ID for the specified flow. It can be embedded directly into your code using the 'embed web tag' button (next to 'add campaign' under the campaign management tab), which generates a script tag for your web page.

This concludes the no-code set up of Zoom Contact Center. After setting up users, assigning skills, creating flows, and establishing entry points, you now have an easy-to-use foundational system for scaled customer support. As you continue exploring ZCC's features, you'll discover even more ways to refine workflows and provide exceptional service. Stay tuned for more in-depth guides to help you make the most of Zoom Contact Center!