Device authorization
Zoom has recently introduced Device Authorization to better improve end user experience when authorizing apps to access Zoom user data on different devices. This also helps to establish a platform wide authorization and authentication workflow to support app access on devices for all Zoom products.
You can authorize with Zoom using the OAuth 2.0 Device Authorization Grant using a simply one-step process. This gives users, who are signed in with Zoom, the ability to authorize app access on another device without typing in the requested user code or needing to re-login to their Zoom account.
Prerequisite for Device Authorization setup
- Users must have an existing private Zoom OAuth-capable application (such as Meeting SDK, OAuth, Zoom App and etc) in their Zoom Developer account.
- Users will also need to reach out to Zoom Support in order to enable this feature and use within their private apps mentioned above.
- Postman or other API platform of choice used for testing purposes.
- QR code generator or other tools to further ease the authorize app access procedure (optional).
Steps to handle the OAuth 2.0 Device Authorization Grant
- Sign in with your Zoom developer account credential at https://marketplace.zoom.us/.
- Locate and access your Meeting SDK app by going to the "Manage" section

If you do not have an app at the moment, you can create a new one by going to "Develop", followed by "Build App" and then select the app type of your choice.
- This article will use Meeting SDK as an example. Under the Feature tab, enable "Use App on Device"
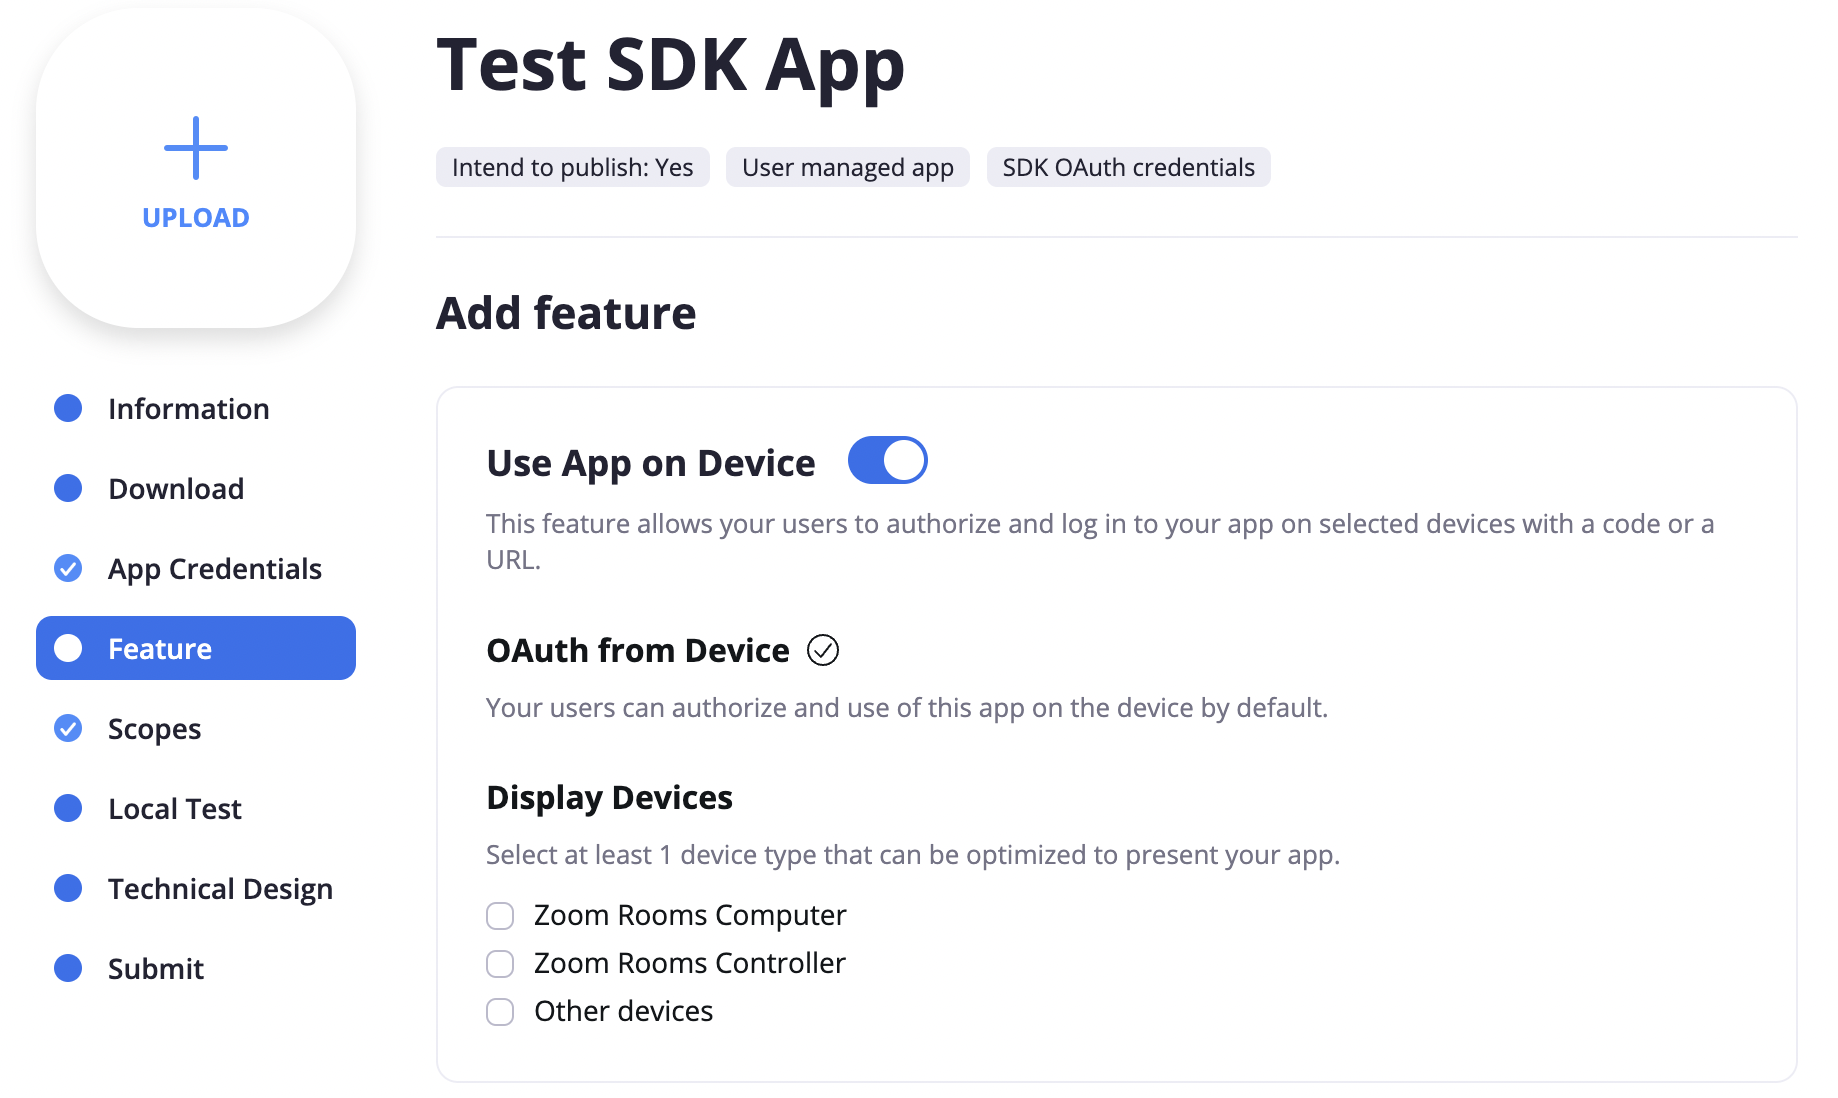
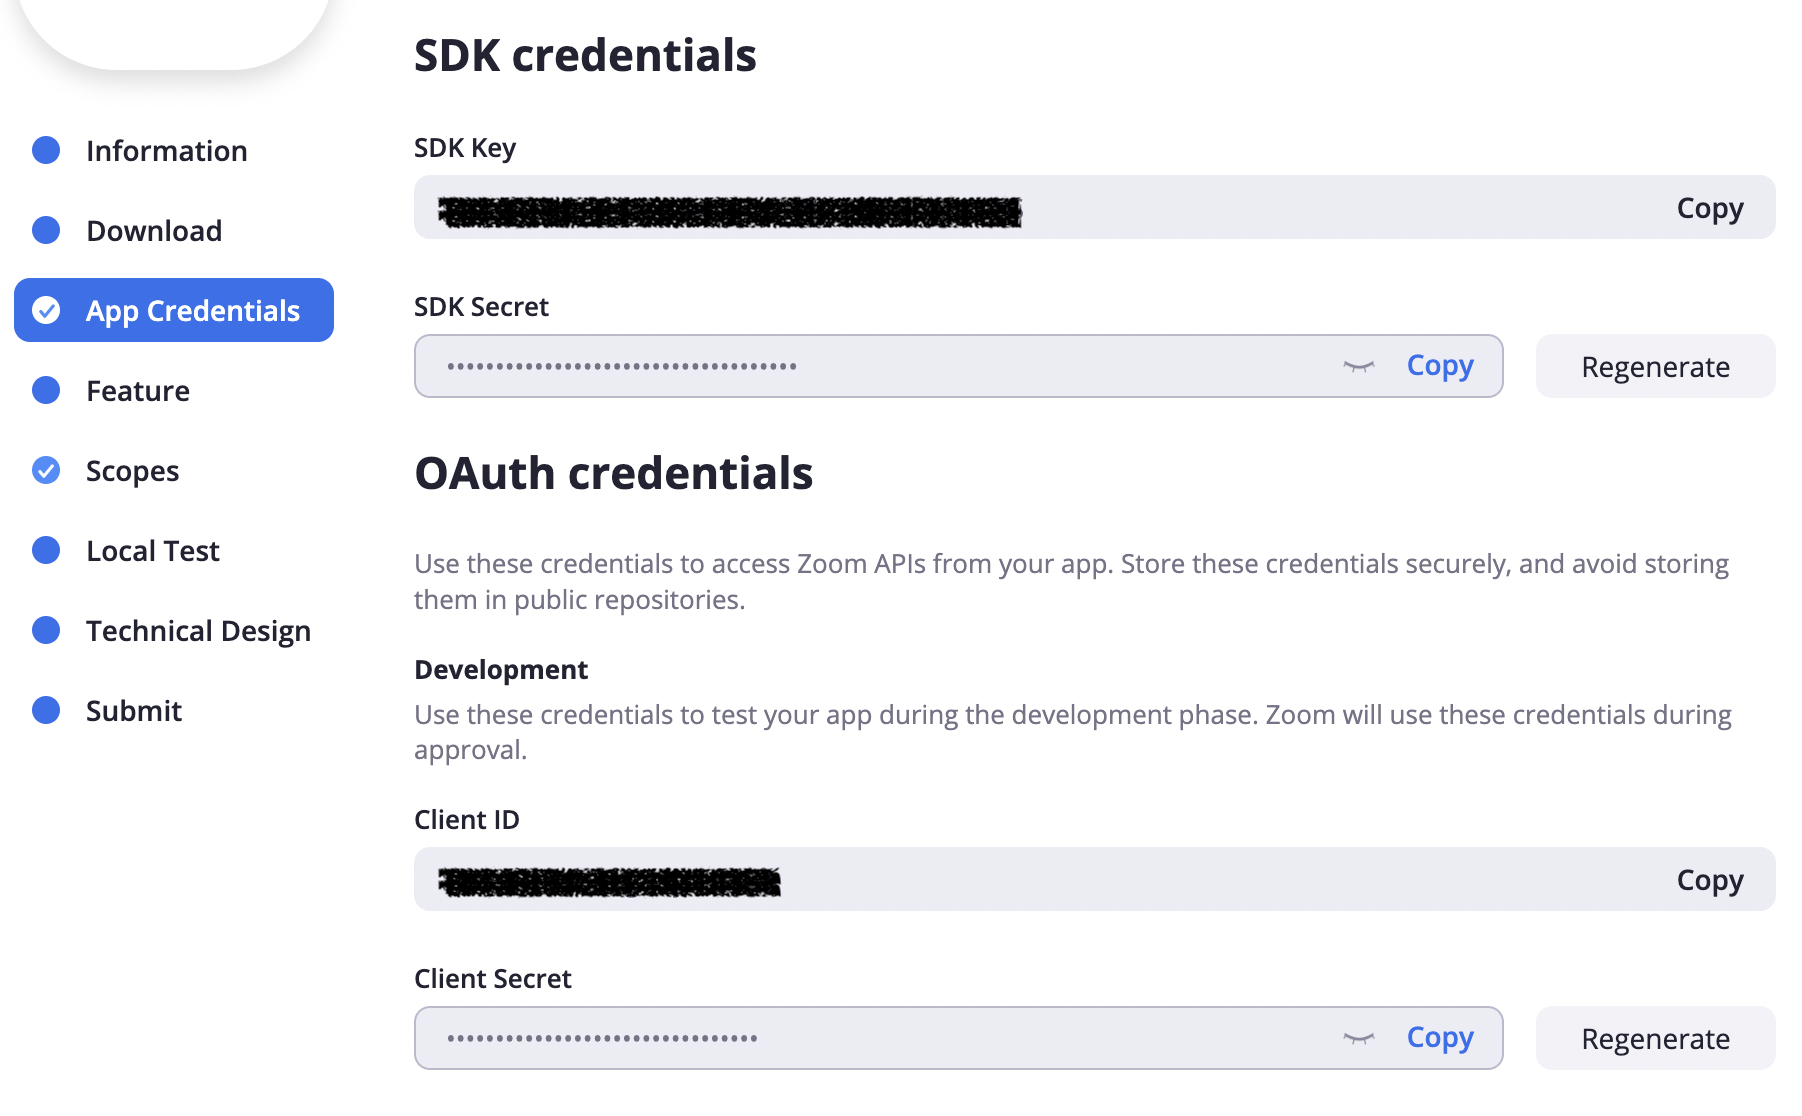
- Under App Credentials -> OAuth credential, save your Client ID and Secret as we will be using these for the next part.
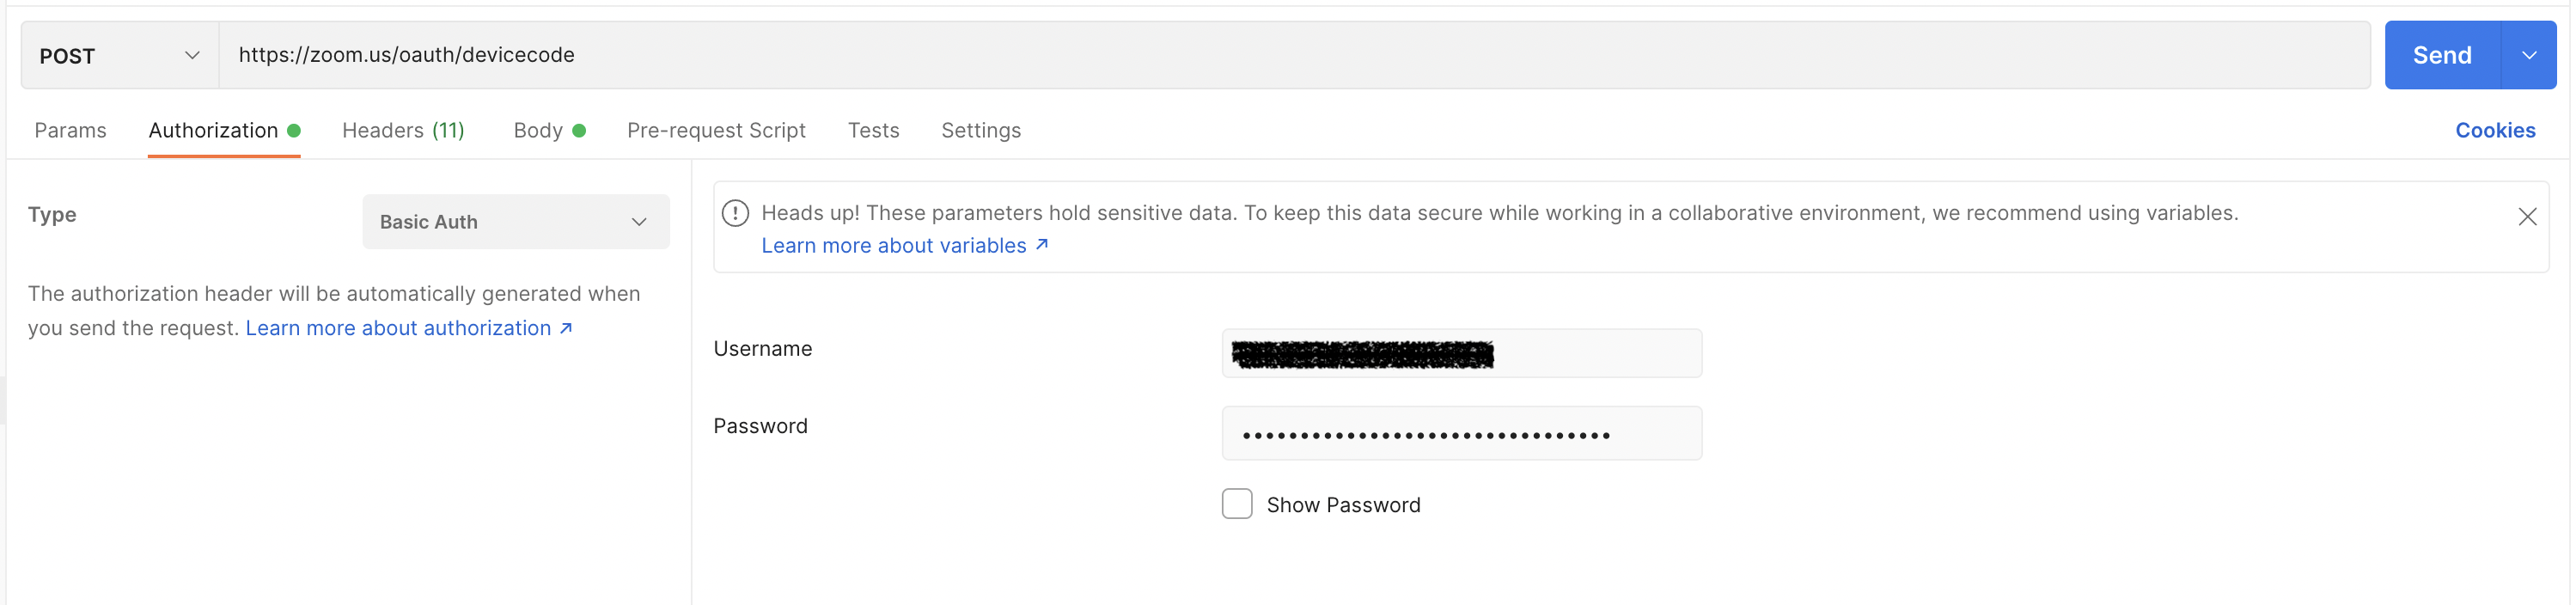
- Next, we will retrieve the device authorization information and the verification link. This article will use Postman with Basic Authorization to send a POST request with the client ID and secret to "https://zoom.us/oauth/devicecode"


- With the above result, there are a few ways you can redirect user's device by either sending them
- "verification_uri" and "user_code" in another communication means such as email or SMS, Or
- "verification_uri_complete" which includes the user_code embedded inside
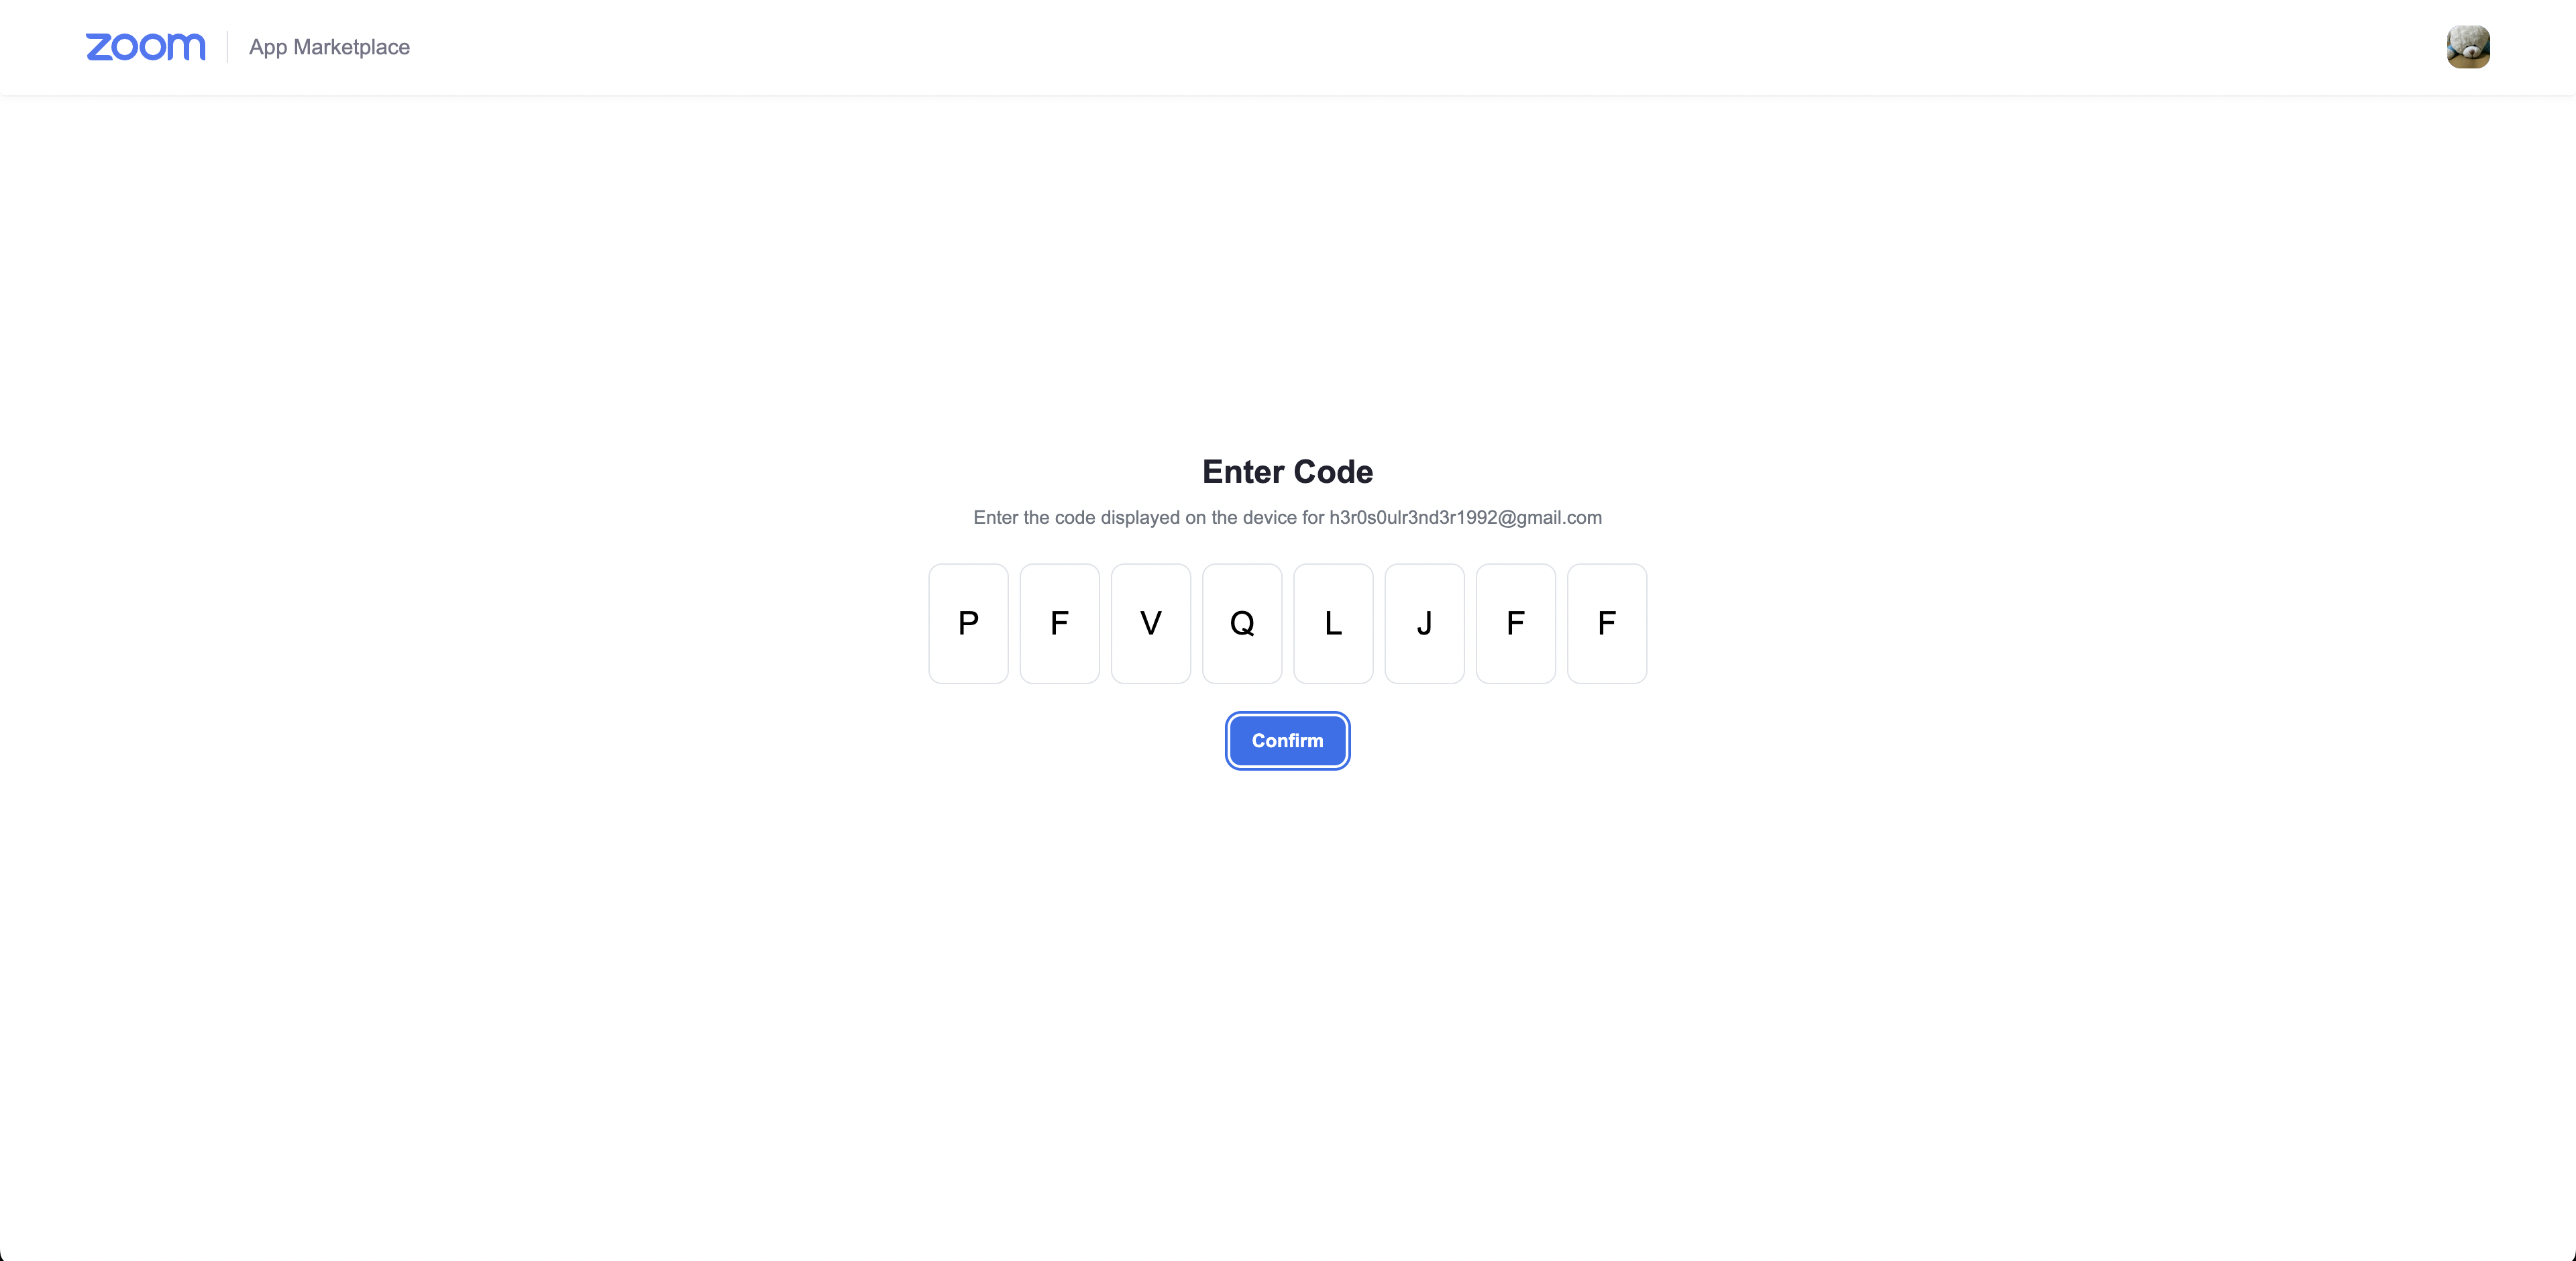
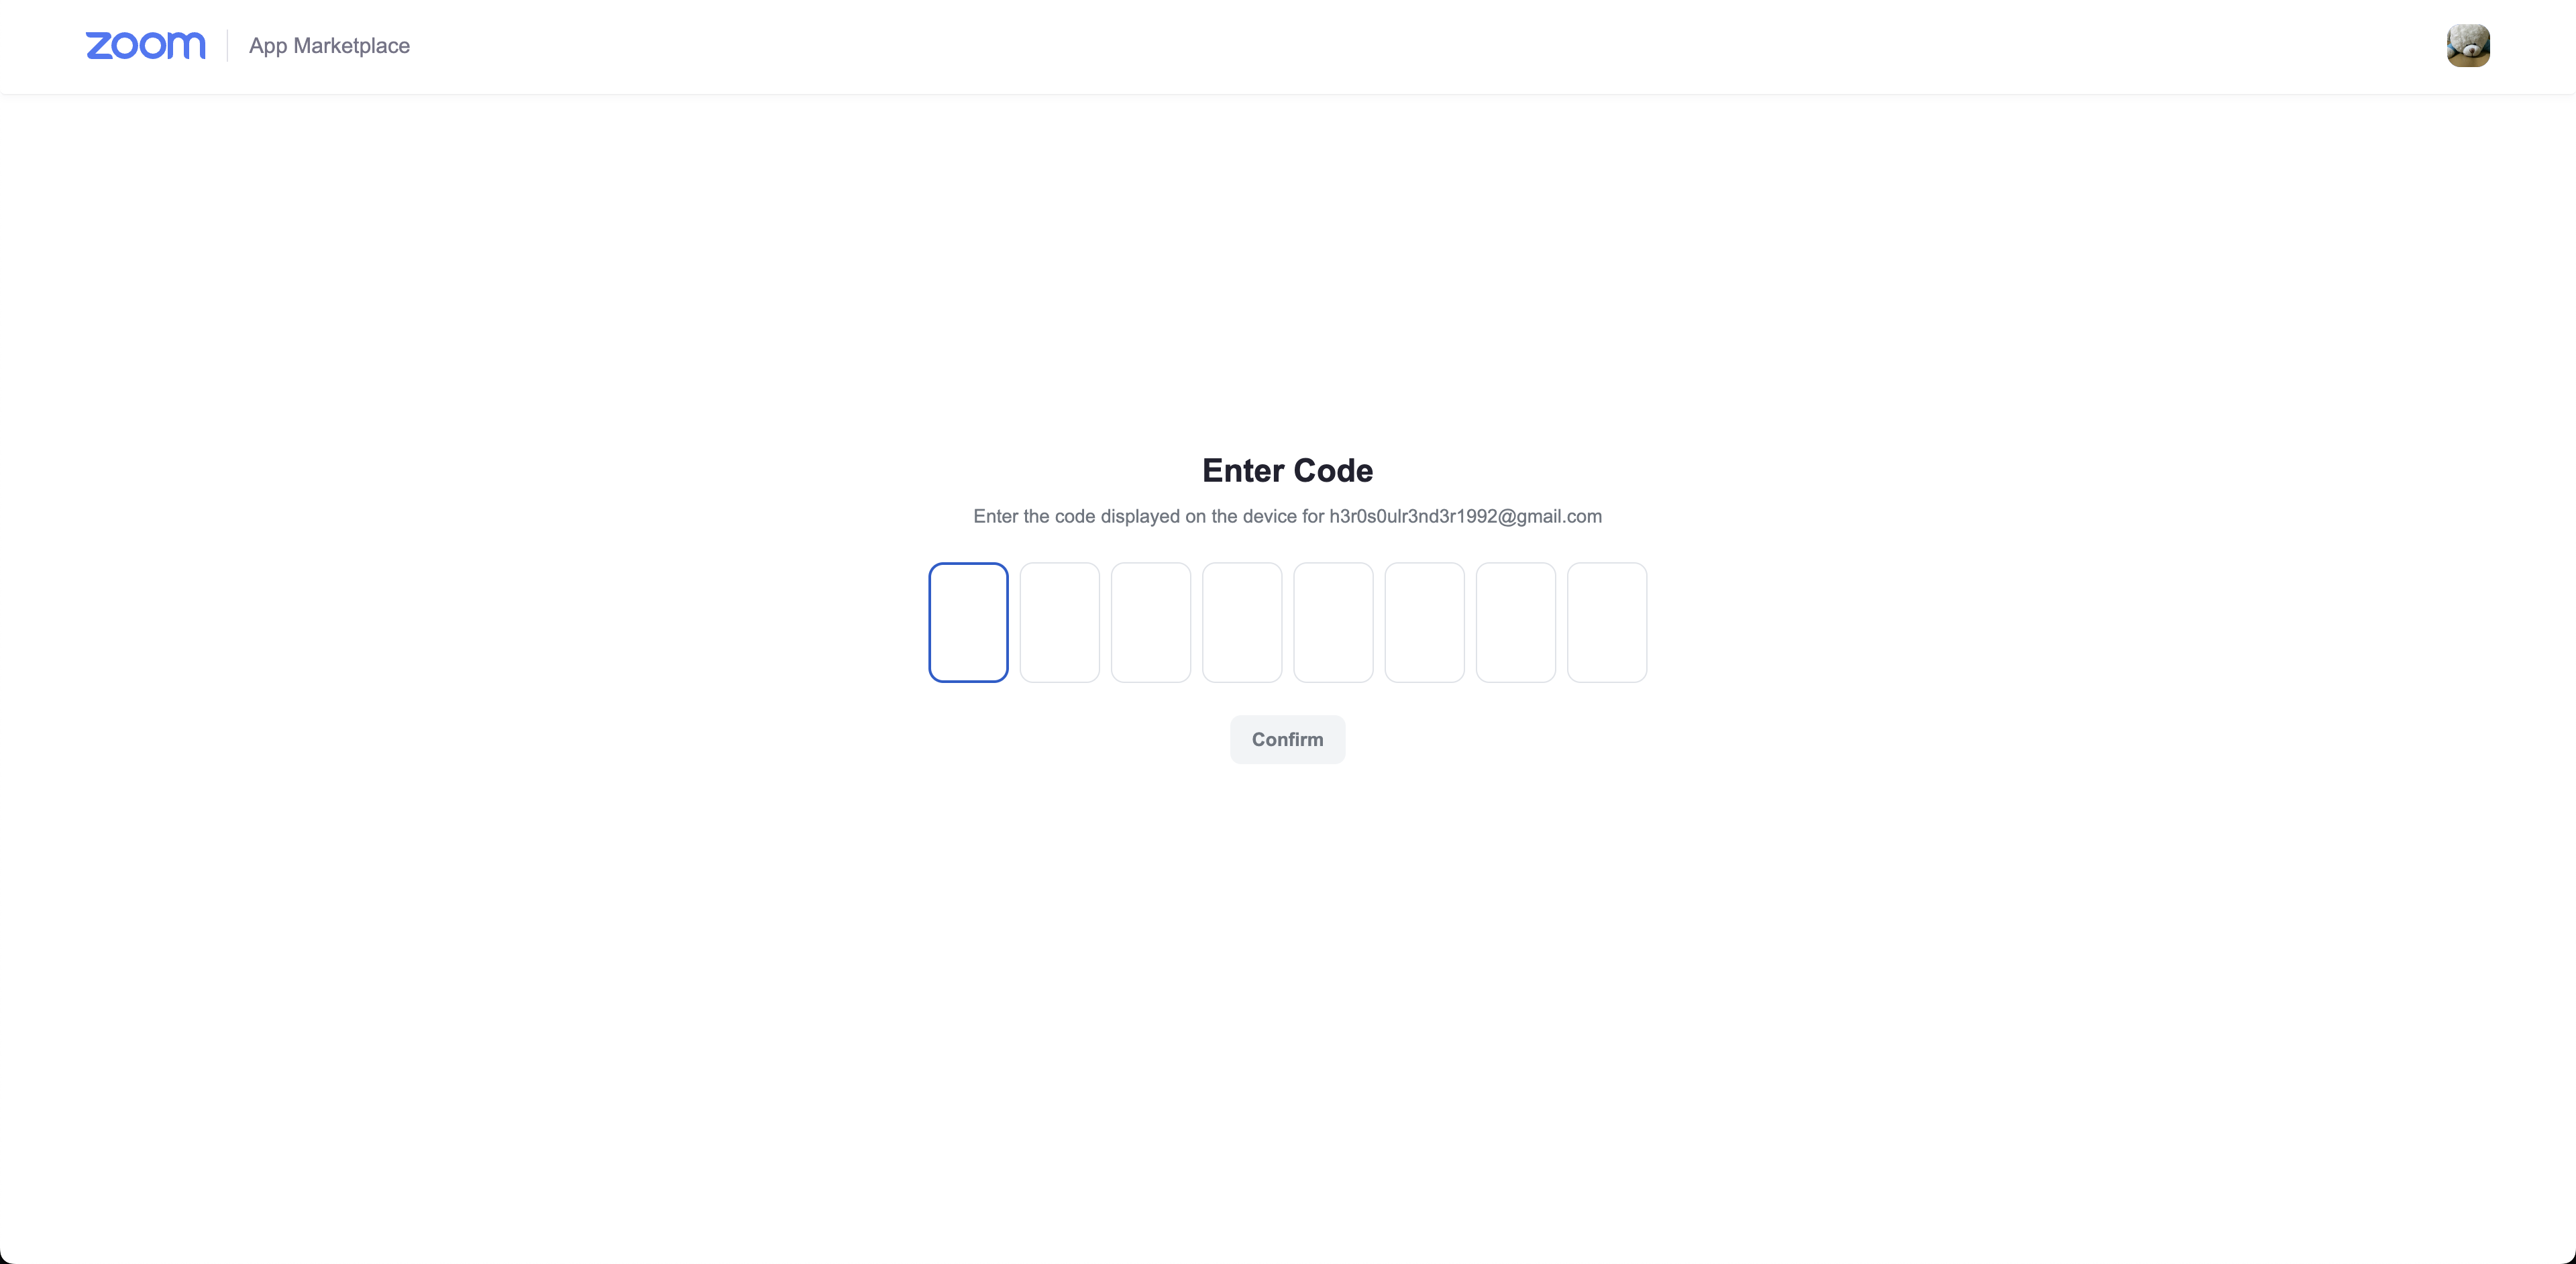
TADA! There you have it! With the "verification_uri_complete" you can simply turn the link into a QR code for users to scan on their other device (w/ Zoom account signed in) and grant access to your application!
You can also visit our documentation on Device Authorization for more information on each of the request as well as response key and value.
- Upon successful verification, users will be prompted to authorize the user of your application.
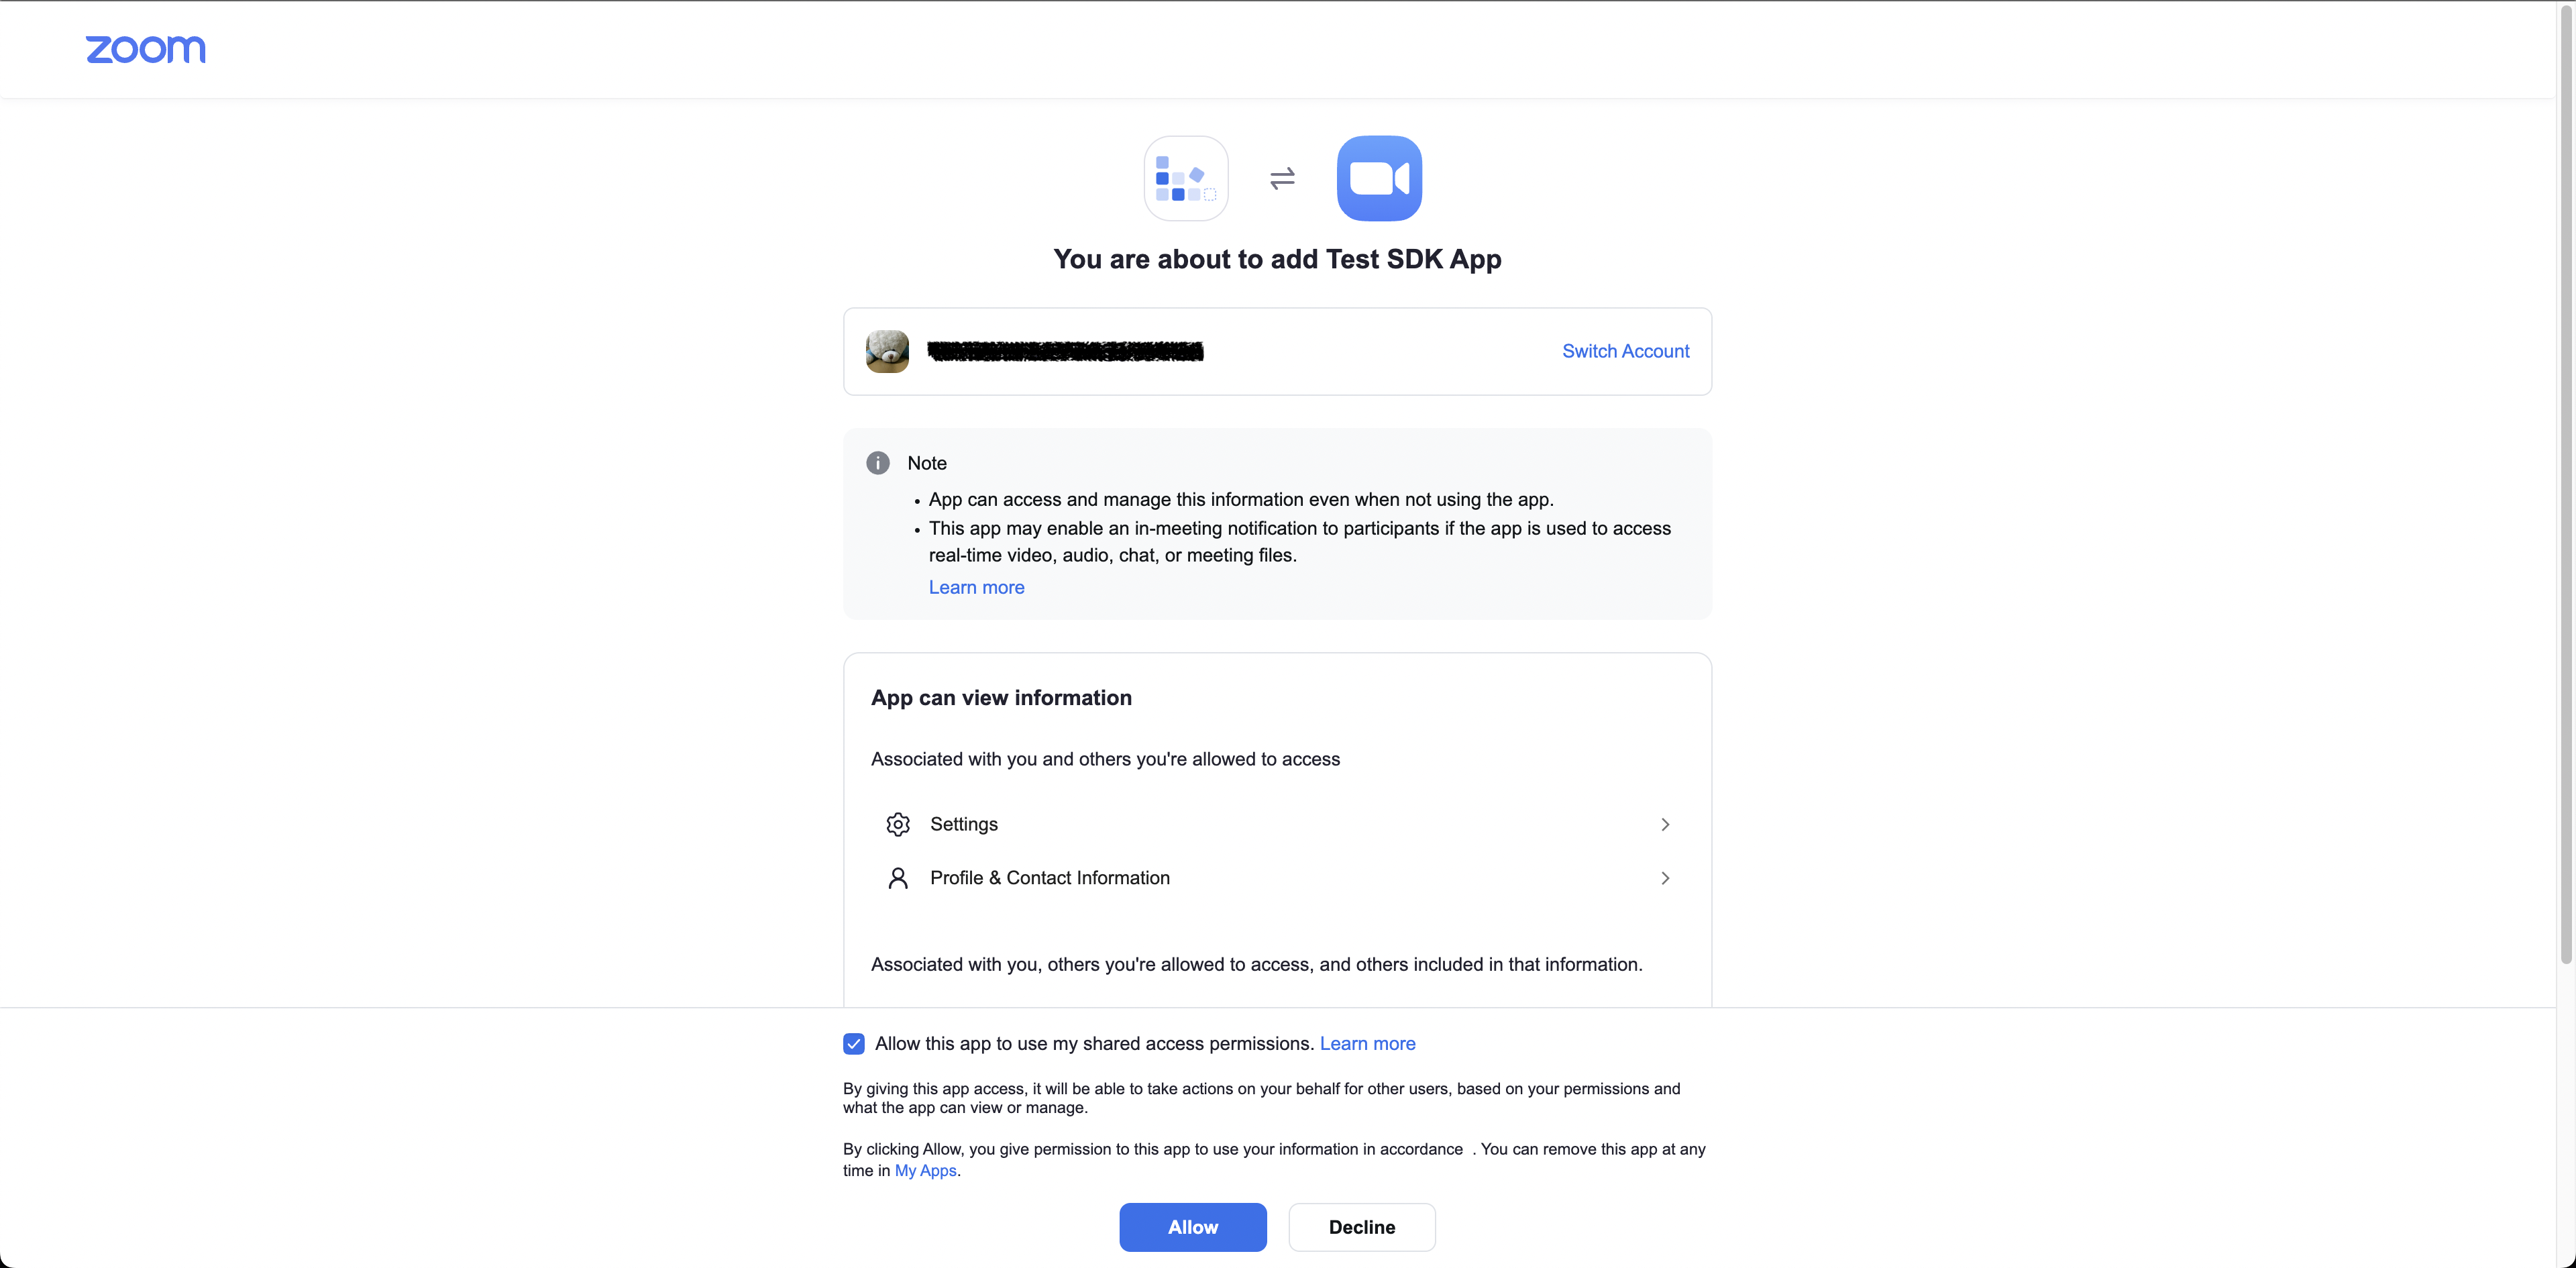
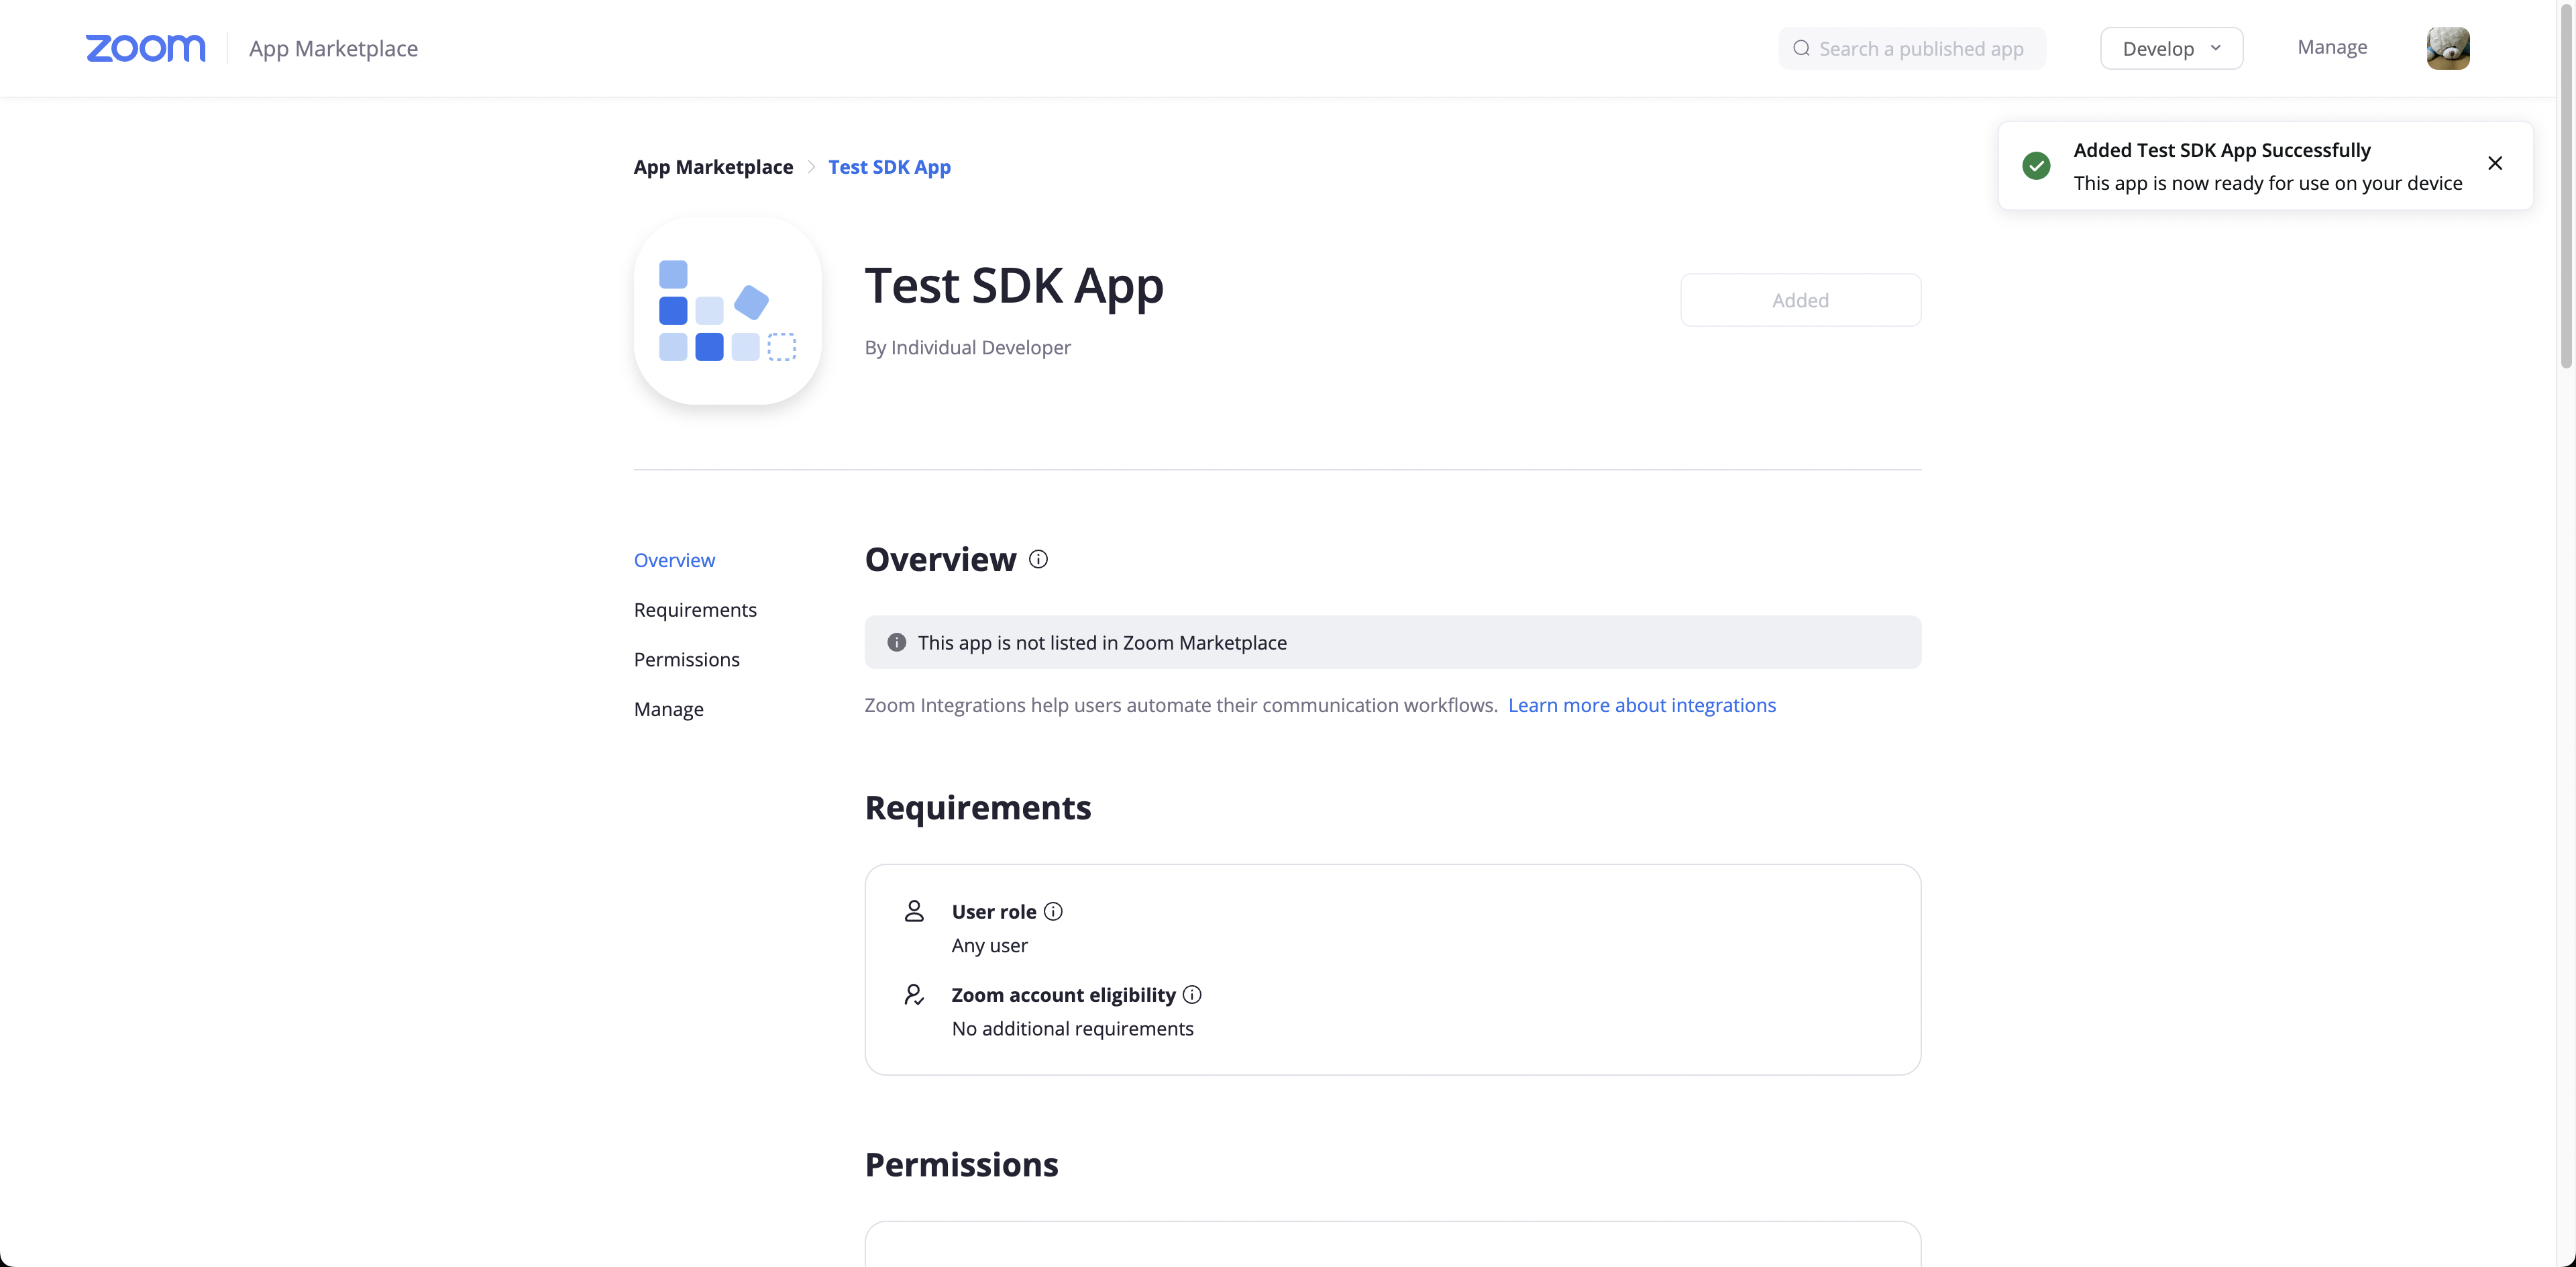
- After clicking on allow, you will see a successful message (e.g. the one shown in the image below on the top right corner) and you can continue with your application.
What's next?
Polling Request for Access & Refresh Token
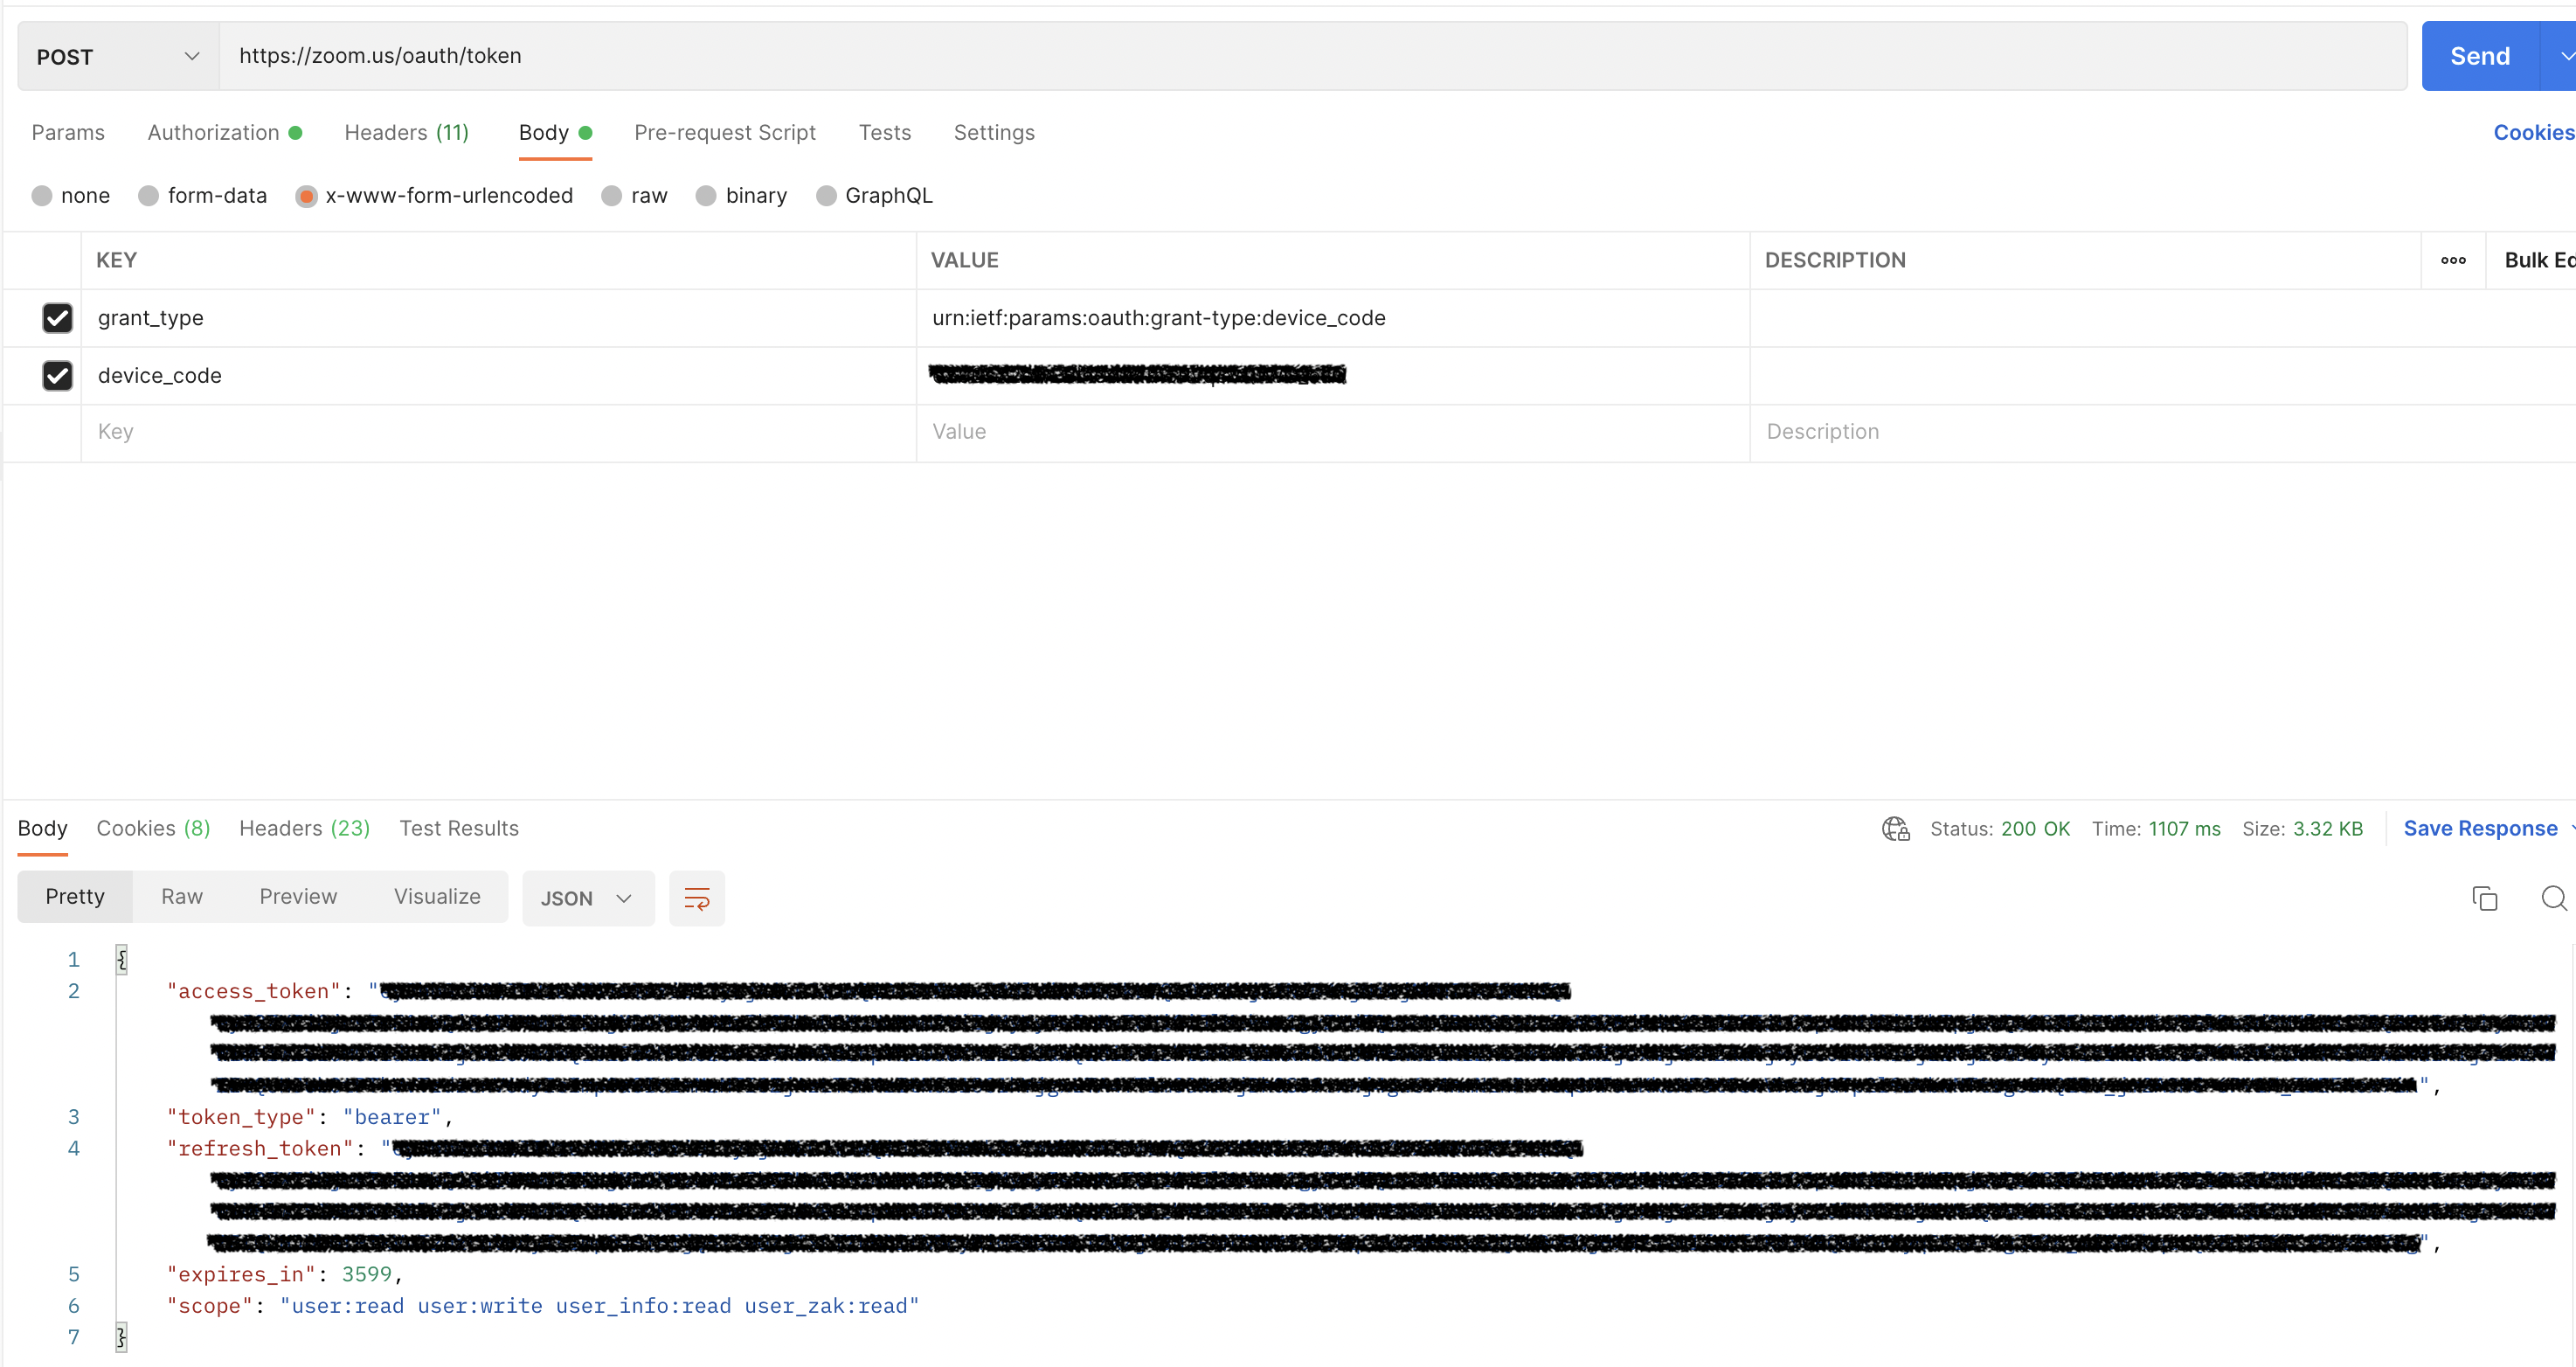
With the device code that we got previously and the same Basic Authorization used earlier, we can use it to retrieve the access and refresh tokens by calling POST to "https://zoom.us/oauth/token" with "grant_type" of "urn:ietf:params:oauth:grant-type:device_code" and "device_code" that you got from the previous API call.
With the access token, you can work wonders with the capabilities of Zoom's API such as creating a meeting, getting past meeting details and etc.
ZAK Token
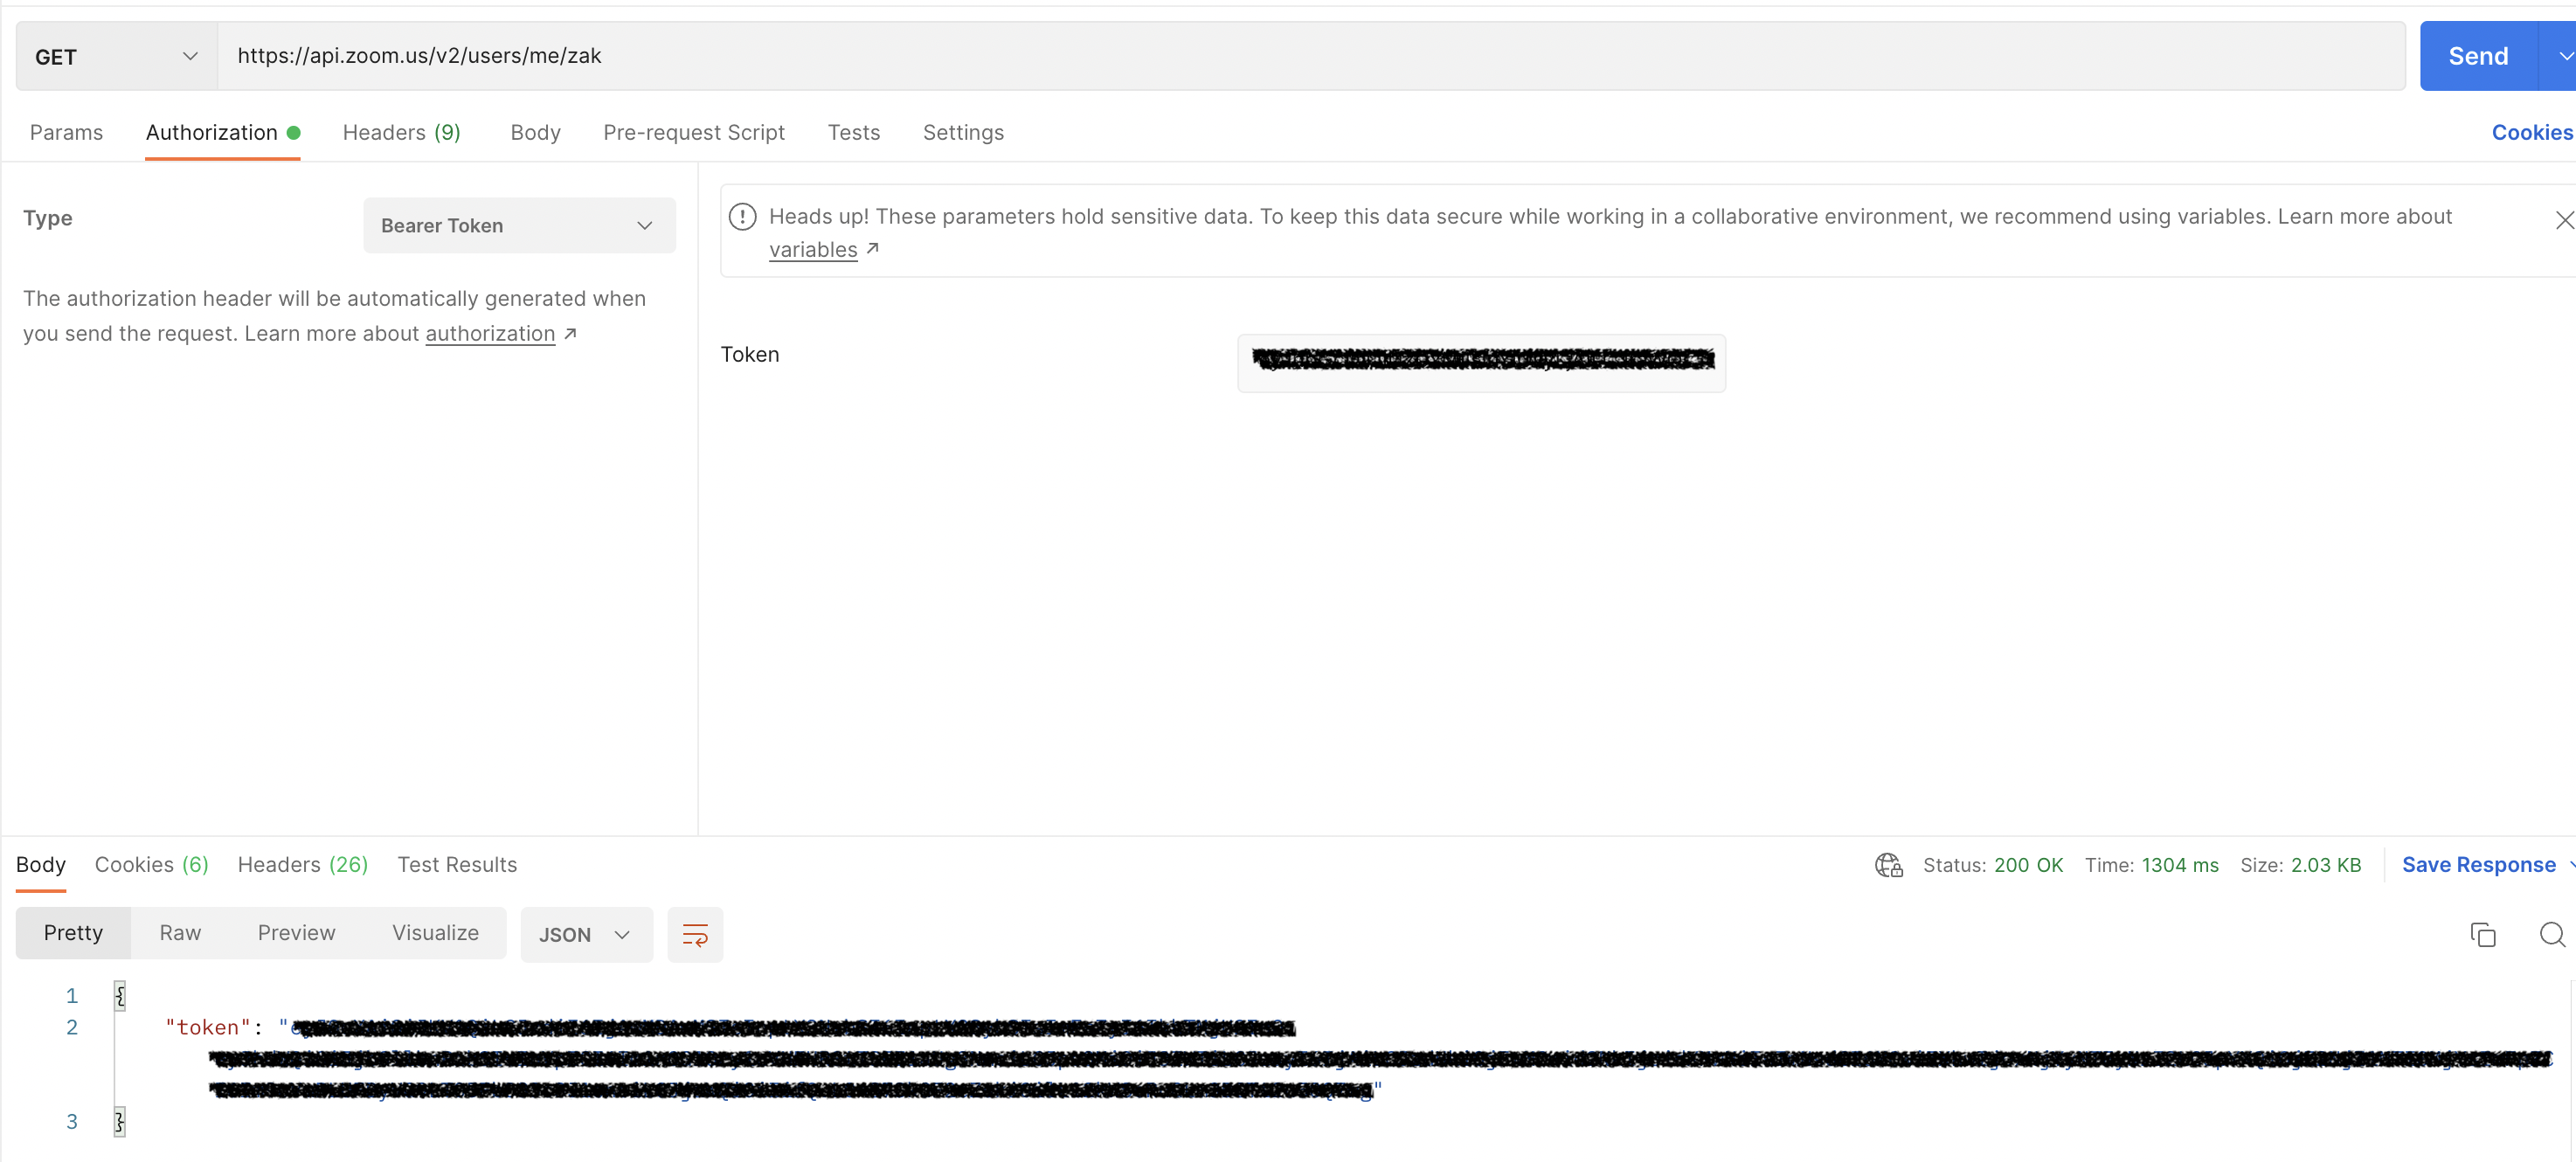
In order to start an instant meeting on the user's behalf, we will need to retrieve their ZAK token. We can simply do this by using the access token we got previously and send a GET call to "https://api.zoom.us/v2/users/me/zak".
Conclusion
With the introduction of the OAuth 2.0 Device Authorization Grant, we can easily authorize another device app access to Zoom easily with the already signed-in Zoom users and make things faster and easier for users!