Creating a CRM sample application for Zoom Phone and Zoom Contact Center
Introduction
Customer relationship management (CRM) tools are crucial for businesses, ensuring strategic processes, organization, and customer interaction. With Zoom technology, you can easily build a CRM for your business, integrating in phone calls, access to user data, secure login, and metric tracking. In this blog, we'll walk through creating a CRM application that can use either of two products; Zoom Phone or Zoom Contact Center.
Product overview
Both Zoom Phone and Zoom Contact Center allow developers to interact with external users via a VoIP system. With Zoom Phone, you can create applications with an integrated telephony system and additional communication channels such as chat and meetings. Zoom Contact Center, on the other hand, is for businesses looking to access an omnichannel customer support system. Once set up with a plan for whichever product you intend to use, you can head over to our documentation site to get started with code integration.
Application overview
The application focused on in this blog has three main branches:
- Main - this branch showcases a working application with hardcoded data to demonstrate components
- Zoom Phone - this branch showcases how to build the same base application with phone features integrated via Zoom Phone Smart Embed and Zoom Phone APIs
- Zoom Contact Center (ZCC) - this branch showcases the same application structure and features with integration via ZCC products
Tech Stack
- Next.js - React-based web framework
- NextAuth.js - open-source authentication solution designed for Next.js applications
- React - UI library
- TailwindCSS - Utility-first CSS
- Zoom Smart Embed - Zoom Phone & Contact Center interfaces
- Node.js API routes - For backend token exchange and API access
- Admin-Level OAuth App - Authorization mechanism for Zoom
Authorization
Zoom supports industry-standard OAuth 2.0 rfc6749 flows to handle authorization and access tokens. So applications can request, refresh, and revoke tokens based on its type and authentication method. Tokens expire after a set time and may need renewal or refresh. In this application, we are using NextAuth.js which is a complete open-source authentication solution for Next.js applications.
Smart Embed
Smart Embed, available for both Zoom Phone and Zoom Contact Center, allows users to easily integrate a soft-phone experience into their application using either a <script> or <iframe> tag. Smart Embed allows developers access to a number of features including:
- Inbound and outbound calling
- Call recording
- Click-to-call
- Engagement wrap-up*
- Call/engagement logging, Events and Contact Search APIs
*Feature only available for contact center
Phone Smart Embed set-up
To set up the Zoom Phone Smart Embed for your application, follow these steps:
- Install Zoom Phone Smart Embed App by heading over to Zoom Marketplace and accessing the Zoom Phone Smart Embed app. You'll see a blue dropdown, where you'll select "Add for Myself".
- Edit your domain list: To ensure your application can access Zoom Phone, you'll need to add your 'Approved Domains'. On the Smart Embed app homepage, scroll down to the 'Manage' section and select 'Configure App'. From there, click the 'Edit' button and add in your application domain. Without this step, you'll run into connection errors after embedding.
- Within your codebase, create a component where you'll embed your
<iframe/>or<script/>that will power your phone widget.
In our sample CRM application, ZP Smart Embed is used to place and receive calls and send texts. We also leverage the click to call API, to trigger phone calls in just one click and receive real time notifications such as call ringing, call connected, and call log is completed events.
Contact Center Smart Embed set-up
To set up Smart Embed for your application, following these steps:
- Navigate to your contact management tab at zoom.us/myhome, and scroll to integrations. Create a new integration, adding in the vanity link of your application (a ngrok link, for example, if not deployed).
- Back under contact center management, select users and find the user's whose credentials will be used in your application build. Add the newly created integration under their user settings.
- Within your codebase, create a component where you'll embed your
<iframe/>script, and copy your application vanity link into the origin parameter in the src attribute. To ensure you can accept incoming calls, you'll need to assign your Contact Center number as to a flow as the entry point.
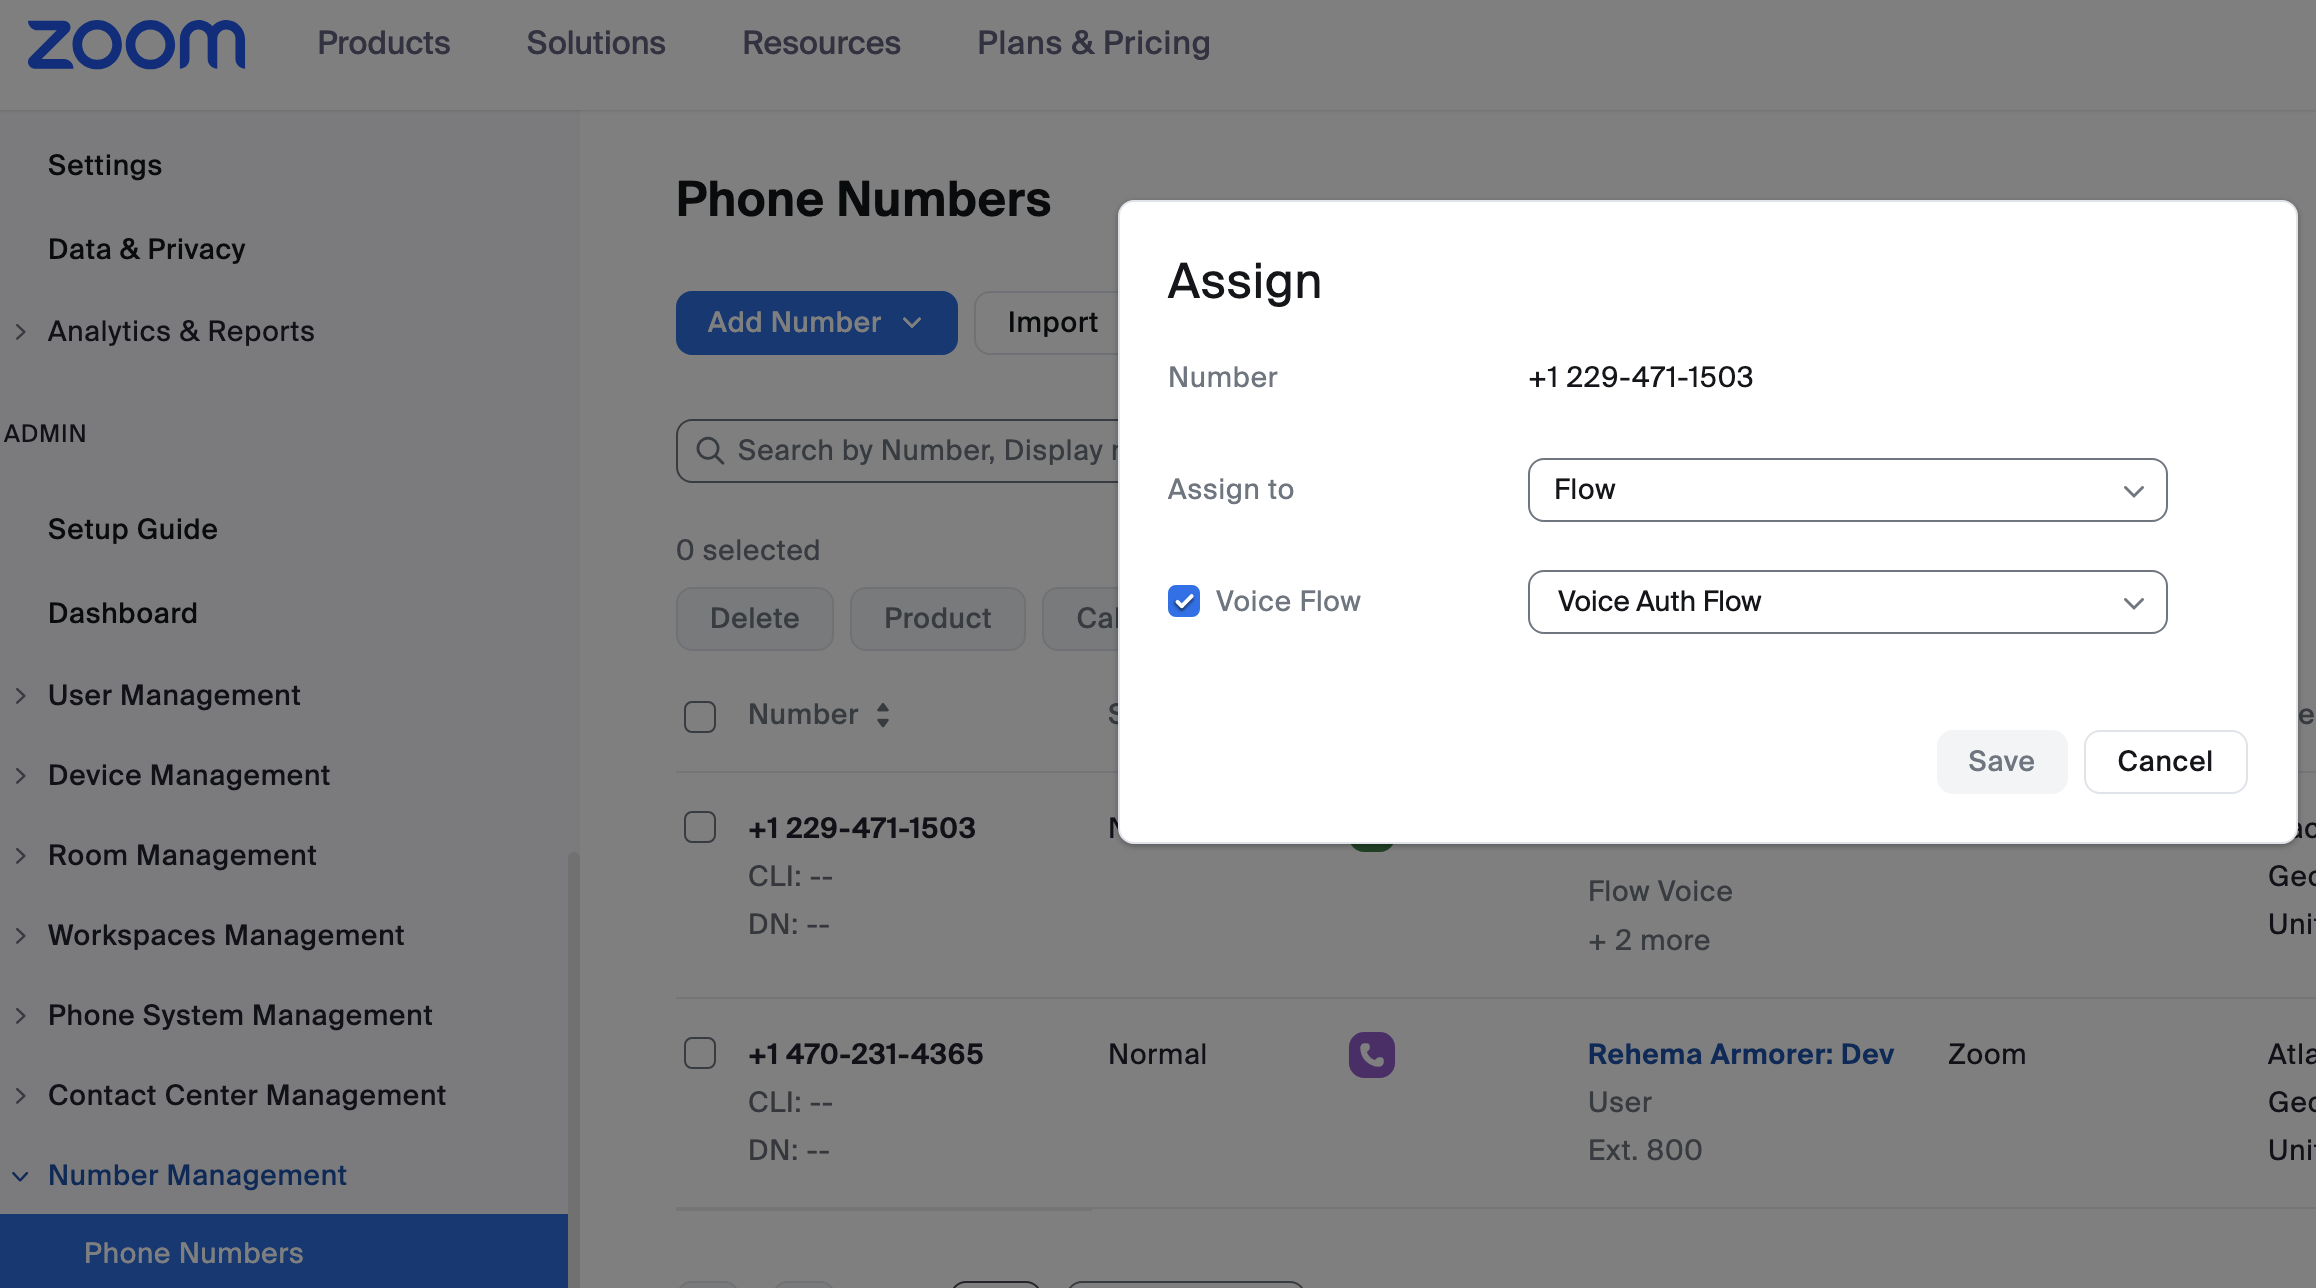
In our sample CRM application, ZCC Smart Embed is used to place and receive calls. With the events that are provided, we can trigger functionality when a call is received, ended, or answered.
Data access via APIs
Our application displays call logs and user accounts to replicate what a business might need to view in their CRM. We were able to achieve this with both products and their offered APIs, although different paths were taken to achieve the same goal. Let's walk through what the process looks like for Phone and ZCC, respectively.
For each endpoint we've listed below, we added the necessary scopes within our marketplace app.
Accessing data with Zoom Phone
To access the data relevant for a CRM application, we made use of the extensive API library offered for Zoom Phone. Below are the endpoints and steps we used to display the information:
Displaying external accounts
ZP stores external accounts in the Phone System Management page (Zoom.us → Admin Tab → Phone System Management → Company Info → Account Settings → External Contacts). To access external contacts added to your account via API, there are two endpoints that we can leverage in our application:
Displaying call-logs
To access the call logs of your account and display a record of all inbound and outbound calls that involve phone users in the account, you can find it within your Phone System Management → Call logs. To access these via API, there are two endpoints:
Accessing data with ZCC
Now that we've reviewed what the process looked like on our phone branch, let's do a similar walk-through for our Contact Center one:
Displaying address book contacts
ZCC stores users accounts within address books managed in admin account configuration (Zoom.us→ Contact Center Management → Address Books). To display address books within our application, we made use of three endpoints:
To simplify our application routes, we used an external API-platform (postman, in this case), to run our first endpoint and get our address book unit for the collection we'd like to display. As shown below, the address book unit number is needed for this endpoint.

Once obtained, we can now pass this unitID into our next endpoint, listAddressBooksUnits within our application. This will display all address books within the respective collection.
const response = await fetch(
    `https://api.zoom.us/v2/contact_center/address_books/${unitID}`,
    {
        method: "GET",
        headers: {
            Authorization: `Bearer ${session.accessToken}`,
            "Content-Type": "application/json",
        },
    },
);
In a separate client-side page named "accounts", we have an input form where users can search for an address book by name. We'll use this input to send to our backend and display the matching address book.
Once we have the search term from the user on our backend, we can use it to filter through the results we get from the endpoint listAddressBooks. Our returned schema will list all address books with their information, including a value for the address book name. We'll filter through our returned objects and only work with the one whose address_book_name values matches the search term sent from the client side.
const matchedBook = data.address_books.find(
    (book) => book.address_book_name.toLowerCase() === bookName.toLowerCase(),
);
Once we have our matching address book, we'll use the id value to pass into our next endpoint listAddressBookContacts. We'll use this returned schema to send the appropriate information back to our frontend to be rendered for our users in our created table.
Displaying voice engagement logs
To create a call-log display, we'll use the following ZCC endpoints:
- List engagements
Within our returned schema, we'll use the
channelvalue to filter through our engagements and only send those that are voice engagements to properly display phone calls (while, with ZCC, any and all engagement types can be displayed, we're only showing voice calls to match the overall structure of our application).
const data = await response.json();
const voiceEngagements =
    data.engagements?.filter((e) =>
        e.channels?.some((c) => c.channel === "voice"),
    ) || [];
Conclusion
That concludes our walkthrough of our dual-branch application, showcasing how to create a basic CRM application using either Zoom Phone or Zoom Contact Center. We've only touched the surface of what can be done with the customer experience. Take a look at our README to get started and get your app up and running. To learn more about what you can achieve with each product, be sure to keep up with our blog for more content on working with them. Happy building!