Getting started with Zoom Video SDK REST API
Introduction
If you're familiar with the Zoom Developer Platform, you've probably used its extensive REST API library. But did you know that the Video SDK has its own API library? When building your own custom application with Zoom's Video SDK, you gain access to an array (pun intended) of endpoints, event listeners, and webhooks for use exclusively with this tool. In this article, we'll focus on the Video SDK API, reviewing the following:
- How to gain access to the API endpoints
- Best implementation methods
- What you can do with the Video SDK API library
Before we go any further, I want to point out the need for a separate Zoom account that is specifically for use with the Video SDK. To purchase a Video SDK plan and create your account, click here.
Now let's go ahead and dive in, starting with credentials.
Video SDK API credentials
Once you have your Video SDK Zoom account set up, you'll navigate to Zoom's developer marketplace. Here, log-in if you haven't already done so, then click 'Build Video SDK' under the 'Develop' dropdown in the upper right-hand corner.
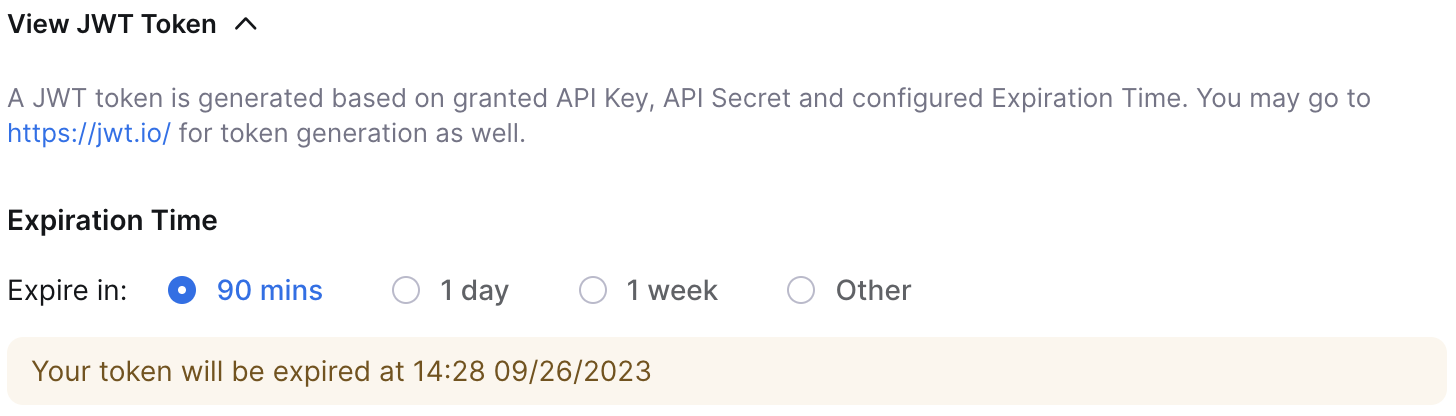
The next page will allow you to fill out basic information about your Video SDK application. After doing so, you can scroll down on the same page to the section titled API Keys. These are the credentials you'll need to copy and paste for use in your application (note: you will also need to access the JWT from the 'View JWT token' dropdown menu within the same section).
Making an endpoint request with your credentials
To make a request to a Video SDK endpoint, you'll need to find the endpoint you want to use for your intended purpose. Luckily, you can easily do this with the Video SDK API library, which sorts endpoints by use case and allows you to filter by search term. Once you find your needed endpoint from the side panel, click on it for information on how to use it. The Get Session Details endpoint page is shown below, for example.
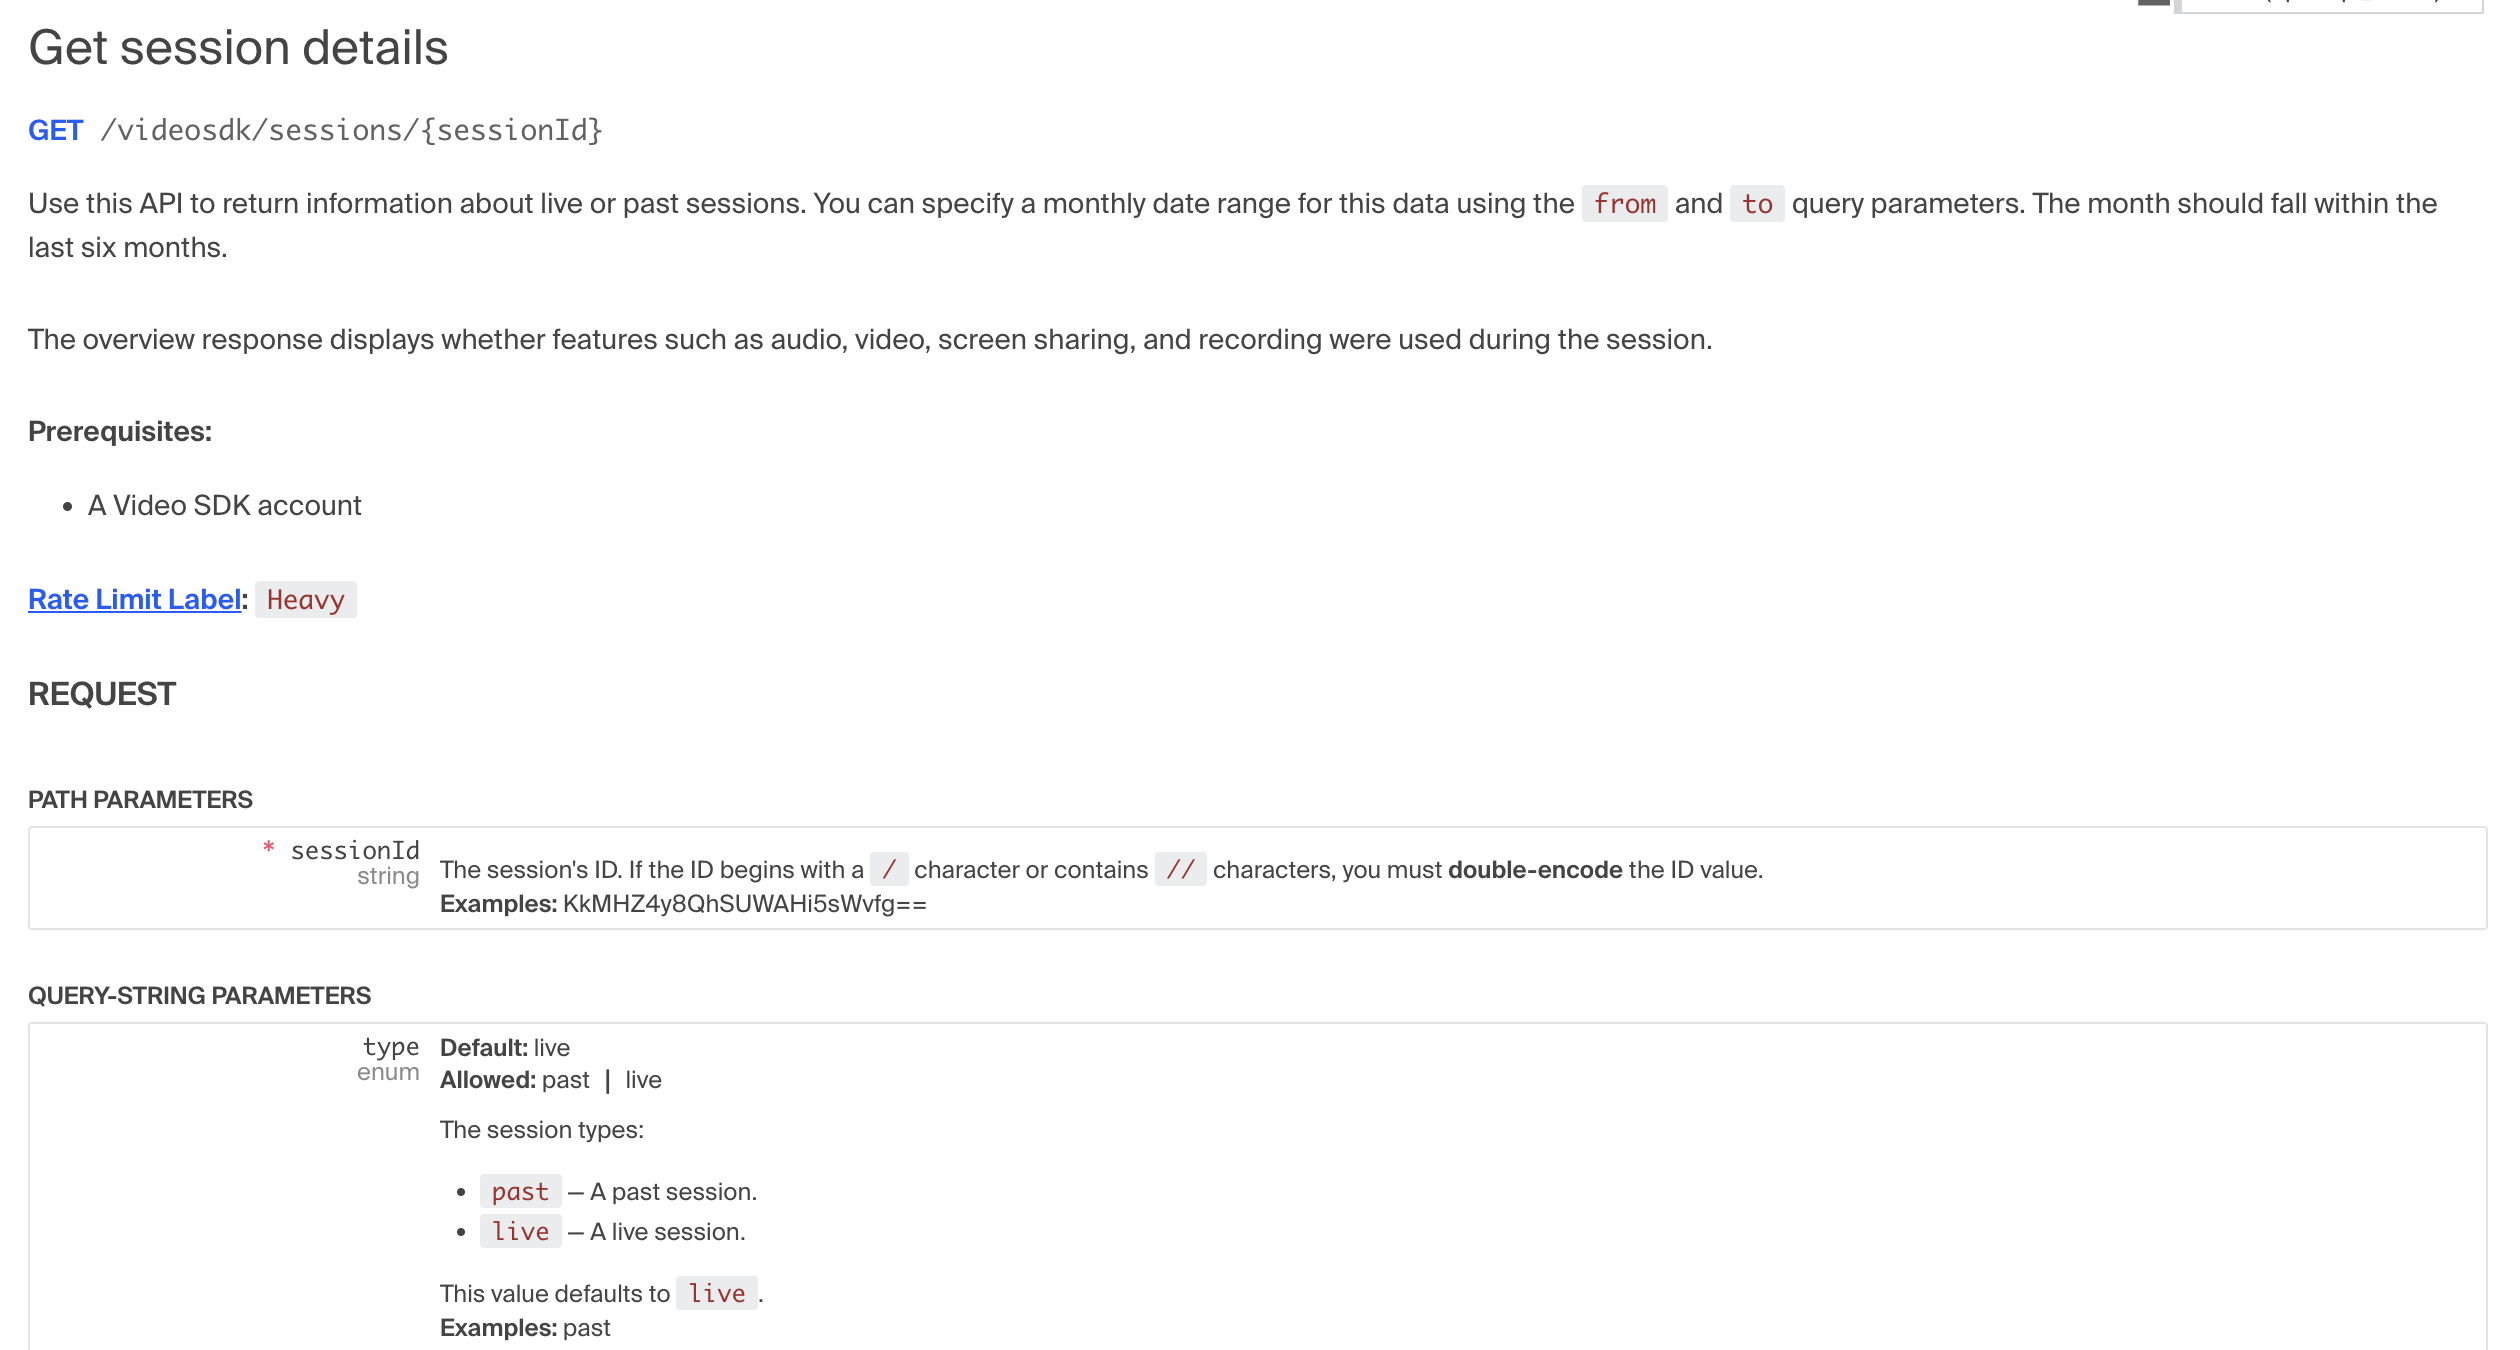
You can use the provided query-string parameters to specify the range/type of data you want to receive from the request. Let's take a look at a URL endpoint with added query-string parameters:
const url = `https://api.zoom.us/v2/videosdk/sessions/${res.locals.sessionId}?type=past`;
- We see our base URL: https://api.zoom.us/v2/videosdk/sessions
- Next, we add in our session ID. In this example, I retrieved my session ID in a previous API request and saved it to a variable. That's what's seen here:
/${res.locals.sessionId}/ - Next, we're adding a query-parameter. We specify 'type' as past, indicating we want information from a previous (as opposed to live) session.
Now that we have our URL, we can move forward with our API request. To authenticate the request, you'll need to add the copied JWT token (from the previous section) as the request header bearer token. An example implementation is shown in the following code snippet:
const axios = require('axios');
const sessionController = {};
const bearerToken = '';
sessionController.getId = async (req, res, next) => {
  const url = 'https://api.zoom.us/v2/videosdk/sessions?type=past&from=2023-05-23&to=2023-06-15';
  let sessionId;
  try {
    sessionId = await axios({
      method: 'GET',
      url,
      header: {
        "Authorization" : `Bearer ${bearerToken}`
      }
    })
  }}
Here, I used the axios package to make an endpoint request within the backend of my application. You'll notice that my header property's value contains the bearer token (stored as a variable and embedded using template literals). Authenticating your requests with the JWT token is necessary for its success, and you'll want to make sure you've set the JWT Token's expiration appropriately before use. You can adjust these settings on your Video SDK application homepage, which we navigated to in our introduction.
At this point, you should be able to successfully make a request to a Video SDK endpoint! Now that we know how to do this, let's talk about what we can do with this.
Using the Video SDK API with your application
This section will go over some example use cases for Video SDK endpoints, relevant for a range of industries.
Recording a medical appointment
Let's say you're holding a virtual appointment as a medical doctor, with an application backed by the Video SDK. The API makes it possible to record an appointment for a patient's file. Here are the steps:
- Make sure recording is enabled on your Video SDK account.
- Add functionality to your application to enable cloud recording.
- Use the 'List recordings of an account' endpoint to retrieve the specific session's recording ID.
- From the returned object (shown below), find the session recording you want by looking at the recording_start and recording_end values. This will help identify the session by telling you when it occurred.
- Within the same returned object, click on the download_url value to download the recorded session.
- From there, the file is now saved to your device! You can save it for a patient's file or send it for their review.
returned object from 'List recording of an account' endpoint
"recording_files": [
  {
    "id": "35497738-9fef-4f8a-97db-0ec34caef065",
    "recording_start": "2022-03-11T12:34:39Z",
    "recording_end": "2022-03-11T12:34:42Z",
    "file_type": "MP4",
    "file_size": 12125,
    "download_url": "https://example.com/download_url",
    "status": "completed",
    "deleted_time": "2022-03-28T07:22:22Z",
    "recording_type": "audio_only"
  }
]
With Video SDK event listeners and webhooks, you can even send a prompt to a patient prior to recording to gain permission.
Tracking session attendance
Now, what if you're hosting a virtual event and need to know who attended? This can be easily done with the Video SDK APIs. Here are the steps:
- Use the List session users endpoint to get a returned object containing session users.
- Add your session ID to the base URL.
- Adjust the query parameters to specify the date range for the sessions (if no query-parameters are added, the returned object will default to a live session's information)
- Your result will contain an array of objects with each user's information. This includes username, time of arrival, user ID, and more.
With that, you can see who attended your session, how long they stayed, and when they left. An example URL endpoint and returned object are shown below:
example URL
const url = `https://api.zoom.us/v2/videosdk/sessions/${res.locals.sessionId}/users?type=past&page_size=30`;
example returned object
{
    "page_size": 30,
    "next_page_token": "suQA5LvDBnH5No5OYD7mqpJuFzJqUOHK8U2",
    "users": [
        {
            "id": "32dsfsd4g5gd",
            "name": "exampleuser",
            "device": "Windows",
            "ip_address": "127.0.0.1",
            "location": "New York",
            "network_type": "Wifi",
            "microphone": "Plantronics BT600",
            "speaker": "Plantronics BT600",
            "camera": "FaceTime HD Camera",
            "data_center": "SC",
            "connection_type": "P2P",
            "join_time": "2019-08-20T19:09:01Z",
            "leave_time": "2019-08-20T19:19:01Z",
            "user_key": "myUserKey"
        }
    ]
}
Conclusion
That's a wrap on this guide to working with the Video SDK APIs. This API library only further proves just how many options you have when building with the Video SDK! If you run into any issues while building, be sure to find us on the forum. Happy building!